Brute Force Attack Xbox 360 Parental Controls

brute-force-xbox-360-parental-controls

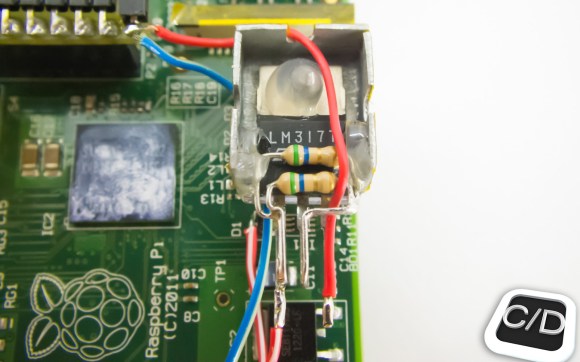
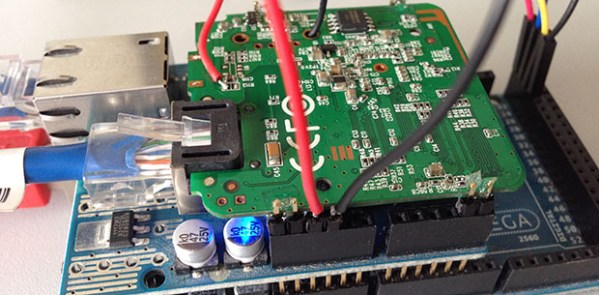
The Xbox 360 has the option of parental controls. It limits the rating of games which can be played on the system. [Oscar] didn’t really need to remove the lock-out. It was simply an interesting proof of concept for him. In the image above he’s holding up a Vinciduino board. It has an ATmega32u4 chip that can brute-force attack the Xbox 360 parental code (translated).

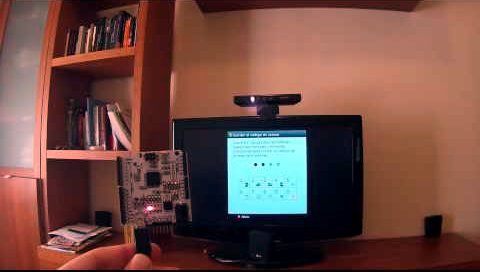
We’ve seen quite a few of these attacks lately. Like the recent iPad pin attack this uses the microcontroller to emulate a keyboard. As you can see in the video, [Oscar] first navigates the menu system to the unlock code screen, then plugs in his device.

The unlock screen calls for a four-digit numeric PIN. That’s a total of 10000 possible combinations. It looks pretty slow in the demo, but according to his calculations the worst case scenario would still break the code in less than seventeen hours. Apparently there’s no lock-out for the max number of wrong codes.

Continue reading “Brute Force Attack Xbox 360 Parental Controls”

Bolstering Raspberry Pi HDMI With A Current Regulator

rpi-hdmi-current-regulator

We’ve never tried using an HDMI to VGA converter with Raspberry Pi. We heard they were expensive and have always just used HDMI out (although DVI would be just as easy). Apparently if you have a VGA converter that isn’t powered the RPi board may output unstable video due to lack of current from the connector. [Orlando Cosimo] shows how to fix the problem with a few inexpensive components.

Just this morning we saw a portable PSU using an LM317. This project uses the same part, but in a different way. [Orlando] uses three resistors in parallel to make the LM317 behave like a current regulator (as opposed to a voltage regulator) which will output about 550 milliamps. Input voltage is pulled directly from the 5V line of the microUSB port. The output is injected into the HDMI connector. This will boost the amount of juice available to the unpowered VGA converter, stabilizing the system.

There are a lot of other power hacks out there for the RPi. One of our favorites is pulling the stock linear regulator in favor of a switch mode regulator.

[via Dangerous Prototypes]

Pull-out Pantry Fills Space Next To Refrigerator

pull-out-pantry


Your refrigerator needs a few inches of space on the hinge side in order for the door to open fully. If there’s a wall on that side it means you leave a gap. A bit of lumber and some inexpensive hardware can turn that gap into a pull-out pantry.

This picture is from [Ratmax00’s] pantry project. He had a 6.5″ gap to work with and started the build by making a wooden frame using pocket screws for the butt joints. Four casters were added to the bottom to make it roll in and out easily. He needed a handle and a way to make sure commodities didn’t fall off the shelves. He chose to use a 3D printer for brackets that hold the fence dowels and a custom handle. If you don’t have that just hit the cabinet hardware aisle at your local home store.

We wonder if it would have been possible to use full-extension draw rails mounted above and below the cabinet in addition to a couple of wheels? This would help keep the pantry from scraping against the fridge or the wall.

While you’re building bookshelf sized things why not get to work on a hidden door as well?

Turning A Router Into An Arduino Shield

[Dirk] had a problem: while he already had an Arduino with an Ethernet shield, he needed WiFi for an upcoming project. Running a Cat5 cable was out of the question, and a true Arduino WiFi shield is outrageously expensive. He did, however, have a WiFi router lying around, and decided it would make a perfect WiFi shield with just a little bit of cutting.

The router [Dirk] used was a TL-WR702N, a common router found in the parts bins of makers the world over. Inspiringly, the size of the router’s PCB was just larger than the space between the Arduino’s pin headers. Turning the router into a shield is simply a matter of scoring the edge of the board and gluing on a few pins for mechanical strength.

Power and ground lines were soldered between the pin headers and the router, while data is passed to the Arduino and Ethernet shield through a short cable. It may not look pretty, but if it works in a pinch we can’t complain.

Veronica 6502 Gets Keyboard Input Via USB

PS2

When building a homebrew computer, there are a few milestones that make all the work seem worth it. Of course, seeing the CPU step through address lines on the blinkenlights is near the top, but even more important is being able to type a character on a keyboard and have it show up on a display. [Quinn] didn’t want her Veronica computer to deal with serial terminals or PS/2 keyboards when she typed her first characters in; instead she wanted to read a USB keyboard using 80s-era hardware.

Back in the early days of USB, design specs and keyboard manufacturers included a legacy mode in nearly every USB keyboard ever manufactured. This allows a USB keyboard to work with the ancient PS/2 protocol. [Quinn] tapped into that functionality nearly every PS/2 keyboard has using a 6522 Versatile Interface Adapter. This VIA is in the same family of chips as the venerable 6502 CPU that provides GPIO pins and timers.

[Quinn] connected the keyboard connector tapped for PS/2 input to an ATtiny13. This microcontroller reads the scan codes from the keyboards and sends them to the VIA and the rest of Veronica. It’s quite a bit of work to get to this point, but [Quinn] finally has a computer she can type on, the first step to developing software for her homebrew computer.

LED Strip Pong As An Arduino Shield

led-pong-strip

[Schuyler Sowa] has been hard at work on his own version of LED strip Pong. We’d say his work has really paid off. The game is robust and full of features.

Unlike the original Pong video game LED pong only has one axis on which the ball travels. The ball will bounce back if the button at the end of the strip is pressed when either of the last two LED pixels are illuminated. To add in a difficulty adjustment [Schuyler] included a poteniometer which alters the speed.

The game board is one meter of LED strip with individually addressable pixels. It cost a whopping $28 and was the second kind he tried after having trouble with the WS2801 based version (which often come as strings of lights). An Arduino board controls the game, with a shield made from protoboard to connect the components. In addition to the two user buttons — which were hacked out of a computer keyboard — you’ll notice a pair of seven segment displays acting as a scoreboard and an HD44780 character LCD rounding out the user interface.

Continue reading “LED Strip Pong As An Arduino Shield”