Schlieren imaging is a technique for viewing the density of transparent fluids using a camera and some clever optical setups. Density of a fluid like air might change based on the composition of the air itself with various gasses, or it may vary as a result of a sound or pressure wave. It might sound like you would need a complicated and/or expensive setup in order to view such things, but with a few common things you can have your own Schlieren setup as [elad] demonstrates.
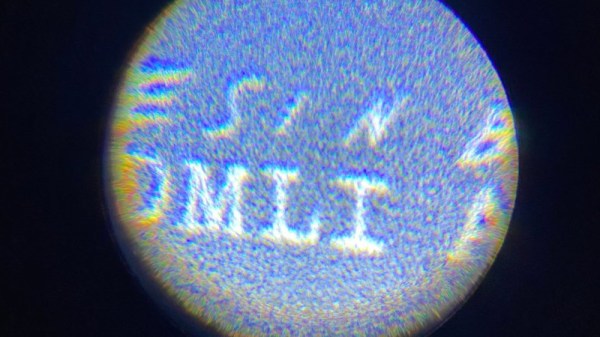
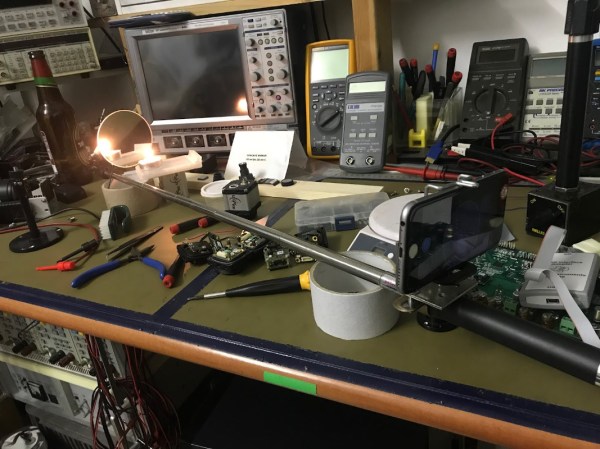
His setup relies on a cell phone, attached to a selfie stick, with a spherical mirror at the other end. The selfie stick makes adjusting the distance from the camera to the mirror easy, as a specific distance from the camera is required as a function of focal length. For cell phone cameras, it’s best to find this distance through experimentation using a small LED as the point source. Once it’s calibrated and working, a circular field of view is displayed on the phone which allows the viewer to see any change in density in front of the mirror.
The only downside of this build that [elad] notes is that the selfie stick isn’t stiff enough to prevent the image from shaking around a little bit, but all things considered this is an excellent project that shows a neat and useful trick in the photography/instrumentation world that could be useful for a lot of other projects. We’ve only seen Schlieren imaging once before and it used a slightly different method of viewing the changing densities.