Conveyor Belt GBoard Brings The Keys To You

It must be April in October again, because Google Japan has a new, hilariously impractical reimagining of the keyboard: a conveyor belt. This time it’s on GitHub with firmware, STLs, and a full build guide if you, too, want to wait a full cycle to get the ‘backspace’ key whenever you make a typo, or to write such fun words as “ooid” or “princesship”.

You can watch it in action in the video embedded below, but just the photo probably gives you the idea: the four staggered rows of keys are each 3D-printed chains holding mechanical key switches, driven from a motor in the base. Each row also has a flexible PCB to keep everything wired together, though it’s unclear how those electrical impulses from the key presses get off the conveyor belt and into your computer. That part of the build guide is “TBD” and the source code doesn’t appear to be complete.

Those details may be forthcoming, or it might never be revealed because this is obviously a joke, but now that they’ve gone to the effort of providing STLs, we’re now invested in figuring out how to actually make it work. A BLE-equipped microcontroller in each belt? RFID tags on each key, with readers in the base? SMD LEDs on the flex PCB that flash out the ASCII code of each pressed key as they whiz past a sensor? In theory, any of those should work, but which should we use? You decide!

We like Google Japan and their weird keyboards, and we have to say that compared to the hat from a few years ago, this one is almost practical, though the rotary-phone one wins on style points. In some ways, it occurs to us that this is the exact inverse of the chain printers of yesteryear.

Thanks to [CityZen] for the tip! If October for you is more “spooky” than “silly”, we still want to know about it. Or if you build any of the Gboards. Either way, let us know on the tips line what you’re up to.

Continue reading “Conveyor Belt GBoard Brings The Keys To You” →
Creating A New Keyboard Flex For An Old Calculator

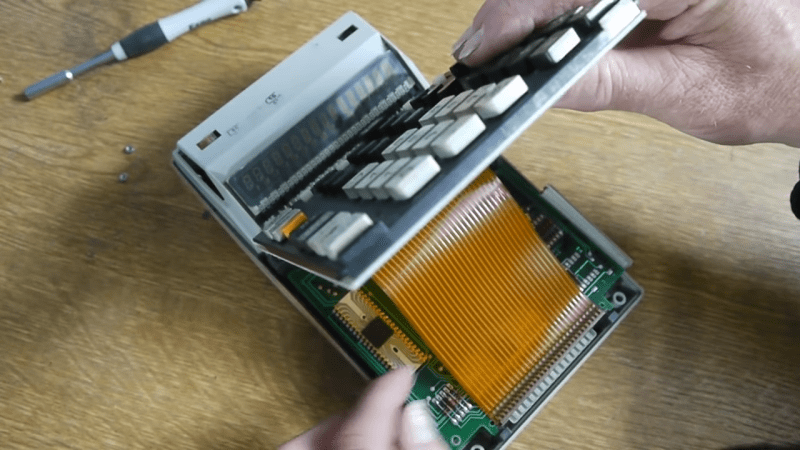
[Menadue] had a vintage Compucorp 326 calculator with an aging problem. Specifically, the flex cable that connects the button pad had turned corroded over time. However, thanks to the modern PCB industrial complex, replacing the obscure part was relatively straightforward!

The basic idea was simple enough: measure the original flex cable, and recreate it with the flat-flex PCB options available at many modern PCB houses that cater to small orders and hobbyists. [Menadue] had some headaches, having slightly misjudged the pitch of the individual edge-connector contacts. However, he figured that if lined up just right, it was close enough to still work. With the new flex installed, the calculator sprung into life…only several keys weren’t working. Making a new version with the correct pitch made all the difference, however, and the calculator was restored to full functionality.

It goes to show that as long as your design skills are up to scratch, you can replace damaged flex-cables in old hardware with brand new replacements. There’s a ton of other cool stuff you can do with flex PCBs, too.

Continue reading “Creating A New Keyboard Flex For An Old Calculator” →

Transparent PCBs Trigger 90s Nostalgia

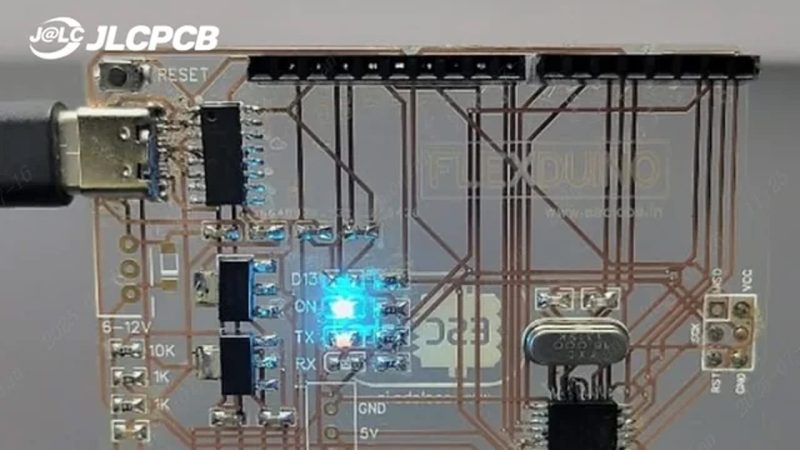
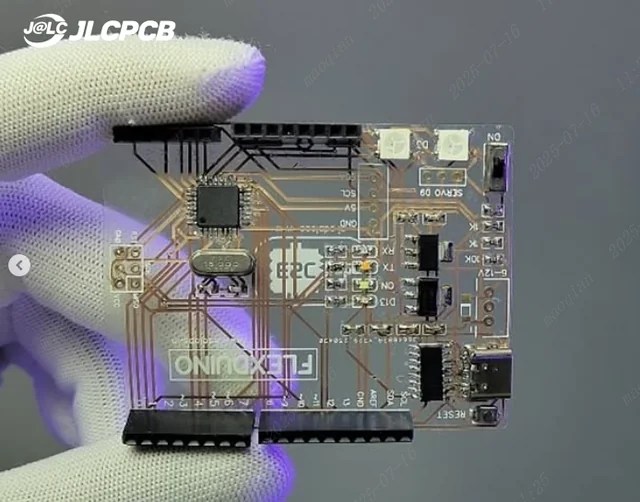
What color do you like your microcontroller boards? Blue? Red? Maybe white or black? Sadly, all of those are about to look old hat. Why? Well, as shared by [JLCPCB], this transparent Arduino looks amazing.

The board house produced this marvel using its transparent flexible printed circuit (FPC) material. Basically, the stuff they use for ribbon cables and flex PCBs, just made slightly differently to be see-through instead of vaguely brown.

The circuit in question is a Flexduino, an Arduino clone specifically designed to work on flexible substrates. It looks particularly good on this transparent material, with the LEDs glowing and the white silkscreen for contrast. If you like what you see, you can order your own circuits using this material directly from JLCPCB’s regular old order form.

Most of all, this project reminds us of the 1990s. Back then, you could get all kinds of games consoles and other electronics with transparent housings. There was the beloved PlayStation Crystal, while Nintendo did something similar with the N64 while adding a whole line of tinted color and charcoal versions too. Somehow seeing a bit of the inside of things is just cool. Even if, in some cases, it’s just to avoid smuggling in prisons.

It took decades before you could get custom PCBs quickly and easily. Now, board houses are competing for the enthusiast (consumer?) market, and competition is spurring development of crazy stuff like transparent and even glow in the dark PCBs. What next? We’re thinking edible, ROHS and WEEE be damned. Drop your thoughts in the comments.

Thanks to [George Graves] for the tip!

Wearable Computing Goes Woven, Wireless, And Washable

Sometimes we come across a wild idea that really tries to re-imagine things, and re-conceiving wearable computing as a distributed system of “fiber computers” embedded into textiles is definitely that. The research paper presents fully-functional fiber computers and sensors that are washable, weave-able, wireless, and resist both stretching and bending.

The research paper with all the details is behind a paywall at this time, but we’ll summarize the important parts that are likely to get a hacker’s mind working.

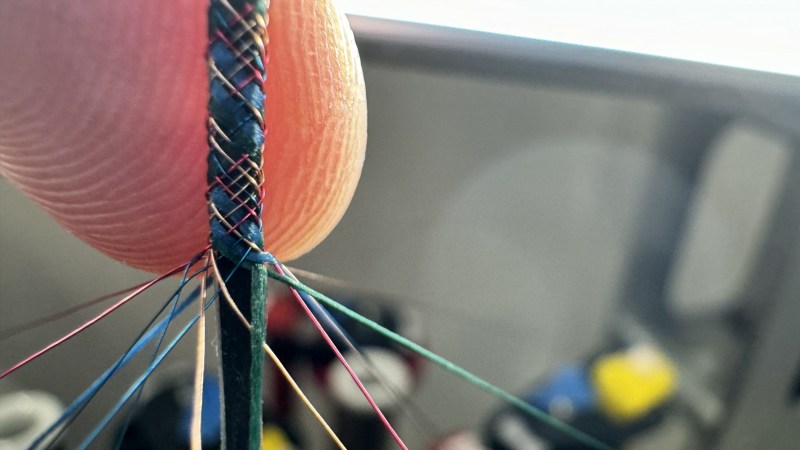
Each fiber strand (like the one shown here) is a self-contained system. Multiple fibers can communicate with one another wirelessly to create a network that, when integrated into garments, performs tasks like health and activity monitoring while using very little power. And what’s really interesting about these fibers is their profound lack of anything truly exotic when it comes to their worky bits.

The inner components of a fiber computer are pretty recognizable: each contains a surface-mount microcontroller, LEDs, BLE (Bluetooth Low Energy) radio, light sensor, temperature sensor, accelerometer, and photoplethysmography (PPG) sensor for measuring blood volume changes through skin. Power is supplied by a separate segment containing a tiny cylindrical lithium-polymer battery, with a simple plug connector. It’s a tiny battery, but the system is so low-power that it still provides hours of operation.

If there’s a secret sauce, it’s in the fabrication. The first step is stretching a system into a long, thin circuit. Each component is nested onto a small piece of flex PCB that acts a little like a breakout board, and that flex PCB gets rolled around each component to make as tiny a package as possible. These little payloads are connected to one another by thin wires, evenly spaced to form a long circuit. That circuit gets (carefully!) sealed into a thermoformed soft polymer and given an overbraid, creating a fiber that has a few lumps here and there but is nevertheless remarkably thin and durable. The result can be woven into fabrics, worn, washed, bent, and in general treated like a piece of clothing.

Closeups of components that make up a single strand of “fiber computer”.

Multiple fibers are well-suited to being woven into clothing in a distributed way, such as one for each limb. Each fiber is self-contained but communicates with its neighbors using a BLE mesh, or transmitting data optically via embedded LEDs and light sensors. Right now, such a distributed system has been shown to be able to perform health monitoring and accurately classify different physical activities.

We’ve seen sensors directly on skin and transmitting power over skin, but this is a clever fusion of conventional parts and unconventional design — wearable computing that’s not just actually wearable and unobtrusive, but durable and even washable.

Repairing A Component On A Flex Connector

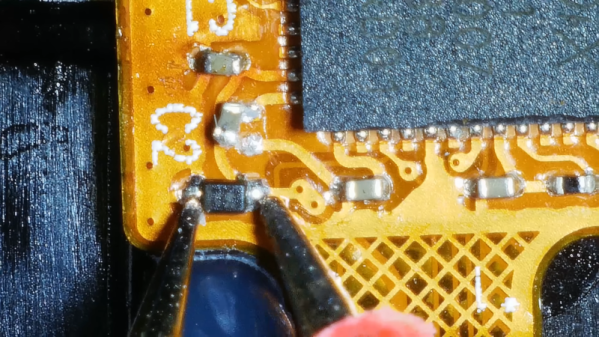
It used to be you could crack open a TV or radio and really work on the components inside. The smallest thing in there was maybe a disc capacitor a little smaller than your pinky’s nail. Nowadays, consumer electronic boards are full of tiny SMD components. Luckily [StezStix Fix?] has a microscope and the other tools you need. Someone sent him an Amazon Echo Show with a bad touchscreen. Can it be fixed?

The video below shows that it can, but there’s a twist. The bad capacitor was mounted on one of those flexible PCB cables that are so hard to work with. It is hard enough not to damage these when you aren’t trying to remove and replace a component from the surface of the cable.

Continue reading “Repairing A Component On A Flex Connector” →

Marimbatron: A Digital Marimba Prototyping Project

The Marimbatron is [Leo Kuipers] ‘s final project as part of the Fab Academy program supervised by [Prof. Neil Gershenfeld] of MIT’s Center for Bits and Atoms. The course aims to teach students how to leverage all the fab lab skills to create unique prototypes using the materials at hand.

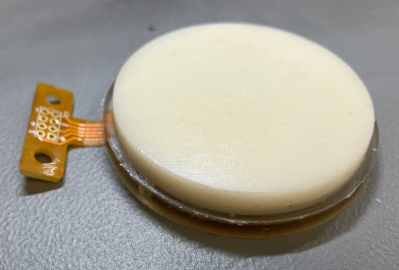
The final polyurethane/PET/Flex PCB stack-up for the sensor pad

Fortunately, one of the main topics covered in the course is documentation, and [Leo] has provided ample material for review. The marimba consists of a horizontal series of wooden bars, each mounted over a metal resonator tube. It is played similarly to the xylophone, with a piano-type note arrangement, covering about five octaves but with a lower range than the xylophone. [Leo] converted this piano-type layout into a more logical grid arrangement. The individual pads are 3D printed in PETG and attached to a DIY piezoresistive pressure sensor made from a graphite-sprayed PET sheet laid upon a DIY flexible PCB. A central addressable LED was also included for indication purposes. The base layer is made of cast polyurethane, formed inside a 3D-printed rigid mould. This absorbs impact and prevents crosstalk to nearby sensors. The sensor PCB was initially prototyped by adhering a layer of copper tape to a layer of Kapton tape and cutting it out using a desktop vinyl cutter. While this method worked for the proof of concept, [Leo] ultimately outsourced the final version to a PCB manufacturer. The description of prototyping the sensor and dealing with over-moulding was particularly fascinating.

Continue reading “Marimbatron: A Digital Marimba Prototyping Project” →

Bespoke Implants Are Real—if You Put In The Time

A subset of hackers have RFID implants, but there is a limited catalog. When [Miana] looked for a device that would open a secure door at her work, she did not find the implant she needed, even though the lock was susceptible to cloned-chip attacks. Since no one made the implant, she set herself to the task. [Miana] is no stranger to implants, with 26 at the time of her talk at DEFCON31, including a couple of custom glowing ones, but this was her first venture into electronic implants. Or electronics at all. The full video after the break describes the important terms.

The PCB antenna in an RFID circuit must be accurately tuned, which is this project’s crux. Simulators exist to design and test virtual antennas, but they are priced for corporations, not individuals. Even with simulators, you have to know the specifics of your chip, and [Miana] could not buy the bare chips or find a datasheet. She bought a pack of iCLASS cards from the manufacturer and dissolved the PVC with acetone to measure the chip’s capacitance. Later, she found the datasheet and confirmed her readings. There are calculators in lieu of a simulator, so there was enough information to design a PCB and place an order.

The first batch of units can only trigger the base station from one position. To make the second version, [Miana] bought a Vector Network Analyzer to see which frequency the chip and antenna resonated. The solution to making adjustments after printing is to add a capacitor to the circuit, and its size will tune the system. The updated design works so a populated board is coated and implanted, and you can see an animated loop of [Miana] opening the lock with her bare hand.

Biohacking can be anything from improving how we read our heart rate to implanting a Raspberry Pi.

Continue reading “Bespoke Implants Are Real—if You Put In The Time” →