A Homebrew GPS Correction System For DIY Land Surveying

For those of you rushing to the comment section after reading the title to tell [Ben Dauphinee] that his DIY land surveying efforts are for naught because only a licensed surveyor can create a legally binding property description, relax — he already knows. But what he learned about centimeter-resolution GPS is pretty interesting, especially for owners of large rural properties like him.

[Ben]’s mapping needs are less rigorous than an official survey; he just wants to get the locations of features like streams and wood lines, and to get topographic elevations so that he has a general “lay of the land” for planning purposes. He originally engaged a surveyor for that job, but after shelling out $4,600 to locate a single property line, he decided to see what else could be done. Luckily, real-time kinematics, or RTK, holds the key. RTK uses a fixed GPS station to provide correction signals to a mobile receiver, called a rover. If the fixed station’s position is referenced to some monument of known position, the rover’s position can be placed on a map to within a couple of centimeters.

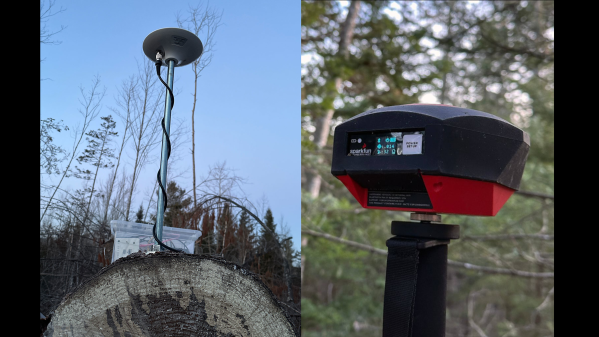
To build his own RTK system, [Ben] used some modules from SparkFun. The fixed station has an RTK breakout board and a multi-band GNSS antenna to receive positioning data, along with a Raspberry Pi to run the RTK server. An old iPhone with a prepaid SIM provides backhaul to connect to the network that provides correction data. [Ben]’s rover setup also came mainly from SparkFun, with an RTK Facet receiver mounted on a photographer’s monopod. Once everything was set up and properly calibrated, he was able to walk his property with the rover and measure locations to within 4 centimeters.

This was not an inexpensive endeavor — all told, [Ben] spent about $2,000 on the setup. That’s a lot, especially on top of what he already paid for the legal survey, but still a fraction of what it would have cost to have a surveyor do it, or to buy actual surveyor’s equipment. The post has a ton of detail that’s worth reading for anyone interested in the process of mapping and GPS augmentation.

Putting That Airplane On The Map – Live And With Python

Mankind’s fascination with airplanes is unbroken. Whether you’re outside with your camera, getting an actual glimpse of the aircraft, or sitting at home with your RTL-SDR dongle and have a look at them from a distance, tracking them is a fun pastime activity. Provided, of course, that you are living close by an airport or in an area with high enough air traffic. If not, well there’s always real-time tracking online to fall back to, and as [geomatics] will show you, you can build your own live flight tracking system with a few lines of Python.

As it’s usually the case with Python, a lot of functionality is implemented and readily available from external modules, which lets you focus on the actual application without having to worry too much about the details. Similarly, plenty of data can be requested from all sorts of publicly accessible APIs nowadays. If you are looking for a simple-enough example to get into both subjects with a real-world application, [geomatics]’ flight tracker uses cartopy to create a map using Open Street Map data, and retrieves the flight information from ADS-B Exchange‘s public API.

We have seen ADS-B Exchange mentioned a few times before, for example with this ESP8266 based plane spotter and its successor. And if you’re more curious about the air traffic in your direct surroundings, it’s probably time for a DVB USB dongle.

Foldable Dymaxion Globe

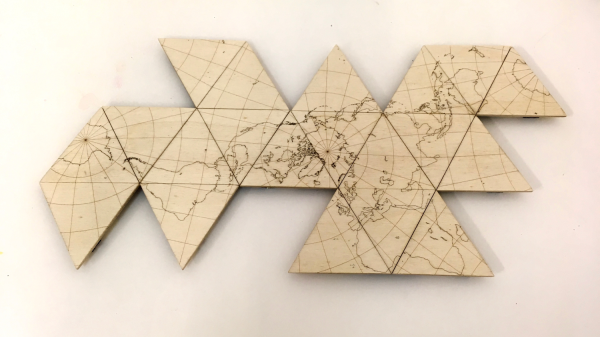
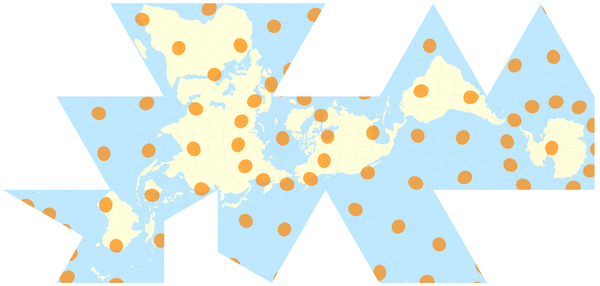
Some time back, we posted about [Gavin]’s laser-cut/3D printed Dymaxion Globe — if you haven’t read about it yet, you should check it out. [noniq] loved the idea, and like a true hacker, built and shared an improved Foldable Dymaxion Globe. It can snap together to form an icosahedron globe, or it can be laid flat to form a map.

Duct tape, stoppers and magnet holders

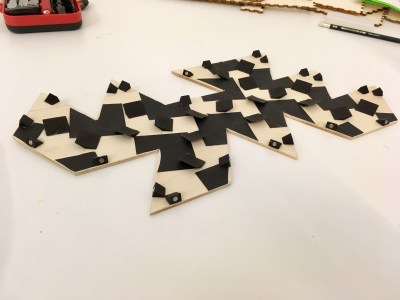
Like the original, [noniq]’s version is laser cut and engraved, and uses some 3D printed parts. But it does away with the fasteners (that’s 60 pairs of nuts and bolts), and instead uses neodymium magnets to make all the triangle pieces snap together to form the icosahedron globe. The hinges are simply some pieces of gaffer-tape.

This design improvement creates a cleaner globe and also addresses some of the concerns posted in the comments of the earlier build. The design files are available for download on [noniq]’s blog — you need to 3D print some magnet holders and stopper plates, and laser cut the 20 triangle tiles. The stopper plates help ensure that the angle between tiles when it is put together is limited to 138 degrees, making it easier to assemble the globe.

Check out the video after the break to hear the satisfying “thunk” of neodymium magnets snapping together.

Continue reading “Foldable Dymaxion Globe”

Laser Cutting A Wooden Dymaxion Globe

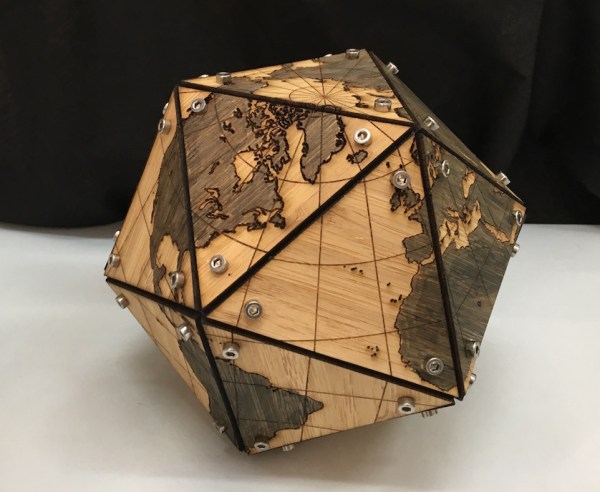
Everyone knows that globes are cool — what else would you use as the centerpiece of your library/study? But, sadly, making your own isn’t a simple process. Even if you had a large (preferably hollow) sphere to work with, you’d still have to devise a clever way of printing the map in sections that can be glued to the curved surface. Wouldn’t it be easier if you could just laser cut flat sections, and assemble them to form a faceted “globe?”

Well, it is, and you can! Because, [Gavin] over at tinkerings.org (a Hackaday favorite) has created the files to do just that! This map projection, originally designed by the very interesting Buckminster Fuller, is designed to be either laid flat or three-dimensionally on an icosahedron (a 20-sided polyhedron). That makes it perfect for laser cutting, as each of the 20 faces can be cut from flat stock.

600px-fuller_projection_with_tissot27s_indicatrix_of_deformation

Continue reading “Laser Cutting A Wooden Dymaxion Globe”