How To Build A Small Metal Furnace At Home

Casting is a great way to make your own custom metal parts. However, casting requires some manner of furnace capable of generating high enough temperatures to melt the metal in question. Few of us have these just lying around, but never fear. It’s possible to build a basic gas-powered furnace at home, with commonly available materials (Youtube link, embedded below).

This furnace is the work of [Ahmed Ghr], and is as simple a build as they come. The idea is to produce a mold in which to cast concrete to create the furnace. A steel bucket is cut up and used as the outside of the mold, with a pipe inserted in the base to act as a feeder for air and gas. A plastic bucket is then inserted within the steel bucket and held in place with spacers, to create the inner combustion cavity. Concrete is poured in and allowed to set. Once finished, the steel bucket is cut away, and a fire is built over the furnace to melt away the plastic inside. Similar techniques are used to produce the lid, and the furnace is completed.

It’s a build that is executed with the most basic of tools, and should serve as a capable furnace for lower melting point metals at the very least. We’ve seen a lot of cement projects lately, as it turns out. Video after the break.

Continue reading “How To Build A Small Metal Furnace At Home”

Concrete Table Even Includes A USB Hub

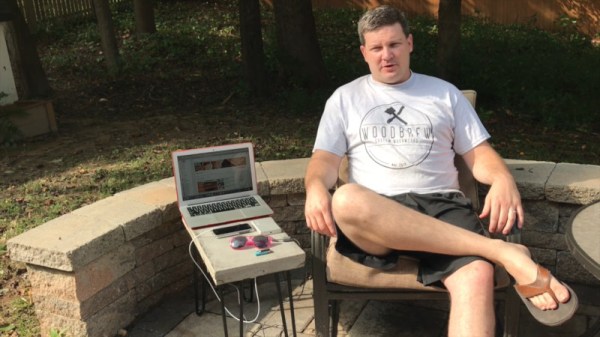
When designing furniture, material choice has a huge effect on the character and style of the finished product. Wood is a classic option, while more modern designs may use metal, plastic or even cardboard. Less popular, but no less worthy, is concrete. It’s heavy, cheap, and you can easily cast it into a wide variety of forms. [KagedCreations] thought this would be ideal, and whipped up this nifty piece of furniture with an integrated USB hub.

A pair of melamine shelves were scrapped to build the form, in which the concrete table is cast. Melamine is a popular choice, as it’s cheap, readily available, and releases easily from the finished concrete. Along with the USB hub, a wooden board is cast into the base of the concrete table top. This serves as an easy attachment point for the pre-made hairpin-style legs, which can be installed with wood screws.

The final result is a tidy side table that has plenty of heft to keep it stable and secure. It’s not the first concrete USB hub we’ve seen, but it’s likely the heaviest thus far. We’d love to see a version with an integrated charging pad, too – if you build one, be sure to let us know. Video after the break.

Continue reading “Concrete Table Even Includes A USB Hub”

Cement Shelves Double As USB Hub

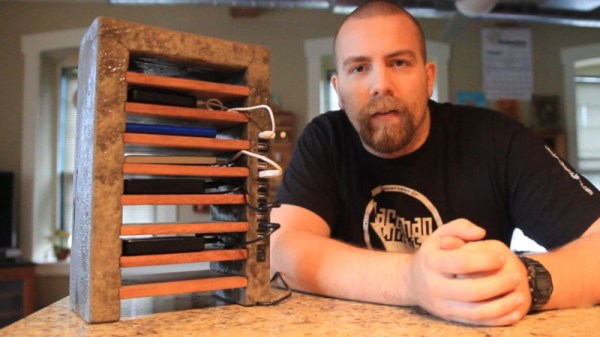
Some of us are able to get by in life with somewhere between 0 and 1 USB ports. We typically refer to these people as “Mac users”. For the rest of us, too much is never enough, and we find ourselves seeking out expansion cards and hubs and all manner of perverse adapters and dongles. [JackmanWorks] was a man who found himself in need of more connectivity, so he built this beautiful shelf with an integrated 12-port hub.

Material choice is key here, with this build looking resplendent in mahogany and cement. As the core of the build, the USB hub is first disassembled and sealed up to prevent damage from the cement. Hot glue is used to protect the PCB, while electrical tape helps cover the individual ports. The cement is then poured into a form which creates the overarching structure for the shelf, with the USB hub being cast in place. With the cement cured, mahogany boards are then cut and waxed, before installation into the structure. These form the individual shelves which hold phones, hard drives and other USB accessories.

The shelf was designed so that the entire structure is supported through the bottom shelf, which then sits on top of the desktop computer case. It’s an attractive piece, and the weight of the cement construction makes it pleasantly stable in use. It’s rare, but we do occasionally see shelf hacks around these parts. Video after the break.

Continue reading “Cement Shelves Double As USB Hub”

Concrete USB Hub Isn’t Going Anywhere

When starting a new project, the choice of material can have a big effect on the character of the finished product. Wood is stylish and has a certain elegance to it, while polished or brushed aluminium is great for a more futuristic feel. Sometimes though, you just want big, cheap and heavy – in which case, concrete is your friend!

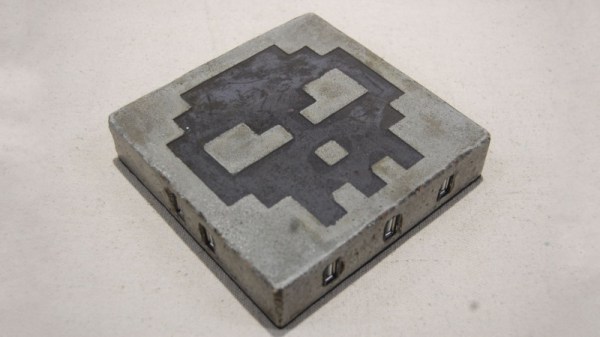
[BALES] was short on USB ports, and needed a hub with plenty of connectivity. Concrete had the benefits of being solid and heavy, and also impervious to beverages. Thus, a melamine form was produced, chosen as its surface doesn’t give the concrete anything to grab on to. A foam skull was cut out and added to create an inlay for decoration, and the 7-port octopus-style hub was placed inside.

With careful attention paid to the mixture consistency, the concrete was poured into the mold and allowed to set. Care was taken to avoid air bubbles and to ensure the mixture flowed completely into the mold, without leaving air pockets behind the inserted components. After allowing it to set for a few days, the part was demolded, with care taken to minimise edge crumbling. The foam skull was removed, and infilled with black epoxy, with a little more used to coat the top and sides of the hub. As a finishing touch, a foam pad was fitted to the base to allow it to sit on a desk without scratching everything up.

In the end, [BALES] has ended up with a hefty hub that won’t skitter around when plugging and unplugging devices. It should also serve admirably as a sturdy drink coaster on those cold winter nights. If you’re trying a similar project yourself, note that sometimes concrete can be surprisingly conductive. Video after the break.

Continue reading “Concrete USB Hub Isn’t Going Anywhere”

Casting Concrete With 3D Printed Molds

[Thomas Sanladerer] wanted to create some molds using 3D printing for concrete and plaster. He used a delta printer with flexible filament and documented his process in the video below.

If you’ve printed with flexible filaments before, you know you need an extruder that has a contained path. [Tom] borrowed a printer, but it didn’t have that kind of set up. The first step was to swap extruders with another printer.

Continue reading “Casting Concrete With 3D Printed Molds”

Curved Wood LED Lamp Needs No Fancy Tools

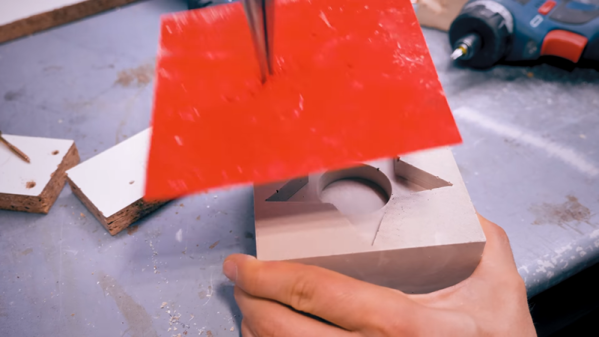
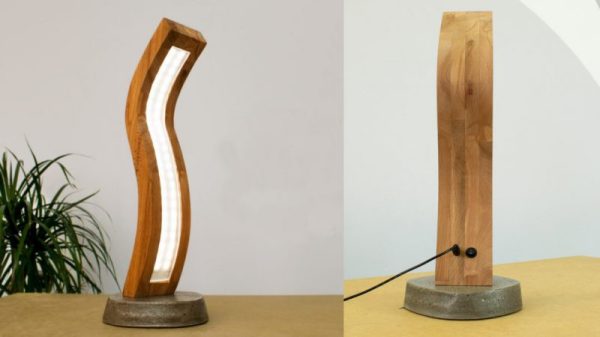
Those of us who aren’t familiar with woodworking might not expect that this curved wood and acrylic LED lamp by [Marija] isn’t the product of fancy carving, just some thoughtful design and assembly work. The base is a few inches of concrete in a plastic bowl, then sanded and given a clear coat. The wood is four layers of beech hardwood cut on an inverted jigsaw with the middle two layers having an extra recess for two LED strips. After the rough-cut layers were glued together, the imperfections were rasped and sanded out. Since the layers of wood give a consistent width to the recess for the LEDs, it was easy to cut a long strip of acrylic that would match. Saw cutting acrylic can be dicey because it can crack or melt, but a table saw with a crosscut blade did the trick. Forming the acrylic to match the curves of the wood was a matter of gentle heating and easing the softened acrylic into place bit by bit.

Giving the clear acrylic a frosted finish was done with a few coats of satin finish clear coat from a spray can, which is a technique we haven’t really seen before. Handy, because it provides a smooth and unbroken coating along the entire length of the acrylic. This worked well and is a clever idea, but [Marija] could still see the LEDs and wires inside the lamp, so she covered them with some white tape. A video of the entire process is embedded below.

Continue reading “Curved Wood LED Lamp Needs No Fancy Tools”

Biologic Additive May Lead To Self-Healing Concrete

If you get a cut or break a bone, your body heals itself. This everyday miracle is what inspired [Congrui Jin] to try to find a way to make concrete self-healing. The answer she and her colleagues are working on might surprise you. They are adding fungus to concrete to enable self-repair.

It isn’t just any fungus. The conditions in concrete are very harsh, and after testing twenty different kinds, they found that one kind — trichoderma reesei — could survive inside concrete as spores. This fungus is widespread in tropical soil and doesn’t pose any threat to humans or the ecology. Mixing nutrients and spores into concrete is easy enough. When cracks form in the concrete, water and oxygen get in and the spores grow. The spores act as a catalyst for calcium carbonate crystals which fill the cracks. When the water is gone, the fungi go back to spores, ready to repair future cracking.

Continue reading “Biologic Additive May Lead To Self-Healing Concrete”