Hats With Sunblock Reminders Are Easy To Make

light_sunscreen-reminder-hat-00

Just about anyone can build this UV index sensing wearable that detects heat rays from the sun and reminds the user to put on sunscreen. There is no soldering required, which makes this a nice beginners projects for those unfamiliar with hooking up electronic sensors.

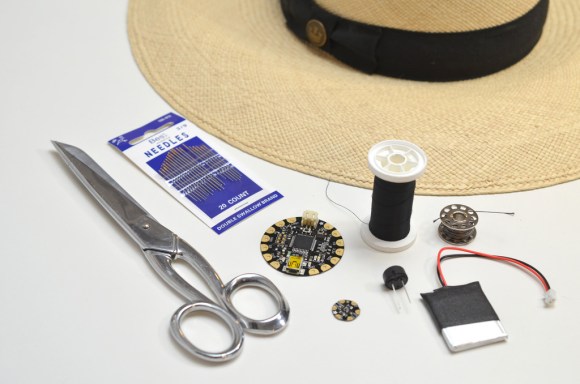
All that is needed is a FLORA main board, one UV index sensor, a piezo Buzzer, a 500mAh lipoly battery, 2-ply conductive thread, a couple of household tools, and your favorite summer’s hat.

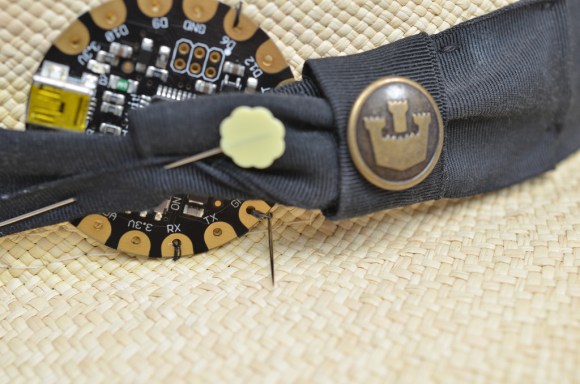
Once the materials have been rounded up, the rest of the process is relatively simple. Threading the FLORA in and place and connecting the Piezo only takes a few minutes. Then the UV sensor is added allowing the hat to start collecting data. A little bit of coding later, and the whole system is ready to be worn out in the sun.

light_sunscreen-reminder-hat-08

What’s great about this project is that the hat can be programmed to play a song when it is time to apply more sunscreen. Everyone from beach bums, to sun-bathing beauties, to music festival attendees will be able to find this hat useful. And, it is cheap and easy to make.

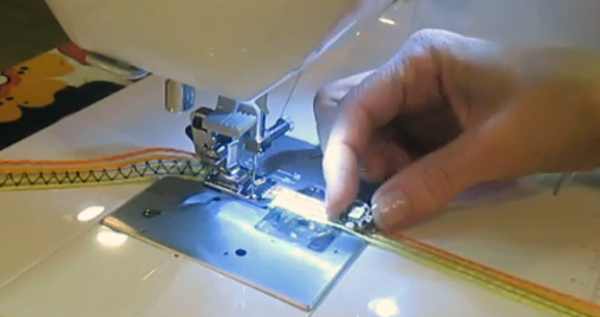
The video on the Adafruit tutorial page shows how simple it is to rig up the system.

Continue reading “Hats With Sunblock Reminders Are Easy To Make”

Blinky LED Necklace That Actually Looks Chic

LED bib necklace by Agy

[Agy] a fabric hacker in Singapore has made a chic light sensitive LED necklace, and written up the tutorial on her blog  Green Issues by Agy. The lovely thing about this hack is that it doesn’t look like a breadboard round her neck, and most of the non-electronic components have been upcycled. [Agy] even used Swarovski crystals as LED diffusers for extra bling.

Using a LilyPad Arduino with a light sensor and a few LEDs, [Agy’s] circuit is not complicated. She seems to be just branching out in to wearable tech, so it is nice that she learnt to program different modes for bright and low light (see video below). Her background in sewing, refashioning and upcycling does show through in her crafty use of an old pair of jeans and lace scraps for this project.

We love tech focused jewelry like [TigerUp’s] LED matrix pendants or [Armilar’s] Nixie-ify Me Necklace, but they do scream Geek. DIY electronically enhanced accessories are becoming more commonplace with the variety of micro-controller platforms expanding rapidly. Low energy wearable boards like MetaWear are making it easy for the tech to be discreet and easily connected to your smartphone.  3D printing is enabling us to create durable enclosures, settings and diffusers like the ones used for LED Stegosaurus Spikes. With all these things, hobby wearable projects can not only be functional and durable, but can also look great too.

Do you think this necklace would look out of place in a non-geeky gathering? Have you got any helpful tips for [Agy’s] code? Have you tried using gems or crystals as diffusers and what were the results? Let us know in the comments below.

Continue reading “Blinky LED Necklace That Actually Looks Chic”

Sewing Conductive Thread In Parallel Lines

[Cynthia] has shared a great video of  machine sewing parallel lines of conductive thread onto ribbon using a cording foot which usually comes standard with most machines. This technique could be particularly useful when using addressable LEDs like a NeoPixel to get the ground, data, and positive lined up fairly accurately. Sewing the conductive thread onto ribbon also makes it a hell of a lot easier to attach to many garments or textiles,  and also makes it easier to replace or reuse.

The method is pretty easy, essentially using the grooves in the cording foot to guide the conductive treads and ensuring even spacing. Two of the lines are sewn down approximately 3 mm apart using a zigzag stitch. The third line is sewn separately making sure the stitching doesn’t break the first two lines. In the video, a striped ribbon is used which has slight troughs that additionally helps the threads stay in place and the sewer to stay on target.

[Cynthia] of Cynthia Designs Studio has been experimenting with embedding electronics in textiles and has quite a few great videos that you can check out on the Cynthia Designs Studio YouTube channel.

We have seen a machine embroidered LED matrix and a hand sewn LED quilt here on Hackaday, but those who have tried know that conductive thread can be very tricky to work with and keep conductivity.  Do you have any tips or tricks for hand or machine sewing conductive thread? If so, please share in the comments below.

Continue reading “Sewing Conductive Thread In Parallel Lines”

Lighted Shoe Ruffles — He’ll Never Step On Your Toes Again

Whether for fashion, emergency lighting, or just to make a statement, these lighted shoe clips make for a unique footwear accessory. [Becky Stern], who we’ve seen before hacking automatic knitting machines, tackles this quick lighted project.

The electronics are simple, two LEDs connected in parallel to a button battery by some conductive thread. The circuit is the same as an LED throwie, but she’s using a sewable battery holder. The ruffle is made by cutting out and folding several circles of fabric. We’re not too used to working with this building material and were glad to hear her tip on fusing the cut edges with a lighter. She’s also got a good tip about bending one LED lead in a square shape and the other in a round shape to keep track of the polarity. After sewing everything together and completing the circuit with the conductive thread [Becky] adds a paper clamp making this easy to use with any shoe. In fact, the guy’s don’t have to miss out on the fun as this could easily double as a boutineer.

Don’t miss [Becky’s] complete walk through video embedded after the break.

Continue reading “Lighted Shoe Ruffles — He’ll Never Step On Your Toes Again”

Musical Shirt From Toy Keyboard

musical_shirt

[mikamika] has put together a great tutorial on how to build this musical shirt. The whole process is covered, from taking apart the toy keyboard to laying out the circuit and creating the fabric switches.  He used the same method as [plusea] for the fabric buttons and conductive thread for most of the connections. It seems as though he has actually taken [plusea]’s wearable shirt project and added some polish. His looks good enough, he might even be able to make it through an airport.

Full Fabric Soft Switches

soft_switch

When we created our backpack strap WiFi detector for Engadget, we embedded soft switches to control the device. They used two sheets of aluminum foil separated by a layer of foam with holes punched in it. [Plusea] has taken a similar approach but has replaced the aluminum foil with conductive fabric. The end result is a set of three soft buttons that can be easily washed. Have a look at the video of it in action below. Check out the followup project that uses the buttons to replace a scroll wheel. Continue reading “Full Fabric Soft Switches”