Tracktorino Shields You From Poor Interfaces

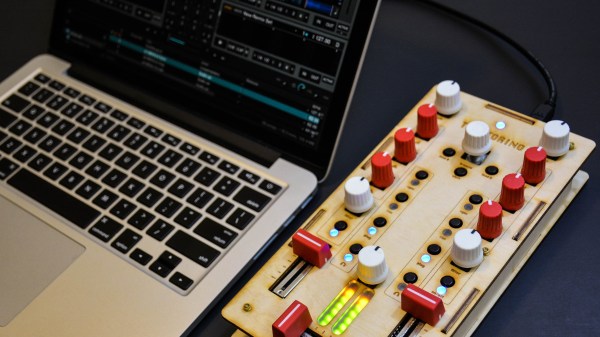
On-screen controls in a digital audio workstation expand the power of a DJ or musician, but they are not intuitive for everyone. The tactility of buttons, knobs, sliders and real-world controls feels nothing like using a mouse, trackpad, or even a touchscreen. Unfortunately, devices meant to put control into a DJs hands can be unavailable due to location or cost. [Gustavo Silveira] took charge of the situation so he could help other DJs and musicians take control of their workstations with a customized MIDI interface for Traktor DJ software.

MIDI is a widely used serial protocol which has evolved from a DIN connector to USB, and now it is also wireless. This means that the Traktorino is not locked to Traktor despite the namesake. On the Hackaday.io page, there’s even a list of other workstations it will work with, but since many workstations, all the good ones anyway, accept MIDI hardware like this, the real list is a lot longer.

The custom circuit board is actually a shield. Using an Arduino UNO, the current poster child of the Arduino world, opens up the accessibility for many people who don’t know specialized software. A vector drawing for a lasercut enclosure is also included. This means that even the labeling on the buttons are not locked into English language.

Here’s another project which combined laser cutting and MIDI to make some very clever buttons or turn your DIN MIDI connector into USB.

Continue reading “Tracktorino Shields You From Poor Interfaces”

There’s More To MIDI Than Music – How About A Light Show?

MIDI instruments and controllers are fun devices if you want to combine your interest in music and electronics in a single project. Breaking music down into standardized, digital signals can technically turn anything with a button or a sensor into a musical instrument or effect pedal. On the other hand, the receiving end of the MIDI signal is mostly overlooked.

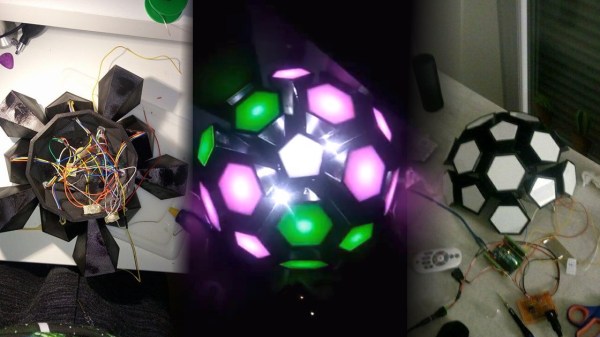
[FuseBerry], a music connoisseur with a background in electronics and computer science, always wanted to build a custom MIDI device, but instead of an instrument, he ended up with a MIDI controlled light show in the shape of an exploded truncated icosahedron ([FuseBerry]’s effort to look up that name shouldn’t go unnoticed). He designed and 3D-printed all the individual geometric shapes, and painstakingly equipped them with LEDs from a WS2818B strip. An Arduino Uno controls those LEDS, and receives the MIDI signals through a regular 5-pin DIN MIDI connector that is attached to the Arduino’s UART interface.

The LEDs are mapped to pre-defined MIDI notes, so whenever one of them is played, and their NoteOn message is received, the LEDs light up accordingly. [FuseBerry] uses his go-to DAW to create the light patterns, but any software / device that can send MIDI messages should do the trick. In the project’s current state, the light pattern needs to be created manually, but with some adjustments to the Arduino code, that could be more automated, something along the lines of this MIDI controlled Christmas light show.

Continue reading “There’s More To MIDI Than Music – How About A Light Show?”

A Custom Control Surface For Audio/Video Editing

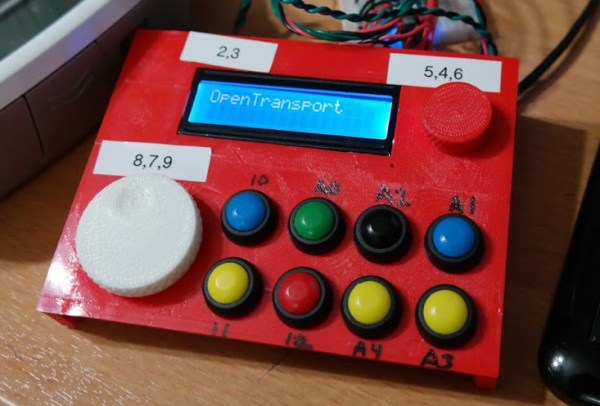
Control surfaces (input devices with sliders, encoders, buttons, etc) are often used in audio and video editing, where they provide an easy way to control editing software. Unfortunately even small control surfaces are fairly expensive. To avoid shelling out for a commercial control surface, [Victor] developed his own custom control surface that sends standard MIDI commands which can be interpreted by nearly any DAW software.

[Victor]’s control surface includes several buttons, a display, and a rotary encoder. His firmware sends MIDI commands whenever a button is pressed or the rotary encoder is turned. [Victor] plans on adding menu functionality to the currently unused LCD display which will allow the user to change the scrubbing speed and other various settings.

One advantage of making your own control surface is that you can customize it to your own needs. [Victor] has posted a model of his 3d-printed enclosure and his source code on the project page so you can easily modify his design with any button configuration you might want.