Building Custom Integrated Circuits

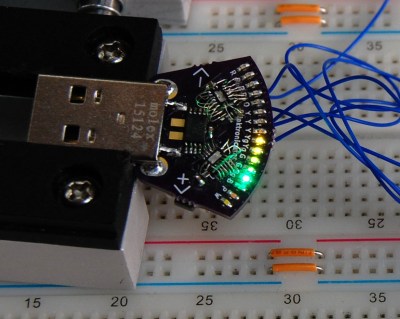
The first integrated circuits weren’t tiny flecks of silicon mounted to metal carriers and embedded in epoxy or ceramic. The first integrated circuits, albeit a looser definition of such, were just a few transistors, resistors, and diodes mashed together in the same package. With this in mind, [Rupert] created his own custom IC. It’s an IR receiver transmitter constructed out of a transistor, resistor, and an LED.

The attentive reader should be asking, “wait, can’t you just buy an IR receiver transmitter?” Yes, yes you can. But that’s not a hack™, and would otherwise be very uninteresting.

[Rupert]’s IC is just three parts, a 2n2222 transistor, a 220Ω resistor and an IR LED. With a good bit of deadbug soldering, these three parts were melded into something that resembled, and had the same pinout of, a Vishay TSOP4838 IR receiver. The epoxy used to encapsulate this integrated circuit is a standard 2-part epoxy and laser printer toner. Once everything is mixed up into a gooey slurry, it’s dripped over the IC producing a blob of an integrated circuit. It’s functionally identical to the standard commercial version, and looks good enough for a really cool project [Rupert]’s been working on.

Thanks [foehammer] for the tip.

Building A Transistor Clock From Scrap

[Phil] has already built a few clocks with Nixies, VFDs, and LED matrices. When his son requested his own clock, he wanted to do something a little different. Inspired by the dead bug style of [Jim Williams]’ creations, [Phil] set out to build a clock made entirely out of discrete components. That includes the counters, driver circuits, and an array of LED.

There are a few inspiration pieces for [Phil]’s clock, starting with the Transistor Clock, a mains-powered clock that uses 194 transistors, 566 diodes, and exactly zero integrated circuits. Design patterns from a clock so beautiful it’s simply called The Clock are also seen, as is a Dekatron emulator from [VK2ZAY].

[Phil]’s creation has no PCB, and all the components are soldered onto tiny wires arranged into something resembling the clocks circuit. It’s a fantastic contraption, and while we’ll still have to give the design award to the clock, [Phil]’s creation shows off the functional circuits; great if he’ll ever need to debug anything.

A Ham Radio Receiver, Manhattan Style

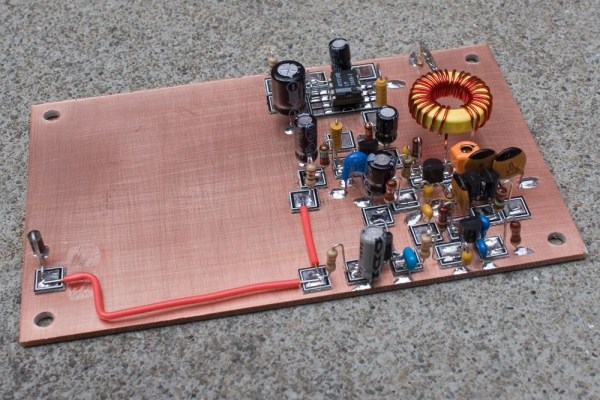
If you’ve never heard of “Manhattan Style” circuit construction, you’re not alone. Popular in ham radio circles, the process looks nicer than straight dead bug style circuit building, but not as involved as etching your own PCB – consider it a nice middle of the road solution.

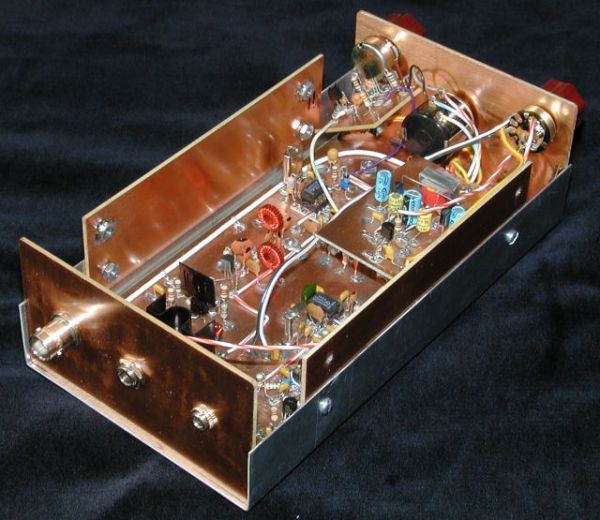
This type of construction is often used to build circuits inside enclosures that are made of copper clad, which is a somewhat common practice among ham radio operators. Manhattan Style circuits are built using glued-on metal pads to which components are mounted. One might think that the large pads you see in the image above would limit you to through-hole components, but that’s definitely not the case. A wide array of SMD pads are available in common pin configurations as well, allowing you to use pretty much any type of component you prefer.

While it might not be appropriate for every project you work on, Manhattan Style circuits and copper clad boxes definitely add a nice touch to certain items, like the Wheatstone Bridge Regenerative Receiver you see above.

[via Make]

Dead-bug Arduino Is Still Breadboard Ready

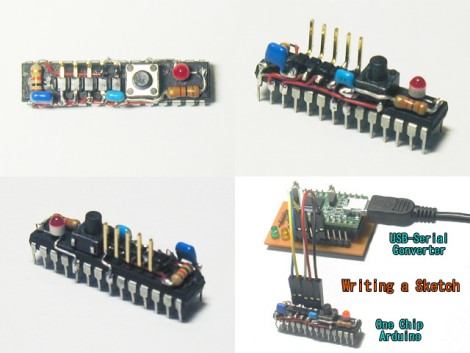
Here’s a no-PCB Arduino that doesn’t obscure the DIP footprint of the AVR chip. It’s built on an ATmega88 chip, and includes a programming header, reset button, a couple of filtering caps, and an LED. This is modeled after the Lilypad hardware, and fits nicely on top of the plastic case of the microcontroller, allowing it to be used in a breadboard or DIP socket. You can see a walk through of the components in the clip after the break.

We don’t really need most of the components on top of the chip (especially the status LED on the SCK line), but there are several things that we like about this. First off, the programming header is extremely nice. We could see this coming in handy for prototyping where you don’t want to add a header to your final design. Just use a chip socket, and this chip while you’re developing firmware. Once everything is dialed in, program a naked chip and swap the two. The same goes for the reset button, which is nice when working on firmware but may not be necessary in your final design.

This is quite an old project, and we’ve actually seen a successor to it. This is Rev. 2 and we looked in on Rev. 7 back in March. That one is a full Arduino, but the circuit board has no substrate.

Continue reading “Dead-bug Arduino Is Still Breadboard Ready”

Doorbell Hack Makes Coworkers Less Annoying

doorbell_wav_player

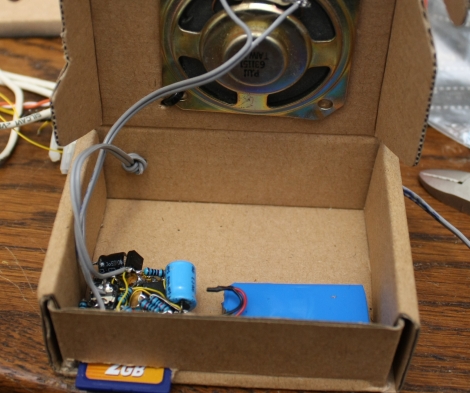
Hackaday reader [Sprite_tm] works in an office building that used to house several businesses, and as a remnant of the previous configuration, a doorbell sits in the hallway just outside his office. Several of his coworkers get a kick out of ringing the doorbell each time they enter the office. While not annoyed at the practice, he was getting tired of the same old “ding-dong” and decided to shake things up a bit.

He wanted to modify the doorbell to play random sounds when triggered, but he was pressed for time as it was March 31st, and he wanted to get it installed for April Fools’ Day. Without any real plan or bill of materials in mind, he pieced things together with whatever he happened to have sitting around.

He used a design borrowed from Elm-chan in order to play wav files from an SD card with an ATTiny85, and used an L293 H-Driver as an improvised sound amplifier. After sorting out some power-related problems, and configuring the circuit to be as stingy with its battery as he could, he declared the project complete. He originally aimed to deadbug everything on the metal sleeve of the SD card socket (which is awesome), but considering the size of the speaker and the battery he selected for the project, he ended up stuffing everything into a cardboard box.

We don’t care too much about how he packaged it, we just wanted to know what his co-workers thought of his doorbell augmentation. In the end, they loved it, but we imagine this doesn’t do anything to discourage any of them from hitting the doorbell multiple times a day.

Stick around to see a quick video of his doorbell hack in action.

Continue reading “Doorbell Hack Makes Coworkers Less Annoying”