In the era of digital streaming, the market is full of wireless speakers that will play content from your smartphone or pull it down from the Internet directly over WiFi. But if you’re feeling a bit nostalgic and want to throw on one of your old CDs, well, you might have a problem. That’s the situation [Chad Boughton] recently found himself in, so he decided to build a compact CD player that could discreetly connect up to his fancy Klipsch speaker.
The optical drive itself was the easy part, as [Chad] already had a laptop-style drive in an external enclosure that he could liberate. But of course, the speaker wouldn’t know what to do with an external disc drive, so there needed to be an intermediary. Enter the Raspberry Pi.
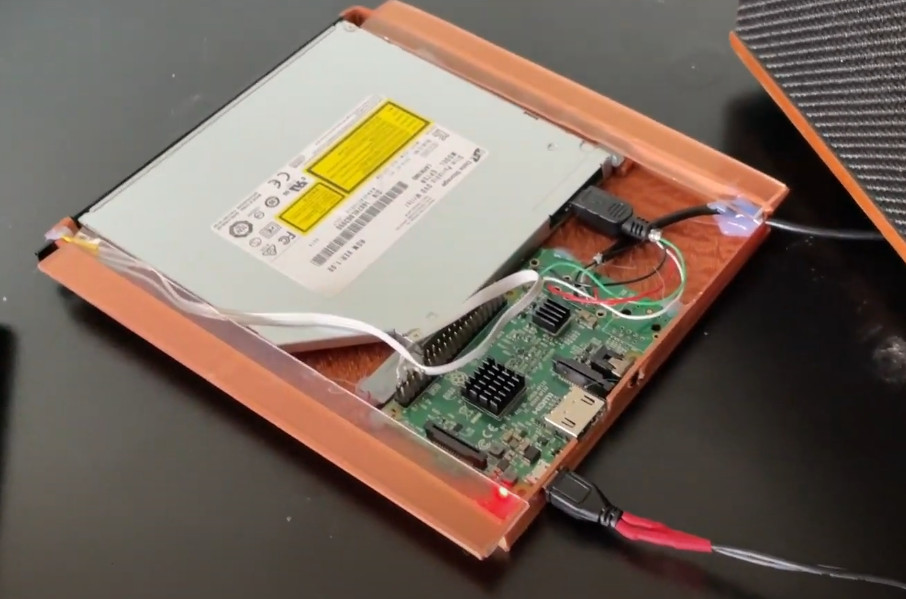 It might not look like it at first glance, but that’s a Pi 3 tucked into the back of the 3D printed frame. It would have been too tall in its original configuration, so [Chad] removed the USB and Ethernet ports; a modification we’ve covered in the past. Of course, he still needed to use the USB ports, so he ended up soldering the two cables — one to the CD drive and the other to the back of the speaker — directly to the Pi.
When plugged into the Raspberry Pi, the Klipsch speaker shows up as a USB audio device, so the software side of things was relatively simple. [Chad] installed VLC to handle CD playback, but he still needed a way to control everything. To that end, a IR receiver hooked up to the Pi’s GPIO pins means the Pi can detect the signals coming from the speaker’s original remote and pass the appropriate command on to VLC. The whole thing is very well integrated, and you could be forgiven for thinking it might be some kind of stock upgrade module at first glance.
Despite recently celebrating its 40th birthday, the CD is unlikely to completely disappear from our lives anytime soon. Manufacturers can turn their back on the standard if they want, but so long as folks still want to play them, they’ll keep coming up with inventive ways to make it happen.
Continue reading “Custom Slimline CD Player Hides Out Under Speaker”