How Mini Can A Mini Lamp Be?

If there is one constant in the world of making things at the bench, it is that there is never enough light. With halogen lamps, LEDs, fluorescent tubes, and more, there will still be moments when the odd tiny part slips from view in the gloom.

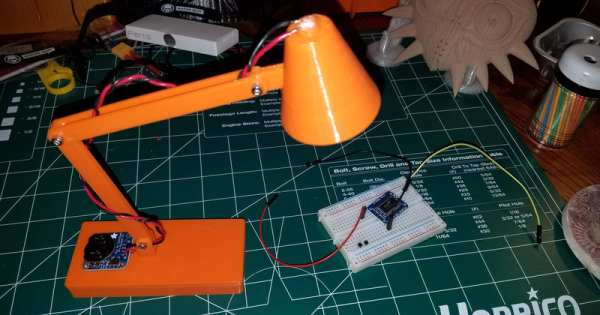
It’s fair to say that [OddDavis]’ articulated mini lamp will not provide all the solutions to your inadequate lighting woes, as its lighting element is a rather humble example of a white LED and not the retina-searing chip you might expect. The lamp is, after all, an entry in our coin cell challenge, so it hardly has a huge power source to depend upon.

What makes this lamp build neat is its 3D-printed articulated chassis. It won’t replace your treasured Anglepoise just yet, but it might make an acceptable alternative to that cheap IKEA desk lamp. With the coin cell LED you’d be hard pressed to use it for much more than reading even with its aluminium foil reflector, but given a more substantial lighting element it could also become a handy work light.

If 3D printed articulated lamps are your thing, take a look at this rather more sophisticated example.

Articulated Computer Lamp Lights Up Your Life

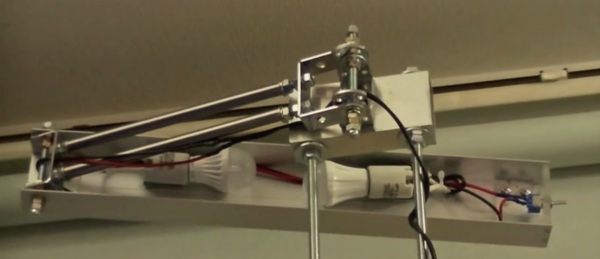
[Samimy] raided his parts bin to build this articulated lamp (YouTube link) for his computer workstation. Two pieces of aluminum angle form the main body of the lamp. Several brackets are used to form two hinges which allow the lamp to be positioned above [Samimy’s] monitor. The light in this case comes from a pair of 4 watt LED bulbs.

[Samimy] used double nuts on the moving parts to make sure nothing comes loose. The outer nuts are acorns, which ensure no one will get cut on an exposed bit of threaded rod. [Samimy] wired the two bulbs up in a proper parallel mains circuit. The switch is a simple toggle mounted in a piece of Plexiglass on the end of the lamp.

One thing we would like to see on this build is a ground wire. With all that exposed aluminum and steel, one loose connection or worn bit of insulation could make the entire lamp body live.

Continue reading “Articulated Computer Lamp Lights Up Your Life”

USB Powered CD Lamp

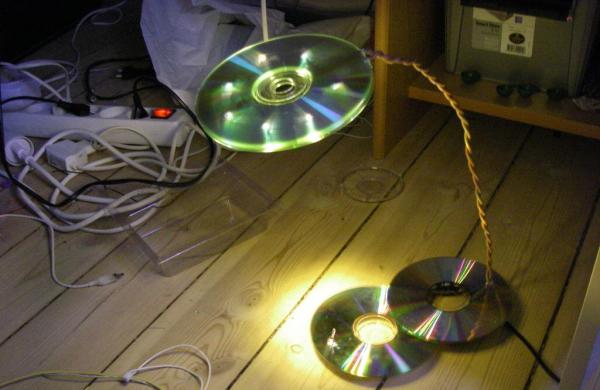
[Artificial Intelligence] has made a desk lamp out of parts he had kicking around in his parts bin. Most recognizable are the 4 CDs that make up the base and the shade. To start this project, [Artificial Intelligence] sketched out a circular pattern on one of the CDs and marked 7 locations where the LEDs will be. Holes were drilled at those marked locations, the LEDs inserted and hot glued into place. Each LED has its own current limiting resistor soldered in a series configuration.

[Artificial Intelligence] mentions the resistor value was determined by a nice LED resistor calculator he found online, ledcalc.com. Then each LED/resistor combo was wired together in a parallel configuration and covered up by another CD to clean up the look and protect the wiring.

The base, like the top, is also made from 2 CDs, but this time there are 5 AA batteries underneath the CDs. These batteries don’t power the lamp, they are only used as a counterweight to prevent the lamp from tipping over. A USB cord runs to the lamp base, goes through an on/off switch and then up a pair of large-gauge solid core wire before connecting to the LED’s in the top of the lamp. The thick solid core wire acts as the only support for the lamp shade and LEDs. Since it is still just wire, the lamp can be bent to shine light in the most convenient position, as any good desk lamp would be capable of.

Desk lamp

Sleek Desk Lamp Changes Colors Based On Sun Position

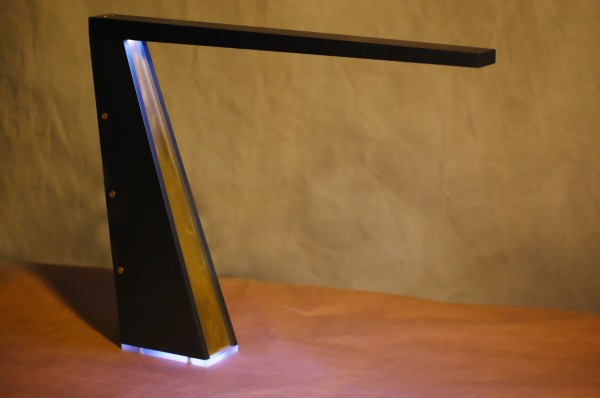
[Connor] was working on a project for his college manufacturing class when he came up with the idea for this sleek desk lamp. As a college student, he’s not fond of having his papers glowing brightly in front of him at night. This lamp takes care of the problem by adjusting the color temperature based on the position of the sun. It also contains a capacitive touch sensor to adjust the brightness without the need for buttons with moving parts.

The base is made from two sheets of aluminum and a bar of aluminum. These were cut and milled to the final shape. [Connor] found a nice DC barrel jack from Jameco that fits nicely with this design. The head of the lamp was made from another piece of aluminum bar stock. All of the aluminum pieces are held together with brass screws.

A slot was milled out of the bottom of the head-piece to make room for an LED strip and a piece of 1/8″ acrylic. This piece of acrylic acts as a light diffuser.  Another piece of acrylic was cut and added to the bottom of the base of the lamp. This makes for a nice glowing outline around the bottom that gives it an almost futuristic look.

The capacitive touch sensor is a pretty simple circuit. [Connor] used the Arduino capacitive touch sensor library to make his life a bit easier. The electronic circuit really only requires a single resistor between two Arduino pins. One of the pins is also attached to the aluminum body of the lamp. Now simply touching the lamp body allows [Connor] to adjust the brightness of the lamp.

[Connor] ended up using an Electric Imp to track the sun. The Imp uses the wunderground API to connect to the weather site and track the sun’s location. In the earlier parts of the day, the LED colors are cooler and have more blues. In the evening when the sun is setting or has already set, the lights turn more red and warm. This is easier on the eyes when you are hunched over your desk studying for your next exam. The end result is not only functional, but also looks like something you might find at that fancy gadget store in your local shopping mall.