APRS Implemented At Low Cost And Small Size

Before smartphones and Internet of Things devices were widely distributed, the Automatic Packet Reporting System (APRS) was the way to send digital information out wirelessly from remote locations. In use since the 80s, it now has an almost hipster “wireless data before it was cool” vibe, complete with plenty of people who use it because it’s interesting, and plenty of others who still need the unique functionality it offers even when compared to more modern wireless data transmission methods. One of those is [Tyler] who shows us how to build an APRS system for a minimum of cost and size.

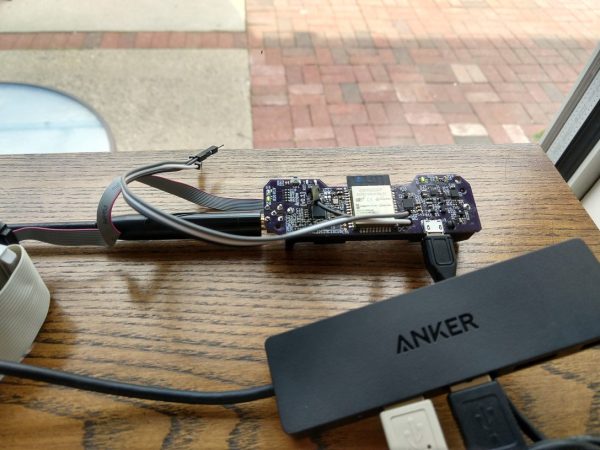
[Tyler]’s build is called Arrow and operates on the popular 2 metre ham radio band. It’s a Terminal Node Controller (TNC), a sort of ham radio modem, built around an ESP32. The ESP32 handles both the signal processing for the data and also uses its Bluetooth capability to pair to an Android app called APRSDroid. The entire module is only slightly larger than the 18650 battery that powers it, and it can be paired with a computer to send and receive any digital data that you wish using this module as a plug-and-play transceiver.

While the build is still has a few limitations that [Tyler] notes, he hopes that the project will be a way to modernize the APRS protocol using methods for radio transmission that have been improved upon since APRS was first implemented. It should be able to interface easily into any existing ham radio setup, although even small balloon-lofted radio stations can make excellent use of APRS without any extra equipment. Don’t forget that you need a license to operate these in most places, though!

Coffee Stirrers Act As Lens For This Digital Straw Camera

What happens when you mix over 23,000 coffee stirrers and a Raspberry Pi camera together? Probably nothing except for a mess, unless you very specifically pack the plastic straws and orient the camera just right. In that case, you get this very cool lenless digital straw camera that takes artfully ghostly images.

Image of Yoda photographed through many straws

Actually, lensless is a bit of a reach for [Adrian Hanft]’s creation. While the camera he’s using to grab the image has a lens, the objective, for lack of a better term, is just a tightly packed bundle of straws. We’ve seen this approach to photography before, but there the camera used film placed at the back of the straw bundles to capture the pixelated image.

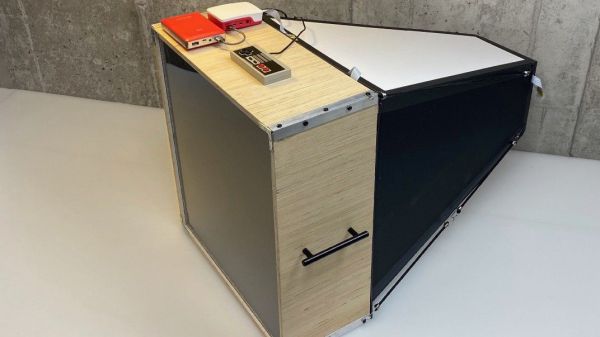
Here, a ground glass screen stands in for the film; a long lightproof box behind that provide a place to mount a camera to capture the images. Cleverly, [Adrian] built the camera mount from Lego, allowing cameras and lenses to be quickly swapped out. A Nintendo gamepad controller talks to custom software running on a Raspberry Pi and allows the photographer to control exposure and scroll through pictures using a smartphone as a display. There’s a short build video below, for those who can’t get enough of straw-packing techniques.

As with the film version of this camera, we just love the look of the photographs that come from this — the texture of the straw honeycomb and the defocused subject make for a striking effect.

Continue reading “Coffee Stirrers Act As Lens For This Digital Straw Camera”

The $50 Ham: A Simple WSPR Beacon

I was having a chat recently with someone, and it surprised me that she had an amateur radio license. I suppose it shouldn’t have come as much of a surprise; after all, getting a ham radio license is a pretty common rite of passage in the life of a hardware hacker. I guess it surprised me because she’d never mentioned it in our past conversations, and as we talked about it, I learned why. “I got my license because I thought ham radio was about building radios, ” she said. “But it’s not.”

In a lot of ways, she is right about the state of ham radio. There was a time that building one’s own gear was as central to the hobby as getting on the air, and perhaps more so. Now, though, with radios as cheap as $30 and the whiz-bang gear that can make reaching out across the planet trivially easy, building your own radios has slipped down a few notches. But homebrewing is far from a dead art, and as we’ll see in this installment of “The $50 Ham”, a WSPR beacon for the HF bands is actually a fun and simple — and cheap — way for the homebrew-curious to get a taste of what it’s like to build your own transmitter.

Continue reading “The $50 Ham: A Simple WSPR Beacon”

The $50 Ham: WSPR-ing Around The World

Everybody has a bucket list,  things to be accomplished before the day we eventually wake up on the wrong side of the grass. Many bucket-list items are far more aspirational than realistic; very few of us with “A trip to space” on our lists are going to live to see that fulfilled. And even the more realistic goals, like the trip to Antarctica that’s been on my list for ages, become less and less likely as your life circumstances change — my wife hates the cold.

Luckily, instead of going to Antarctica by myself — and really, what fun would that be? — I’ve recently been getting some of the satisfaction of world travel through amateur radio. The last installment of “The $50 Ham” highlighted weak-signal digital modes using WSJT-X; in that article, I mentioned a little about the Weak Signal Propagation Reporter, or WSPR. It’s that mode that let me test what’s possible with very low-power transmissions, and allowed me to virtually visit six continents including Antarctica and Sweden-by-way-of-Alaska.

Continue reading “The $50 Ham: WSPR-ing Around The World”

The $50 Ham: Digital Modes With WSJT-X

As it is generally practiced, ham radio is a little like going to the grocery store and striking up a conversation with everyone you bump into as you ply the aisles. Except that the grocery store is the size of the planet, and everyone brings their own shopping cart, some of which are highly modified and really expensive. And pretty much every conversation is about said carts, or about the grocery store itself.

With that admittedly iffy analogy in mind, if you’re not the kind of person who would normally strike up a conversation with someone while shopping, you might think that you’d be a poor fit for amateur radio. But just because that’s the way that most people exercise their ham radio privileges doesn’t mean it’s the only way. Exploring a few of the more popular ways to leverage the high-frequency (HF) bands and see what can be done on a limited budget, in terms of both cost of equipment as well as the amount of power used, is the focus of this installment of The $50 Ham. Welcome to the world of microphone-optional ham radio: weak-signal digital modes.

Continue reading “The $50 Ham: Digital Modes With WSJT-X”

Vacuum Tube Logic Hack Chat

Join us on Wednesday, December 9th at noon Pacific for the Vacuum Tube Logic Hack Chat with David Lovett!

For most of us, circuits based on vacuum tubes are remnants of a technological history that is rapidly fading from our collective memory. To be sure, there are still applications for thermionic emission, especially in power electronics and specialized switching applications. But by and large, progress has left vacuum tubes in a cloud of silicon dust, leaving mainly audiophiles and antique radio enthusiasts to figure out the hows and whys of plates and grids and filaments.

But vacuum tubes aren’t just for the analog world. Some folks like making tubes do tricks they haven’t had to do in a long, long time, at least since the birth of the computer age. Vacuum tube digital electronics seems like a contradiction in terms, but David Lovett, aka Usagi Electric on YouTube, has fallen for it in a big way. His channel is dedicated to working through the analog building blocks of digital logic circuits using tubes almost exclusively. He has come up with unique circuits that don’t require the high bias voltages typically needed, making the circuits easy to work with using equipment likely to be found in any solid-state experimenter’s lab.

David will drop by the Hack Chat to share his enthusiasm for vacuum tube logic and his tips for exploring the sometimes strange world of flying electrons. Join us as we discuss how to set up your own vacuum tube experiments, learn what thermionic emission can teach us about solid-state electronics, and maybe even get a glimpse of what lies ahead in his lab.

join-hack-chatOur Hack Chats are live community events in the Hackaday.io Hack Chat group messaging. This week we’ll be sitting down on Wednesday, December 9 at 12:00 PM Pacific time. If time zones have you tied up, we have a handy time zone converter.

Click that speech bubble to the right, and you’ll be taken directly to the Hack Chat group on Hackaday.io. You don’t have to wait until Wednesday; join whenever you want and you can see what the community is talking about.

Continue reading “Vacuum Tube Logic Hack Chat”

Building This Mechanical Digital Clock Took Balls

In the neverending quest for unique ways to display the time, hackers will try just about anything. We’ve seen it all, or at least we thought we had, and then up popped this purely mechanical digital clock that uses nothing but steel balls to display the time. And we absolutely love it!

Click to embiggen (you’ll be glad you did)

One glimpse at the still images or the brief video below shows you exactly how [Eric Nguyen] managed to pull this off. Each segment of the display is made up of four 0.25″ (6.35 mm) steel balls, picked up and held in place by magnets behind the plain wood face of the clock. But the electromechanical complexity needed to accomplish that is the impressive part of the build. Each segment requires two servos, for a whopping 28 units plus one for the colon. Add to that the two heavy-duty servos needed to tilt the head and the four needed to lift the tray holding the steel balls, and the level of complexity is way up there. And yet, [Eric] still managed to make the interior, which is packed with a laser-cut acrylic skeleton, neat and presentable, as well he might since watching the insides work is pretty satisfying.

We love the level of craftsmanship and creativity on this build, congratulations to [Eric] on making his first Arduino build so hard to top. We’ve seen other mechanical digital displays before, but this one is really a work of art.

Continue reading “Building This Mechanical Digital Clock Took Balls”