Laser-Etching Photos On To Eggs

CNC machines are every maker’s dream. Capable of churning out accurate parts from CAD designs with a minimum of manual labor, they’re a great tool to have in the workshop. Alternatively, you can use them for more entertaining pursuits. [Leo]’s project is one of the latter – etching greyscale photos on to eggs.

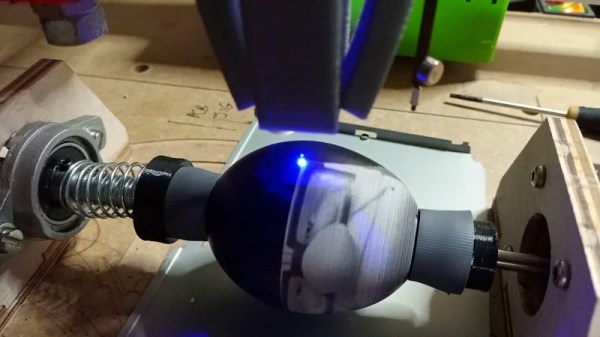
The first thing you’ll need is an egg-compatible CNC machine. The Eggbot is a popular option, else a fourth-axis on an existing machine can also do the job as in [Leo]’s case. Coupling the egg is a delicate task, for which some rubber paper rollers are salvaged from an old printer and put to work. Then, a laser needs to be fitted to the CNC head, and the egg depth mapped with a probe to ensure the entire etching is in focus. Then it’s simply a matter of loading up an image, and turning the greyscale data into the relevant G-code to burn it onto the egg.

Using eggs coated in black ink, the results [Leo] achieves are impressive. The eggs would make an amusing Easter gift, or serve as a great cheap way to teach students about CNC techniques. Obviously, eye protection is a must, and be sure to mount your laser securely to avoid any unintentional exposures. Video after the break.

Continue reading “Laser-Etching Photos On To Eggs”

What Can You Learn From An Eggbot?

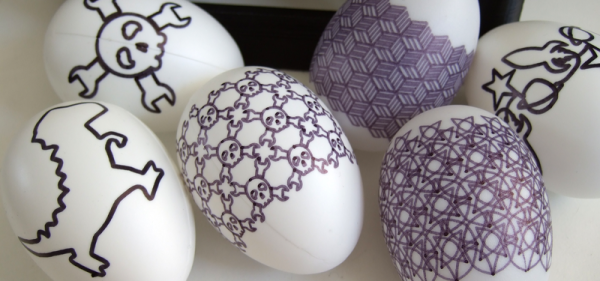
An eggbot is probably the easiest introduction to CNC machines that you could possibly hope for, at least in terms of the physical build. But at the same time, an eggbot can let you get your hands dirty with all of the concepts, firmware, and the toolchain that you’d need to take your CNC game to the next level, whatever that’s going to be. So if you’ve been wanting to make any kind of machine where stepper motors move, cut, trace, display, or simply whirl around, you can get a gentle introduction on the cheap with an eggbot.

Did we mention Easter? It’s apparently this weekend. Seasonal projects are the worst for the procrastinator. If you wait until the 31st to start working on your mega-awesome New Year’s Dropping Laser Ball-o-tron 3000, it’s not going to get done by midnight. Or so I’ve heard. And we’re certainly not helping by posting this tutorial so late in the season. Sorry about that. On the other hand, if you start now, you’ll have the world’s most fine-tuned eggbot for 2020. Procrastinate tomorrow!

I had two main goals with this project: getting it done quickly and getting it done easily. That was my best shot at getting it done at all. Secondary goals included making awesome designs, learning some new software toolchains, and doing the whole thing on the cheap. I succeeded on all counts, and that’s why I’m here encouraging you to build one for yourself.

Continue reading “What Can You Learn From An Eggbot?”

Mug-O-Matic Plots On Coffee Mugs

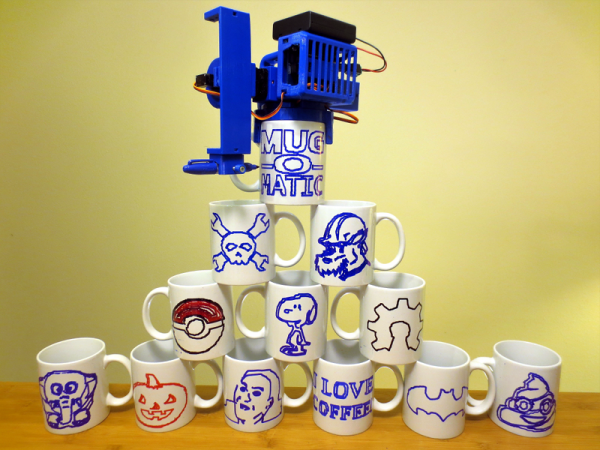
There is something fascinating about watching an autonomous machine. An automatic car wash, a soda vending machine that picks up the product behind a window, a plotter, or a robot like a CNC or 3D printer are all interesting to watch. Although [EngineerDog] bills Mug-O-Matic as a tiny CNC, we think it is more of a plotter for coffee mugs. It’s still fun to watch though, as you can see in the video below.

The design has about 60 printed parts and uses a Sharpie at the business end. It accepts gcode and can even emblazon your favorite mug with our own Jolly Wrencher, so you know we like it.

Continue reading “Mug-O-Matic Plots On Coffee Mugs”

Trek To Evil Mad Scientist Laboratories

I’ve been a huge fan of EMSL for quite some time now, and my recent field trip proved that it has earned the name Evil Mad Scientist Laboratories for a good reason. For instance, look at the reflection in the glass near the bottom and you’ll glimpse the hearse that [Lenore] and [Windell] have sitting in front of the shop. But stop at the threshold, inside there are delights that ate up a couple of hours without me even noticing. And they thought they were going to get work done that day.

Don’t judge me by my appearance. This is late afternoon on a summer Saturday in Sunnyvale. Why does that matter? Obviously summer Saturdays in Silicon Valley always start with the Electronics Swap Meet and Engineer’s breakfast! That was a ton of fun but if you’re doing it right it’s also a bit tiring. No worries, a shot of excitement came over me as soon as I walked in that front door.

Continue reading “Trek To Evil Mad Scientist Laboratories”

Spherebot: Decorating Xmas Baubles

spherebot_1-446x500

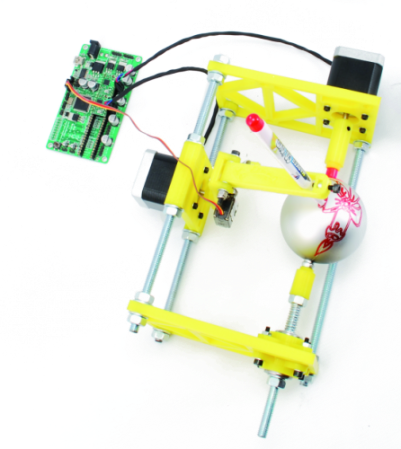
The Spherebot is an open source machine capable of printing designs onto spherical objects, such as Xmas baubles!

The design is based on the ever-popular Egg-Bot, which we have seen derived into many other useful printers such as the Mug Plotter, and the Ping Pong Printer.

The Spherebot features two stepper motors, one servo motor for marker actuation, some cheap mounting hardware, and a whole bunch of 3D printed parts—all of which are available on Thingiverse. In this design they used a 3D printer controller board called the 3Drag by Open-Electronics, which is based on the ATmega2560 (the same microcontroller as the Arduino MEGA). The Spherebot doesn’t require all three axes or an extruder, so they only installed 2 out of the 4 stepper drivers on the board to save cost.

Once you have it all built, it’s a simple matter of uploading your design into the free Spherebot-Host-GUI provided on GitHub. Stick around after the break to see just what it is capable of!

Continue reading “Spherebot: Decorating Xmas Baubles”

CNC Ping Pong Printer Uses Simple Construction

spherebot

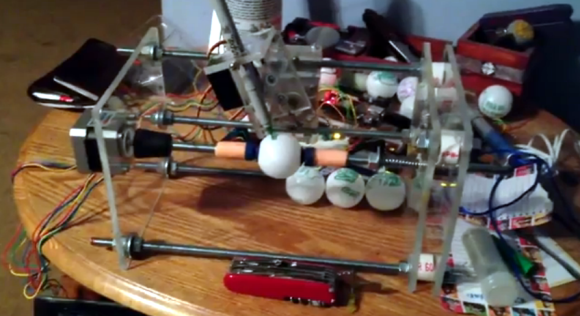
This is one of the simplest CNC builds we’ve seen but it still functions quite well. It’s a clone of the EggBot, but is aimed at printing on spherical Ping Pong balls rather than oblong eggs. [Chad] calls it the Spherebot, but you should be careful not to confuse it with the morphing sphere robot which can walk around like a hexapod.

The project is both mechanically and electronically simple. The body of the printer is made up of three acrylic plates, which we’re sure were clamped together when drilling holes to guarantee proper alignment. Threaded rod and nuts are used to mount the plates to one another, as well as to hold the sphere in place while printing. One stepper motor turns the ball while the other pivots the pen mount. A servo motor is responsible for lifting the pen. The entire thing is driven by an Arduino along with two stepper motor driver boards. Don’t miss [Chad’s] presentation embedded after the break.

Continue reading “CNC Ping Pong Printer Uses Simple Construction”

Mug Plotter Based On The Egg-Bot

mug-plotter

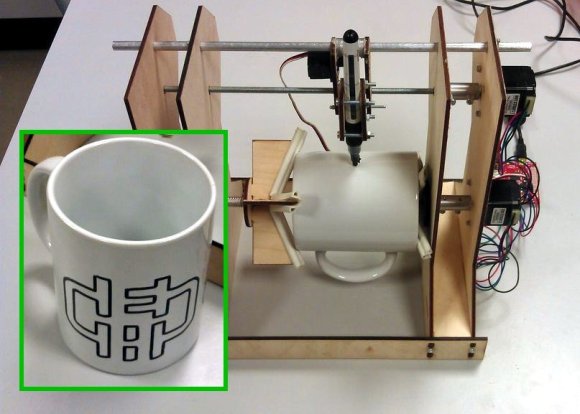
Here’s a fun way to break up the monotony in the old cubicle farm. The Mug Plotter will let you expertly inscribe your coffee vessel with a different witty saying or design for each day of the week. If it looks familiar that’s because it’s loosely based on the non-flat drawing robot, the Egg-Bot.

[Teed] built the machine using laser cut plywood parts. He starts off the build description with the griping technique. There are two parts to this, one is concave and fits in the mouth of the mug. The convex side grips the bottom edges of it. These parts go on the frame along with the slide and thread rods which hold the stylus. A servo motor is along for the ride, providing the ability to lift the marker when necessary.

You can see in the clip after the break that there’s a bit of oscillation in the rig when one of the steppers starts turning really fast. But it doesn’t seem to affect the look of the design very much at all.

Continue reading “Mug Plotter Based On The Egg-Bot”