Pinewood Derby Cars Have Come A Long Way

Get your graphite and hike a wheel, [Aron Hoekstra] writes in to completely embarrass us with some excellent pinewood derby cars.    In the pursuit of that extra something [Aron] consulted with his sons who came up with some cool ideas for cars, one Tron themed and the other basically a Wiimote with wheels! The official Pinewood derby rules say nothing about electronics, so as long as nothing helps the block-o-wood travel down the track faster, anything goes. This means you are free to load up whatever cool lights you want, but will have to earn your robotics merit badge some other way.

[Aron] Starts the builds by carving out the shape of the cars, each feature a hollowed out cavity underneath to accommodate the batteries and electronics. For the Tron Light Runner car, one continuous EL strip weaves in and out of the derby car’s body, and a single AAA battery runs the driver. [Aron] notes that it took around five feet of EL wire to cover the little car, which is two more than the driver is rated for. Fortunately the extra little bit of additional wire had little effect on its brightness.

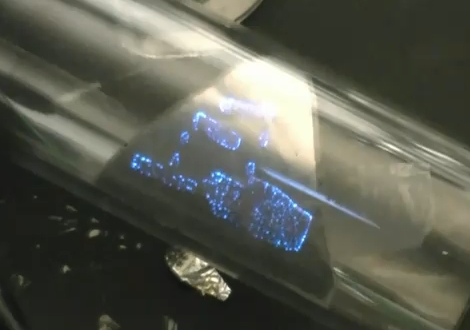
The Wiimote car has detailed 3d buttons, a breadboard with a linear regulator,  and PIC 16F628 driving  blue LEDs.  For the majority of the time the PIC simply runs a chase routine for the four LEDs, but [Aron] went through the trouble to program in the Wiimote’s start-up sequence!

Shown above the [Hokestra]’s work is my older brother’s pinewood derby car (top left) and my… potato rocket… thing… (top right)  from many many years ago. I now seriously regret not considering LEDs! Although I think all that existed then was red,  green and IR.

Check out videos of the [Hoekstra] bros’ cars after the jump!

Continue reading “Pinewood Derby Cars Have Come A Long Way”

Wireless Electricity Enables Next Generation Of Annoying Packaging

Yep, these cereal boxes light up. They’re using a new branded-technology called eCoupling that provides electricity via induction, which means the shelves have a coil with AC power running through it. The “printed coils” on the boxes allow inventory control and data exchange presumably thanks to a low-power microcontroller. But in the video after the break you can see that the printed lighting on the boxes lets them flash parts of the box art as a way to attract customers’ attention. We’d bet that they’re using electroluminescent materials but we weren’t able to get find specifics on how this is done. We just hope advertisers don’t start rolling noise-makers into their packaging.

Continue reading “Wireless Electricity Enables Next Generation Of Annoying Packaging”

Jacob’s Ladder Using EL Wire

For Halloween [Paul] wanted to build a Jacob’s Ladder without the peril that working with high voltage might bring. He was inspired by a sequencer board for electroluminescent wire and decided to build a Jacob’s Ladder simulator using the glowing material. What he ended up with is quite convincing. Eight segments of EL wire have been mounted between two diverging towers. When a PIR sensor detects motion in the room, an Arduino switches on the simulation, playing a recording of the classic sizzling voltage sound while using the sequencer board to flicker the wires from bottom to top. See for yourself in the video after the break. We give [Paul] bonus points for constructing the base out of Lego.

But if you’re not one for being cautions, there’s always this real Jacob’s Ladder build. Or maybe you just want to make something glow with the EL wire.

Continue reading “Jacob’s Ladder Using EL Wire”

How To Work With EL Wire

As you can see, [Phillip Torrone] has a nice start on his Tron costume for the movie premiere. Electroluminescent wire is what makes these costumes glow and if you’ve never worked with the stuff before you’re in for a treat. Adafruit posted a tutorial explaining how to work with EL wire. The process isn’t hard, but they’ve got a few nice tips, like using copper tape as a platform for soldering the corona wires. There is also a discussion of the math involved with properly powering your setup.

In this case, Adafruit is using ready-made power inverter units. If you’ve interested in hacking together your own inverter take a look at the background information from [Jeri Ellsworth].

Jeri Makes Flexible EL Displays

A failed chemistry experiment led [Jeri Ellsworth] to discover a flexible substrate for electroluminescent displays. We’re familiar with EL displays on the back of a glass panel like you would find in an audio receiver, but after making a mesh from aluminum foil [Jeri] looked at using the porous metal to host phosphors. She starts by cleaning foil and using a vinyl sticker to resist etching portions of the aluminum. It then goes into a bath of boric acid, electrified with the foil as the anode. As the foil etches she tests the progress by shining a laser through the foil. After this the phosphors are applied to the back surface of the foil, covered in a dielectric, and topped off with a conductive ink that will carry the AC necessary to excite the phosphors. This is layering materials in reverse compared to her EL PCB experiments. See [Jeri] explain this herself in the clip after the break.

You can see above that this produces a pretty well-defined display area. It reminds us of that color changing paint display. We think it would be worth a try to build a few 7-segment displays using this method.

Continue reading “Jeri Makes Flexible EL Displays”

EL Wire: Make It, Connect It, Power It

[Jeri’s] back with a series of videos that outlines the step-by-step electroluminescent wire manufacturing, making EL panels from PCBs, and assembling power supplies for EL hardware. These concepts are actually quite approachable, something we don’t expect from someone who makes their own integrated circuits at home.

The concept here is that an alternating current traveling through phosphors will excite them and produce light. You need two conductors separated by a dielectric to get the job done. For wire, [Jeri] uses one strand of enameled magnet wire and one strand of bare wire. The enamel insulates them, protecting against a short circuit.

But that’s not all, she also tests using a circuit board as an EL panel. By repurposing the ground plane as one of the conductors, and using the solder mask as the dielectric she is able to paint on a phosphor product resulting in the glowing panel.

Finally, you’ve got to get juice to the circuit and that’s where her power supply video comes into the picture. We’ve embedded all three after the break. It’s possible that this is cooler than blinking LEDs and it’s fairly inexpensive to get started. The circuitry is forgiving, as long as you don’t zap yourself with that alternating current.

Continue reading “EL Wire: Make It, Connect It, Power It”

Making EL Wire

[youtube=http://www.youtube.com/watch?v=3RKBGxJJmwg]

[Jeri Ellsworth] adds electroluminescent wire to the list of things she makes. The materials list is incredibly low. The common components are epoxy coated magnet wire for the center conductor and bare wire for the second conductor. The part you don’t have on hand is phosphors, although she does link to a source.

The bad news: she doesn’t show us the build process or share the details about the inductor that fires this thing up. The good news: in-depth videos are on the way. In the mean time you can marvel in her glowing success at the end of the video, or check out some of her other electroluminescent fun.