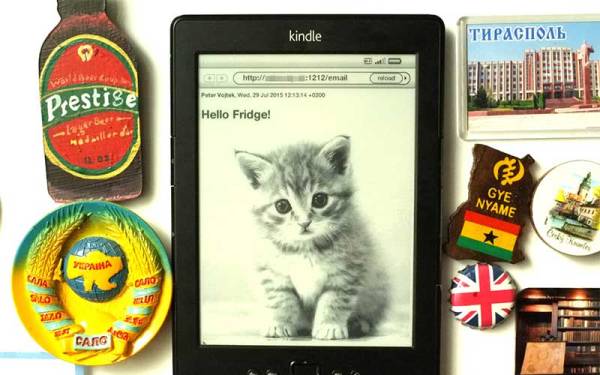
IP Tracker

An Arduino Device That Monitors Your External IP Address

[Bayres’] dad setup a webcam as a surveillance camera for a remote property. The only problem was that the only stable Internet connection they could get at this property was DSL. This meant that the external IP address of the webcam would change somewhat often; the needed a way to keep track of the external IP address whenever it changed. That’s when [Bayres] built a solution using Arduino and an Ethernet shield.

The main function of this device is to monitor the public IP address and report any changes. This is accomplished by first making a request to checkip.dyndns.org. This website simply reports your current public IP address. [Bayres] uses an Arduino library called Textfinder in order to search through the returned string and identify the IP address.

From there, the program compares this current value to the previous one. If there is any change, the program uses the Sendmail() function to reach out to an SMTP server and send an e-mail alert to [Beyres’] dad. The system also includes a small LCD. The Arduino outputs the current IP address to this display, making it easy to check up on the connection. The LCD is driven by 74HC595 shift register in order to conserve pins on the Arduino.

The system is also designed with a pretty slick setup interface. When it is booted, the user can enter a configuration menu via a Serial terminal. This setup menu allows the user to configure options such as SMTP server, email address, etc. These variables are then edited and can be committed to EEPROM as a more permanent storage solution. Whenever the system is booted, these values are read back out of the EEPROM and returned to their appropriate variables. This means you can reconfigure the device on the fly without having to edit the source code and re-upload.

Checking Email With The ESP8266

Ever so slowly, everyone’s favorite WiFi adapter is making its way into Internet-enabled projects. [jimeer01] created a device that reads the subject and sender lines from the latest email in his inbox and displays it on an LCD using the ESP8266 WiFi chip.

[jimeer] is using a ByPic for writing to the LCD and querying an inbox through an ESP8266 module. The ByPic is a board built around the BV_Basic firmware, stuffing a PIC microcontroller in an Arduino form factor and giving it a BASIC interpreter. Because this board isn’t ‘compile and flash’ like an Arduino, it’s perfectly suited for changing WiFi configurations and IMAP server credentials on the fly.

The device grabs the latest email in an inbox and displays the date, sender, and subject on the display. After scrolling through those lines, the PIC hits the ESP8266 to query the server again, grabbing the latest email, and repeating the whole process again, all without needing to connect the device to a computer. Video below.

Continue reading “Checking Email With The ESP8266”

Raspberry Pi Spies On Your Front Door

doorbell pictures

One of [Sander]’s first projects with a Raspberry Pi was to get it to send messages to his iPhone. From there he decided to take it a step further and wire the tiny computer up to his doorbell, creating a system that can send push messages to his phone whenever someone is at the front door.

[Sander]’s doorbell is wireless, and he decided to keep all of its original functionality. All it took to signal the Pi was a simple circuit tied to the doorbell’s status LED which turns off whenever the doorbell is pushed.

The Raspberry Pi runs a python program that handles the GPIO pin which is wired to the doorbell. When the doorbell is pushed, the program processes and sends the push notification while taking pictures of the visitor with an attached webcam. The pictures are included in the message so [Sander] can see who is at the front door. The code for the project is included on his project page.

This project rang a bell for us since we’ve seen projects using a Raspberry Pi and push notifications. None of them so far have included a webcam or utilized an existing wireless doorbell though, and this is a great step forward!

Telegraph Sounder Clicks Out Email Messages

telegraph-box-together

[Patrick Schless] is excited to show off the project he took on about nine months ago. After finding an antique telegraph sounder he wired it up to an Arduino to see if he could make it tick. The successful experiment laid the ground work for different hardware that would make it into a morse code email reader.

He doesn’t know much about the background of the old hardware, but driving it is relatively simple. It’s basically a magnetic relay so you need to have a transistor for switching and a flyback diode for protection. Once those components are in place it’s just a matter of toggling a bit. [Patrick] knew he wanted to pull messages from an online source, so he set his Arduino aside and grabbed a Raspberry Pi. It worked like a charm. His plan was to put this on a bookshelf in perpetuity so he went the extra mile, designing his own PCB and having it spun using the OSH Park service. The project is finished with this low-profile laser-cut base which houses all of the electronics.

Now if he wants to respond to his emails in Morse code he needs to build this keyboard.

Continue reading “Telegraph Sounder Clicks Out Email Messages”

Wireless Unread Email Counter Tells You How Busy You’re Not

counter

One of the marks of how busy you are – or how well your spam filters are set up – is how many unread emails you have in your inbox. [trumpkin] over on Instructables posted a great tutorial for making a wireless counter that displays the number of unread emails in your Gmail account.

[trumpkin] used a tiny and inexpensive 419 MHz transmitter and receiver combo to make this project work. On his desktop, he wired up a USB to UART bridge attached to the transmitter. For the receiver side, an ATMega328 reads the data coming off the receiver and displays the number of unread emails on two seven-segment displays.

The wireless device runs off of two AA batteries and should provide enough power to keep the email monitor running for a long time. More than enough time for your inbox to fill up and for you to become overwhelmed with the work you should be doing.

Web Connected Treat Dispenser Appeases The Pets

web-connected-treat-dispenser

[John] was looking for a project for his newly acquired Raspberry Pi and decided to include his dog in the fun. although his finished project looks a lot like an old time camera, it’s actually a web-connected treat dispenser that uses his dog’s email address for dispensation.

Let’s take a look at the hardware from top to bottom. There’s a camera with a eagle’s eye shot of his furry friend waiting for treats. The cylinder below that is the motor which drives the treat dispenser. You can see the chain tensioner on the back which connects the motor to the tube dispenser in the center of the box. Just above that outlet is the character display which gives feedback to anyone watching the dispenser. Nearing the bottom is a hopper that catches the treats, then flips over to dump them onto the floor. And finally at the bottom is a slot for the Raspberry Pi which drives everything.

Most of [John’s] projects revolve around CNC work. In addition to the demo video found after the break there’s a second that focuses on CAD design. About half way through that clip he gives us a close-up tour of all the hardware.

Continue reading “Web Connected Treat Dispenser Appeases The Pets”