Nothing quite beats the warm glow of a tube. What better way to enjoy that glow than to use it to read numbers? Nixie tubes were created by Haydu Brothers Laboratories, and popularized by Burroughs Corp in 1955. The name comes from NIX I – or “Numeric Indicator eXperimental No. 1”. By the mid 1970’s, seven segment LED’s were becoming popular and low-cost alternatives to Nixies, but they didn’t have the same appeal. Nixie tubes were manufactured all the way into the 1990’s. There’s just something about that tube glow that hackers, makers, and humans in general love. This week’s Hacklet highlights the best Nixie (and Nixie inspired) projects on Hackaday.io!
 We start with [Sascha Grant] and Nixie Temperature Display. [Sascha] mixed an Arduino, a Dallas DS18B20 Temperature sensor, and three IN-12A Nixie tubes to create a simple three digit temperature display. We really love the understated laser-cut black acrylic case. An Arduino Pro Micro reads the Dallas 1-wire sensor and converts the temperature to BCD. High voltage duties are handled by a modular HV power supply which bumps 9V up to the required 170V. Controlling the Nixie tubes themselves are the classic K155ID1 BCD to decimal converter chips – a favorite for clock builders.
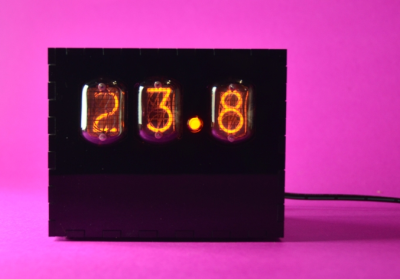
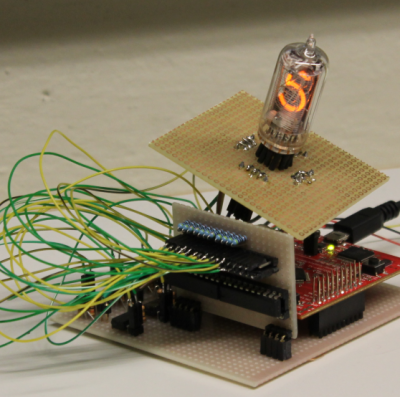 Next up is [Christoph] with Reading Datasheets and Driving Nixie Tubes. Chips like the K155ID1, and the 74141 make driving Nixie tubes easy. They convert Binary Coded Decimal (BCD) to discrete outputs to drive the cathodes of the Nixie. More importantly, the output drivers of this chip are designed to handle the high voltages involved in driving Nixie tubes. These chips aren’t manufactured anymore though, and are becoming rare. [Christoph] used more common parts. His final drive transistor is a MPSA42 high voltage NPN unit. Driving the MPSA42’s is a 74HC595 style shift register. [Christoph] used a somewhat exotic Texas Instruments TPIC6B595 with FET outputs, but any shift register should work here. The project runs on a Stellaris Launchpad, so it should be Arduino compatible code.
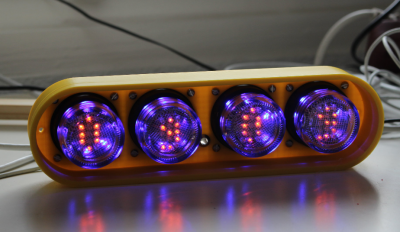 [Davedarko] has the fixietube clock. Fixietube isn’t exactly a Nixie. It’s an LED based display inspired by Nixie tubes. Modern amber LEDs aren’t quite the same as classic Nixies, but they get pretty darn close. [Dave] designed a PCB with a 3×5 matrix of LEDs to display digits. A few blue LEDs add a bit of ambient light. The LEDs are driven with a 74HC595 shift register. The entire assembly mounts inside a tiny glass jam jar, giving it the effect of being a vacuum tube. The results speak for themselves – fixietubes certainly aren’t Nixies, but they look pretty darn good. Add a nice 3D printed case, and you’ve got a great project which is safe for anyone to build.
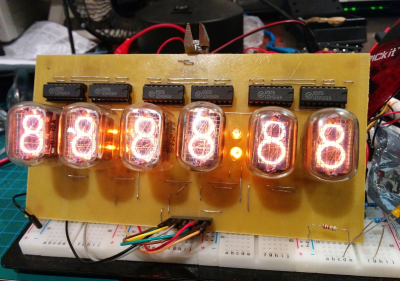 Finally, we have [Johnny.drazzi] with his Open Nixie Clock Display. [Johnny] has been working on Open Nixie for a few years. The goal is to create a Nixie based clock display which can be driven over the SPI bus. So far, [Johnny] has 6 Russian IN-12 tubes glowing with the help of the ubiquitous K155ID1 BCD to decimal converter. The colons of the clock are created with two INS-1 neon indicators. [Johnny] spends a lot of time analyzing the characteristics of a Nixie tube – including the strike voltage, and steady state current. If you’re interested in building a Nixie circuit yourself, his research is well worth a read!
Not satisfied? Want more Nixie goodness? Check out our Nixie tube project list!
That’s about all the time we have for this week’s Hacklet. As always, see you next week. Same hack time, same hack channel, bringing you the best of Hackaday.io!

 Starting today you can visit the project’s website and
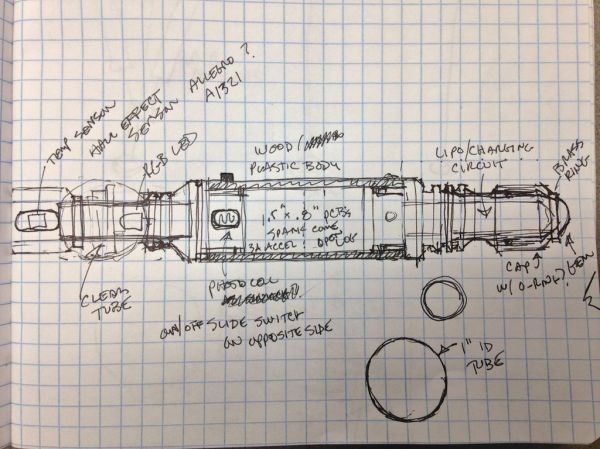
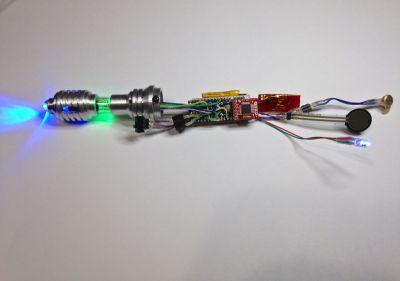 Many weekends later [Sam] and his dad finished the body of the screwdriver and started work on the electronics. To keep it simple they used an Arduino Pro Mini 5V with a Sparkfun OpenLog to record all the data — and a handful of sensors of course!