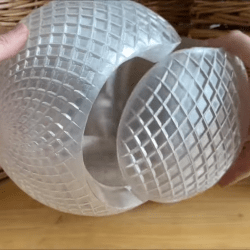
3D Print Finishing By Spraying Glazing Putty

Finishing off 3D prints is a labour-intensive process, and getting a good looking, smooth surface suitable for painting takes a lot of time and plenty of practice. Deeper printing layer lines or minor surface defects can be smoother over with a variety of materials, from putties to resins, but the deeper the defect, the thicker the filler and that takes it toll on the surface details – smoothing those out and making fine details less distinct. [Darkwing dad] has another solution that looks pretty easy to achieve, by mixing acetone with glazing putty it can be airbrushed over the print surface in one go. After a little experimentation with the ratio of putty to acetone, a wide open nozzle and a low pressure, it was found that a nice even spray could be achieved. Importantly it dries in just a few minutes, enabling multiple coats to be applied in a short space of time.

Once sufficient thickness has been applied, the coating can easily sanded to get a smooth result with the worst of the gaps filled, and the layer lines nicely hidden. The final part of the filling process is more typical, with a few coats of filler primer applied straight from a rattle can, followed by a light sand and you’re good for painting.

We’ve covered smoothing 3D prints practically as long as we’ve been covering 3D printing itself, and there are multiple ways to do this, depending on the filament material, your budget and you tolerance for noxious fumes. Here’s a guide for smoothing using UV curable resins, using a special smoothable filament with IPA, and finally if this is just too fancy, smelly or expensive, just whip out the old butane torch and smooth those prints with good old fashioned fire.

Continue reading “3D Print Finishing By Spraying Glazing Putty”

G10 Is The 3D Print Surface You Crave

Print surfaces have been a major part of 3D printer development and experimentation since the beginning. [Makers Muse] has been experimenting with G10, a cheap high-pressure fiberglass laminate, and found that it’s an excellent candidate for most of your FDM printing needs. (Video embedded after the break.)

You’re probably more familiar with the fire-resistant version of G10, FR-4, the fiberglass substrate used for most PCBs. It’s also known by the brand name Garolite. [Makers Muse] tested with PLA, PETG (on his headphone build), ABS, ASA, PET, PCTG, and nylon. All the materials displayed excellent bed adhesion when heated to the appropriate temperature, and would often self-release the part as it cooled down. For TPU, the bed was left unheated to prevent it from sticking too well. 0.5 mm, 1.5 mm, and 3 mm G10 sheet thicknesses were tested, and [Makers Muse] found 1.5 mm to be the perfect balance between rigidity, and flexibility for removing particularly sticky prints.

G10 has been used in some commercial 3D printers, but there is very little information regarding its use beyond high-temperature materials like nylon. It leaves an excellent surface finish on the bottom of parts, as long as you take care not to scratch the bed. Compared to glass, its lower weight is advantageous for printers where the bed moves for the Y-axis. Another major advantage is the low cost, especially compared to some of the more exotic bed materials.

The results certainly look very promising, and we are keen to get our hands on some G10 for our own printers. If you have trouble finding it for sale, check out your local knife-making suppliers, who sell it as handle materials.

Continue reading “G10 Is The 3D Print Surface You Crave”

Strangest Upside-Down 3D Printer Fits In A Filament Box

It’s rare these days for a new FDM printer to come along that sparks our interest, but the [Kralyn]’s Positron managed to do it. (Video, embedded below.) It prints upside down and packs down into a filament box while still boasting a print volume of 175 mm x 176 mm x 125 mm.

Unlike most 3D printers, the hotend and XY-gantry is mounted below the build plate, directly onto the base. You might assume that a printer needs to extrude plastic with gravity to work properly, but the real action is in the smooshing of the plastic layers. It appears that it might even improve bridging since the hotend is supporting the plastic as it gets extruded. A clear glass build plate is used, with the same heating strips found on the rear windows of most cars. This also allows the user still see the part, and provides the added advantage of being able to quickly spot bed leveling and adhesion problems.

Another interesting side effect of this arrangement is rigidity. There is no need to suspend the XY gantry with the heavy hotend in the air, so it can be mounted directly on the thick aluminum base plate. It uses an H-bot style gantry, with Synchromesh timing cables instead of belts, which eliminates the concern of belt twist. To get the best possible print volume within the size of a filament box, the gantry axes are arranged diagonally across the base plate. The Z-axis can disconnect and lay flat on top of the printer and uses the linear rails to keep it perfectly straight and perpendicular when mounted. Continue reading “Strangest Upside-Down 3D Printer Fits In A Filament Box”

3D Printing Without Support Material Thanks To An Additional Axis

Fused Deposition Modelling (FDM) 3D printers which squirt out molten plastic layer by layer are by far the most popular type in general use. Most machines extrude plastic through a nozzle above print bed, and struggle to produce parts with overhangs without using support material. However, a German team of researchers have recently come up with a solution.

In a prototype built by researchers at the Zurich University of Applied Sciences (ZHAW), a standard Cartesian printer has a third rotary axis added, upon which the nozzle can rotate. Additionally, the nozzle is angled at 45 degrees to the print bed, rather than the usual perpendicular setup. This allows layers of a print to be built up in such a way that support material is not needed for the vast majority of typical overhangs. This is particularly useful for hollow parts, where removing support material can be particularly difficult.

The team believes that such technology could be implemented on existing printers by way of a simple upgrade kit, and we can imagine a few experimenters will be champing at the bit to try it out. If you do, be sure to drop us a line. Alternatively, consider using a marker to make removing supports easier. Video after the break.

Continue reading “3D Printing Without Support Material Thanks To An Additional Axis”

Put That New Resin Printer To Work Making PCBs

With all the cool and useful parts you can whip up (relatively) quickly on a 3D printer, it’s a shame you can’t just print a PCB. Sure, ordering a PCB is quick, easy, and cheap, but being able to print one-offs would peg the needle on the instant gratification meter.

[Peter Liwyj] may just have come up with a method to do exactly that. His Instructables post goes into great detail about his method, which uses an Elegoo Mars resin printer and a couple of neat tricks. First, a properly cleaned board is placed copper-side down onto a blob of SLA resin sitting on the print bed. He tricks the printer into thinking the platform is all the way down for the first layer by interrupting the photosensor used to detect home. He lets the printer go through one layer of an STL file that contains his design, which polymerizes a thin layer of plastic onto the copper. The excess resin is wiped gently away and the board goes straight into a ferric chloride etching bath. The video below shows the whole process.

As simple as it sounds, it looks like it works really well. And [Peter] didn’t just stumble onto this method; he approached it systematically and found what works best. His tips incude using electrical tape as a spacer to lift the copper off the print surface slightly, cleaning the board with Scotchbrite rather than sandpaper, and not curing the resin after printing. His toolchain is a bit uncoventional — he used SketchUp to create the traces and exported the STL. But there are ways to convert Gerbers to STLs, so your favorite EDA package can probably fit in to the process too.

Don’t have a resin printer? Don’t worry — FDM printers can work too.

Continue reading “Put That New Resin Printer To Work Making PCBs”

Art of 3D printer in the middle of printing a Hackaday Jolly Wrencher logo

3D Printering: Will A Resin Printer Retire Your Filament-based One?

Adding a resin printer to one’s workbench has never looked so attractive, nor been so affordable. Complex shapes with effortlessly great detail and surface finish? Yes, please! Well, photos make the results look effortless, anyway. Since filament-based printers using fused deposition modeling (FDM) get solid “could be better” ratings when it comes to surface finish and small detail resolution, will a trusty FDM printer end up retired if one buys a resin printer?

The short answer is this: for users who already use FDM, a resin-based stereolithography (SLA) printer is not likely to take over. What is more likely to happen is that the filament printer continues to do the same jobs it is good at, while the resin printer opens some wonderful new doors. This is partly because those great SLA prints will come at a cost that may not always justify the extra work.

Let’s go through what makes SLA good, what it needs in return, and how it does and doesn’t fit in with FDM.

Continue reading “3D Printering: Will A Resin Printer Retire Your Filament-based One?”

Finishing FDM Prints With SLS Resin

[Thomas Sanladerer] has a filament-based 3D printer and a resin one. Can the two types of raw material combine to make something better? [Thomas] did some experiments using some magnets to suspend the parts and a hot air soldering gun to heat things up.

The trick turns out to be cutting the resin with alcohol. Of course, you also need to use a UV light for curing.

The parts looked pretty good, although he did get different results depending on a few factors. To see how it would work on a practical part, he took a very large printed alien egg. The problem is, the egg won’t fit in the curing station. A few minutes with a heat sink, a drill press, and an LED module was all it took to build a handheld UV curing light.

The good news is you don’t need a resin printer to take advantage of the process — just the resin. He also points out that if you had parts which needed to maintain their dimensions because they mate with something else, you could easily mask the part to keep the resin away from those areas.

If this video (and the results it shows) has you interested, then you’ll love the in-depth account that [Donald Papp] wrote up last year about his own attempts to smooth 3D printed parts with UV resin.

Continue reading “Finishing FDM Prints With SLS Resin”