Thermoelectric Module Keeps Printer Filament Cool And Dry

Anyone who has left their car windows open during a rainstorm will tell you the best way to dry the upholstery is to crank the AC and close the windows. A couple of hours later, presto — dry seats. The same can be said for 3D printer filament, and it’s pretty much what [Ben Krejci] is doing with this solid-state filament dryer.

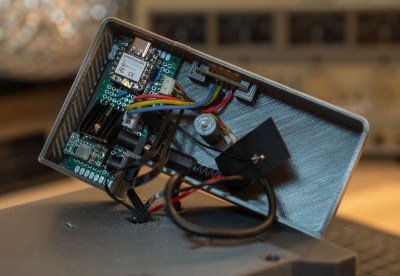
The running gear for this build is nothing fancy; it’s just a standard thermoelectric cooling module and a fan. The trick was getting the airflow over the module right. [Ben] uses two air inlets on his printed enclosure to pull air from the cold side of the Peltier, which allows the air enough time in contact with the cold to condense out the water. It also allows sufficient airflow to keep the hot side of the module from overheating.

Water collection was a challenge, too. Water always finds a way to leak, and [Ben] came up with a clever case design incorporating a funnel to direct water away. The module is also periodically run in reverse to defrost the cold side heatsink.

The dehumidifier lives in a large tool cabinet with plenty of room for filament rolls and is run by an ESP32-C3 with temperature and humidity sensors, which allowed [Ben] to farm most of the control and monitoring out to ESPHome. The setup seems to work well, keeping the relative humidity inside the cabinet in the low 20s — good enough for PETG and TPU.

It’s an impressively complete build using off-the-shelf parts. For a different approach to solid-state filament drying, check out [Stefan]’s take on the problem.

DIY Mini Fridge Is Pure Brilliance In Foam

There’s nothing more pleasing on a hot day than an ice-cold beverage. While the vast majority of us have a fridge in the kitchen, sometimes it’s desirable to have a further fridge in the lab, games room, or workshop. To that end, you may find value in this ultra-cheap, low-cost DIY fridge build from [Handy_Bear].

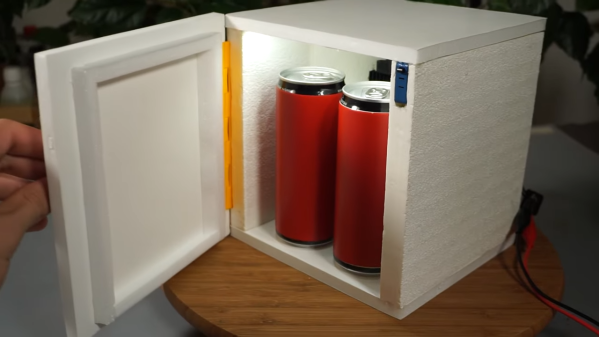
Like many tiny fridge builds, this design eschews complex gas-cycle refrigeration techniques for simple Peltier modules. These are devices that have one cold side and one hot side, because they move heat when electricity is applied. This build uses a Peltier module fitted with a fan to better shift away heat from the hot side, improving the module’s cooling ability.

The “fridge” itself is assembled out of thick XPS insulation foam. A hot wire cutter was used to cut several slabs which were then assembled using hot glue. The Peltier module is installed on the back, at the top of the fridge. Thus, air which is cooled in this area will then travel down through the rest of the fridge’s cavity. [Handy_Bear] also goes over how to produce a working hinge and a gasket for the door, which helps with ease-of-use and efficiency. As a nice touch, a set of 12V LED lights are also installed inside, which light when the door is open. Just like the real thing!

The final build is noisy, slow to cool down, and it uses 60 watts of power to cool down just two regulation-sized sodas. Notably, you could fit two standard NATO smoke grenades in the same space, as they’re almost-identically sized (ask us how we know). However, smoke grenades don’t usually need to be refrigerated.

None of that means it isn’t fun though! Plus, [Handy_Bear] notes that adding a second Peltier would greatly aid the fridge’s ability to quickly chill your grenades sodas. You might even like to explore the use of special fan designs to make the fridge even quieter! Video after the break.

Continue reading “DIY Mini Fridge Is Pure Brilliance In Foam”

Build Your Own Freezer With Thermoelectric Coolers

Freezers are highly useful devices. You can preserve food, stop a dead animal from stinking out your apartment, and keep your vodka at the optimal drinking temperature. Of course, most of us bought ours from the local whitegoods store, but [Tech Ingredients] set out to build his own (YouTube, embedded below).

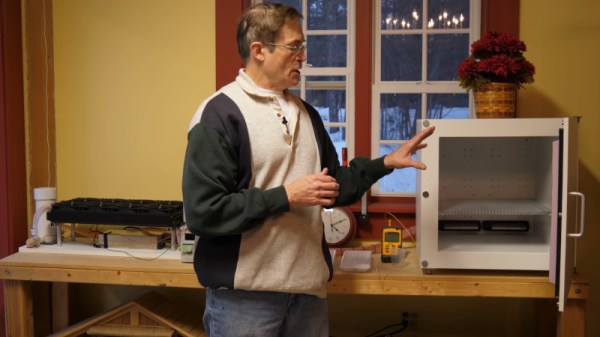
Unlike your freezer at home, this build doesn’t use the typical heat pump and refrigeration cycle with a compressor and expansion valve and so on. Instead, this freezer uses thermoelectric devices to pump heat, in combination with a glycol cooling circuit and fan-cooled radiators.

It’s not the most efficient or practical way to build a freezer, but it is functional and the device demonstrably works, making ice cubes over the course of a few hours. Performance can be further improved by moving the radiator assembly outdoors to make the most of the low ambient temperatures.

[Tech Ingredients] has further plans to experiment with a dessicant-based refrigeration system, and reports that initial results are promising. We’re eager to see how that goes; we’re fans of any rig that can cool a beer down in no time flat. Video after the break.

Continue reading “Build Your Own Freezer With Thermoelectric Coolers”

See The Radioactive World With This Peltier Cloud Chamber

Remember when a homemade cloud chamber was a science fair staple? We haven’t participated for decades, but it seemed like every year someone would put a hunk of dry ice in a fish tank, add a little alcohol, and with the lighting just right – which it never was in the gymnasium – you might be lucky enough to see a few contrails in the supersaturated vapor as the occasional stray bit of background radiation whizzed through the apparatus.

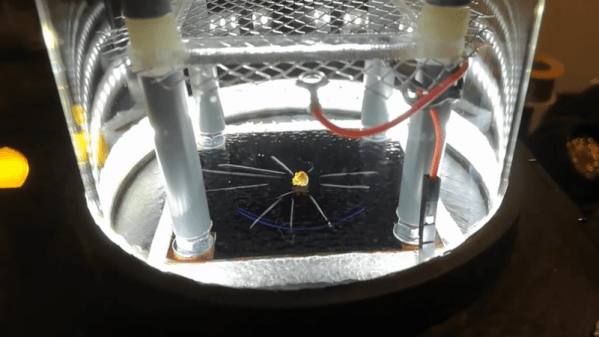
Done right, the classic cloud chamber is a great demonstration, but stocking enough dry ice to keep the fun going is a bit of a drag. That’s where this Peltier-cooled cloud chamber comes into its own. [mosivers] spares no expense at making a more permanent, turn-key cloud chamber, which is perched atop a laser-cut acrylic case. Inside that is an ATX power supply which runs a Peltier thermoelectric cooling module. Coupled with a CPU cooler, the TEC is able to drive the chamber temperature down to a chilly -42°C, with a strip of white LEDs providing the required side-lighting. The video below gives a tour of the machine and shows a few traces from a chunk of pitchblende; it’s all pretty tame until [mosivers] turns on his special modification – a high-voltage grid powered by a scrapped electronic fly swatter. That really kicks up the action, and even lets thoriated TIG welding electrodes be used as a decent source of alpha particles.

It’s been a while since we’ve seen a Peltier cloud chamber build around here, which is too bad because they’re great tools for engaging young minds as well as for discovery. And if you use one right, it just might make you as famous as your mother.

Continue reading “See The Radioactive World With This Peltier Cloud Chamber”

Thermoelectric Dry Ice Generator Does Not Work (Yet)

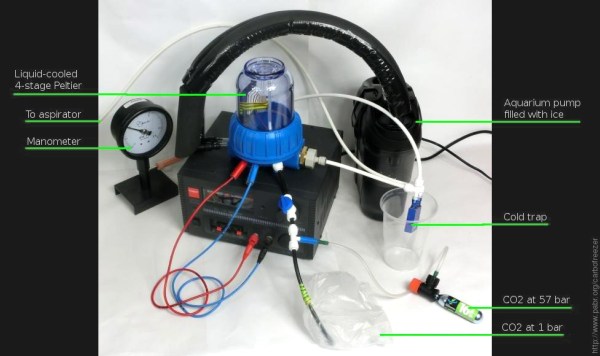
[Pabr] is trying to make dry ice the hard way by building a thermoelectric dry ice generator. The project is a well planned round trip through thermodynamics and cryogenics with a hard landing on the icy grounds of trial and error.

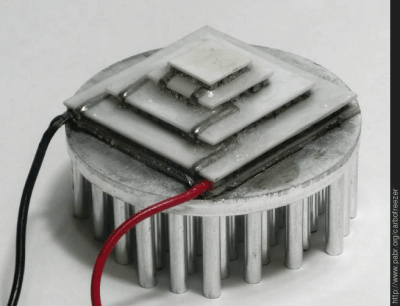
[Pabr’s] four stage Peltier element on a heatsink.
While dry ice can be obtained with simpler methods, for example by venting gaseous CO2 from fire extinguishers and collecting the forming CO2 flakes, [pabr’s] method is indeed attractive as a more compact solid-state solution. The setup employs a four stage Peltier element, which uses four Peltier stages to achieve a high temperature differential.

With sufficient cooling on the high-temperature side of the element, it should be well capable of achieving temperatures below -78.5 °C, the sublimation temperature of CO2. So far, [pabr] has built three different setups to expose small amounts of CO2 to the cold of the Peltier element, hoping to observe the formation of little dry ice flakes.

Continue reading “Thermoelectric Dry Ice Generator Does Not Work (Yet)”

Pain Box Project

Making The Dune “Pain Box” A Reality

If you are unfamiliar with Dune, then you may not know what the pain box is. The pain box is a fictional device that produces an excruciating burning sensation without causing any actual damage. [Bryan] has been working on a project to duplicate this effect in the real world. It sounds like he may be on the right path by using the “thermal grill illusion”.

The thermal grill illusion is a sensory trick originally demonstrated back in 1896. The trick is made up of two interlaced grills. One is cool to the touch, and the other is warm. If the user touches a single grill, they won’t experience any pain because neither temperature is very extreme. However if the user places their hand over the interlaced grills simultaneously they will immediately experience a burning heat. This usually causes the person to pull their hand away immediately. It’s a fun trick and you can sometimes see examples of it at science museums.

The thermal grill illusion sounded like the perfect way to make the pain box a reality. [Bryan] has set specific constraints on this build to make it more true to the Dune series. He wants to ensure the entire package fits into a small box, just big enough to place an adult hand inside. He also wants to keep safety in mind, since it has the potential to actually cause harm if it were to overheat.

[Bryan] has so far tried two methods with varying success. The first attempt involved using several thermoelectric coolers (TECs). [Bryan] had seen PCBs etched a certain way allowing them to radiate heat. We’ve seen this before in 3D printer surfaces. He figured if they could become hot, then why couldn’t they become cold too? His idea was very simple. He etched a PCB that had just two large copper pours. Each one branched out into “fingers” making up the grill.

Each side of the grill ultimately lead to a flat surface to which a TEC was mounted. One side was cold and the other was hot. Heat sinks we attached to the open side of the TECs to help with performance. Unfortunately this design didn’t work. The temperature was not conducted down to the fingers at all. The back side of the PCB did get hot and cold directly under the TECs, but that wouldn’t work for this illusion.

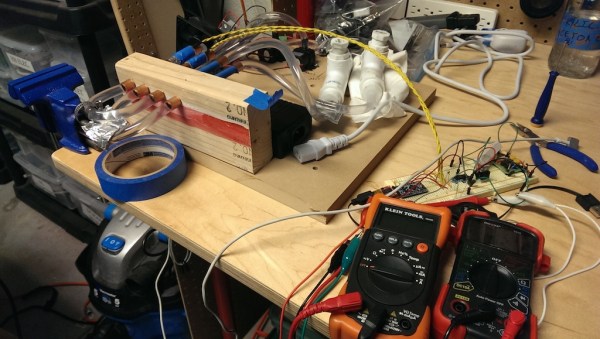
The latest version of the project scraps the PCB idea and uses small diameter copper tubing for the grill. [Bryan] is working with two closed loop water systems. One is for warm water and the other is for cold. He’s using an aquarium pump to circulate the water and the TECs to actually heat or cool the water. The idea is that the water will change the temperature of the copper tubing as it flows through.

While the results so far are better than the previous revision, unfortunately this version is having problems of its own. The hot water eventually gets too hot, and it takes over an hour for it to heat up in the first place. On top of that, the cold water never quite gets cold enough. Despite these problems, [Bryan] is hopefully he can get this concept working. He has several ideas for improvements listed on his blog. Maybe some Hackaday readers can come up with some clever solutions to help this project come to fruition.