How The Hunga Tonga Volcano Eruption Was Felt Around The World

On the 14th of January, 2022, the Hunga Tonga-Hunga Ha’apai volcano began a gigantic eruption that would go on to peak in ferocity the next day. The uninhabited island volcano would quickly make headlines as the country of Tonga was cut off the world and tsunamis bore out from the eurption zone.

In a volcanic event of this size, the effects can be felt around the world. With modern instruments, they can be properly understood too. Let’s take a look at how the effects of the Hunga Tonga eruption were captured and measured across the globe.

Continue reading “How The Hunga Tonga Volcano Eruption Was Felt Around The World”

Hackaday Links Column Banner

Hackaday Links: January 23, 2022

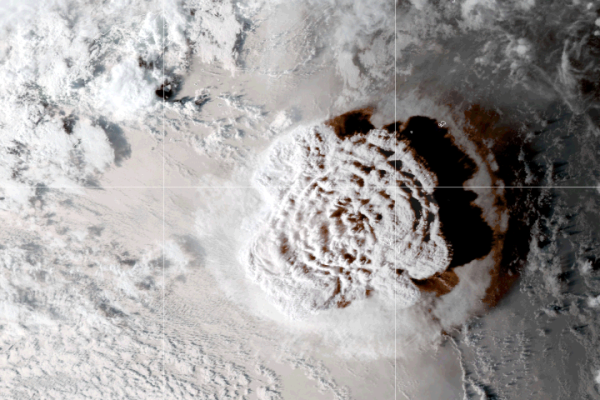
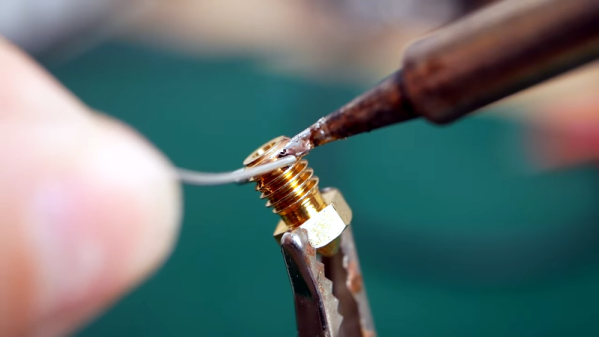
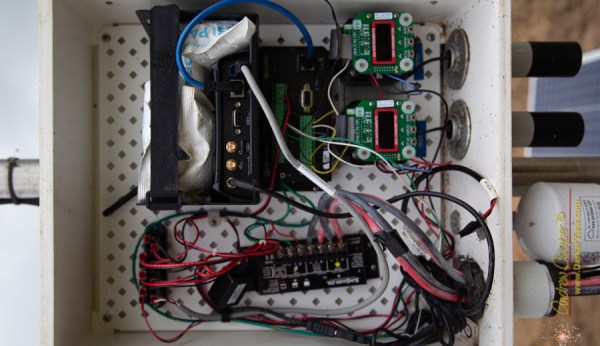
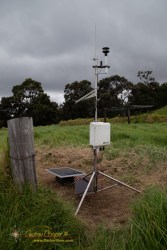
When Tonga’s Hunga-Tonga Hunga-Ha’apai volcano erupted on January 15, one hacker in the UK knew just what to do. Sandy Macdonald from York quickly cobbled together a Raspberry Pi and a pressure/humidity sensor board and added a little code to create a recording barometer. The idea was to see if the shock wave from the eruption would be detectable over 16,000 km away — and surprise, surprise, it was! It took more than 14 hours to reach Sandy’s impromptu recording station, but the data clearly show a rapid pulse of increasing pressure as the shockwave approached, and a decreased pressure as it passed. What’s more, the shock wave that traveled the “other way” around the planet was detectable too, about seven hours after the first event. In fact, data gathered through the 19th clearly show three full passes of the shockwaves. We just find this fascinating, and applaud Sandy for the presence of mind to throw this together when news of the eruption came out.

Good news for professional astronomers and others with eyes turned skyward — it seems like the ever-expanding Starlink satellite constellation isn’t going to kill ground-based observation. At least that’s the conclusion of a team using the Zwicky Transient Facility (ZTF) at the Palomar Observatory outside San Diego. ZTF is designed to catalog anything that blinks, flashes, or explodes in the night sky, making it perfect to detect the streaks from the 1,800-odd Starlink satellites currently in orbit. They analyzed the number of satellite transients captured in ZTF images, and found that fully 20 percent of images show streaks now, as opposed to 0.5 percent back in 2019 when the constellation was much smaller. They conclude that at the 10,000 satellite full build-out, essentially every ZTF image will have a streak in it, but since the artifacts are tiny and well-characterized, they really won’t hinder the science to any appreciable degree.

Speaking of space, we finally have a bit of insight into the causes of space anemia. The 10% to 12% decrease in red blood cells in astronauts during their first ten days in space has been well known since the dawn of the Space Age, but the causes had never really been clear. It was assumed that the anemia was a result of the shifting of fluids in microgravity, but nobody really knew for sure until doing a six-month study on fourteen ISS astronauts. They used exhaled carbon monoxide as a proxy for the destruction of red blood cells (RBCs) — one molecule of CO is liberated for each hemoglobin molecule that’s destroyed — and found that the destruction of RBCs is a primary effect of being in space. Luckily, there appears to be a limit to how many RBCs are lost in space, so the astronauts didn’t suffer from complications of severe anemia while in space. Once they came back to gravity, the anemia reversed, albeit slowly and with up to a year of measurable changes to their blood.

From the “Better Late Than Never” department, we see that this week that Wired finally featured Hackaday Superfriend Sam Zeloof and his homemade integrated circuits. We’re glad to see Sam get coverage — the story was also picked up by Ars Technica — but it’s clear that nobody at either outfit reads Hackaday, since we’ve been featuring Sam since we first heard about his garage fab in 2017. That was back when Sam was still “just” making transistors; since then, we’ve featured some of his lab upgrades, watched him delve into electron beam lithography, and broke the story on his first legit integrated circuit. Along the way, we managed to coax him out to Supercon in 2019 where he gave both a talk and an interview.

And finally, if you’re in the mood for a contest, why not check out WIZNet’s Ethernet HAT contest? The idea is to explore what a Raspberry Pi Pico with Ethernet attached is good for. WIZNet has two flavors of board: one is an Ethernet HAT for the Pico, while the other is as RP2040 with built-in Ethernet. The good news is, if you submit an idea, they’ll send you a board for free. We love it when someone from the Hackaday community wins a contest, so if you enter, be sure to let us know. And hurry — submissions close January 31.

DIY High Flow 3D Printing Nozzle

Sometimes advances happen when someone realizes that a common sense approach isn’t the optimal one. Take radio. Success in radio requires bigger antennas and more power, right? But cell phones exist because someone realized you could cram more people on a frequency if you use less power and smaller antennas to limit the range of each base station. With FDM 3D printing, smaller nozzles were all the rage for a while because they offer the possibility of finer detail. However, these days if you want fine detail you should be using resin-based printers and larger nozzles offer faster print times and stronger parts. The Volcano hotend started this trend but there are other options now. [Stefan] over at CNC Kitchen decided to make his own high flow nozzle and he claims it is better than other options.

Don’t get too carried away with the DIY part. As you can see in the video below, he starts with a standard nozzle, so it is really a nozzle conversion or hack. The problem with high flow isn’t the hole in the nozzle. It is melting the plastic fast enough. The faster the plastic moves through the nozzle, the less time there is for it to melt.

Continue reading “DIY High Flow 3D Printing Nozzle”

Peeking Inside A Volcano Sensor

On a recent walk through the Hawaii Volcanoes National Park, [Andrew Cooper] stumbled upon an unlocked monitoring station. Being an engineer, he couldn’t resist taking a look. This station is one of a network of sulfur dioxide (SO2) monitoring stations installed around the park to keep an eye on volcanic emissions. Unsurprisingly, sulfur dioxide is unhealthy to breathe. Sensors like these keep people informed about local conditions before taking their strolls among the volcanic foothills, enjoying gorgeous vistas as [Andrew] describes it.

[Andrew] wasn’t particularly surprised at the contents of the station, since he builds similar equipment in his day job. Continuous power is provided by lead acid batteries kept charged by an array of three mis-matched solar panels. There are duplicate SO2 monitors, an air particulate meter, and a standard weather station affixed to the top. Data is logged on-site and reported up the chain by a cell-phone modem. [Andrew] wasn’t impressed with the workmanship, noting:

It appeared as if the circuits were wired by a ham-handed grad student with no sense of pride in their work.

Continue reading “Peeking Inside A Volcano Sensor”

Raspberry Shake Detects Quakes

The Raspberry Pi’s goal, at least while it was being designed and built, was to promote computer science education by making it easier to access a working computer. What its low price tag also enabled was a revolution in distributed computing projects (among other things). One of those projects is the Raspberry Shake, a seismograph tool which can record nearby earthquakes.

Of course, the project just uses the Pi as a cost-effective computing solution. It runs custom software, but if you want to set up your own seismograph then you’ll also need some additional hardware. There are different versions of the Raspberry Shake, the simplest using a single Geophone which is a coil and magnet. Vibrations are detected by sensing the electric signal generated by the magnet moving within the coil of wire. Other models increase the count to three Geophones, or add in MEMS accelerometers, you can easily whip one of these up on your own bench.

The entire setup will fit nicely on a coffee table as well, making it much smaller (and cheaper) than a comparable professional seismograph. Once all of the Raspberry Shakes around the world were networked together, it gives an accurate, real-time view of seismic activity anywhere you can imagine. If you’ve ever been interested in geology or just want to see where the latest earthquake was, check out their projects. But you don’t need even a Raspberry Pi to see where the earthquakes are, thanks to a Hackaday Prize entry all you need is a Twitter account.

Thanks to [Rich Cochran] aka [AG6QR] for the tip!

Eclipse 2017: Report From An Extinct Volcano

Location, location, location — what’s critical to real estate is also critical to eclipse watching, and without sounding too boastful, those of us atop South Menan Butte, an extinct volcano in southeast Idaho, absolutely nailed it. Not only did we have perfect weather, we had an excellent camping experience, great food, a magnificent natural setting, and a perch 800 feet above a vast plain stretching endlessly to the east and west. Everything was set up for a perfect eclipse experience, and we were not disappointed.

Continue reading “Eclipse 2017: Report From An Extinct Volcano”

DIY Nozzle Socks For Your 3D Printer

If you have a 3D printer, your nozzle and heater block are invariably covered in a weird goo consisting of decomposed and burnt plastic. There’s only one way around this – a nozzle sock, or a silicone boot that wraps around the heater block and stops all that goo from accumulating.

Right now, E3D sells silicone nozzle socks for their normal-sized heater blocks, with a release for their maxi-sized Volcano blocks coming shortly. [Ubermeisters] couldn’t wait, so he designed a 3D printed mold to cast as many Volcano nozzle socks as he could ever need.

The mold itself is taken from the mechanical drawings of the E3D Volcano hotend, printed in Proto Pasta HTPLA. To create the nozzle sock, this mold is filled with a goo made from GE Silicone I, mineral spirits, plaster of Paris, carbon powder, aluminum powder, titanium microspheres, and bronze powder colorant from Alumalite.

The mold is sprayed with release, filled with silicone goo, and slowly brought together. After a few hours, the silicone has cured, can be removed from the mold, and the flash can be cut away from the finished part. The end result is great — it fits the Volcano hotend well, and shouldn’t be covered in melted, burnt plastic in a week’s time.

All the files for the Volcano nozzle sock mold can be found on YouMagine. Alternatively, you could wait another month or two for E3D to release their ‘official’ Volcano nozzle sock.