Recording Audio With Chrome Using HTML5

recording-audio-with-chrome

The Dubjoy project was stopped dead in its tracks when the newest version of the Google Chrome browser stopped using Adobe’s flash plugin and transitioned to their own called Pepper Flash. The aim of development was to produce a browser-based editor for translating the audio track of a video clip. After a bit of head scratching and a lot of research they decided to try ditching the use of Flash and implemented a way to record audio using HTML5.

There were quite a few issues along the way. The initial recording technique generated raw audio files, which are not playable by Chrome’s HTML5 audio player. This can be worked around by buffering the raw audio, then converting it to a different format once the recording is finished. The user also needs to monkey with the Chromes flags to enable HTML5 audio. So they did get it working, but it’s not yet a smooth process.

We love seeing the neat stuff you can do with HTML5. One of our favorites is the use of a tablet’s accelerometer as a browser game controller.

[via Reddit]

Traffic Camera Countermeasure

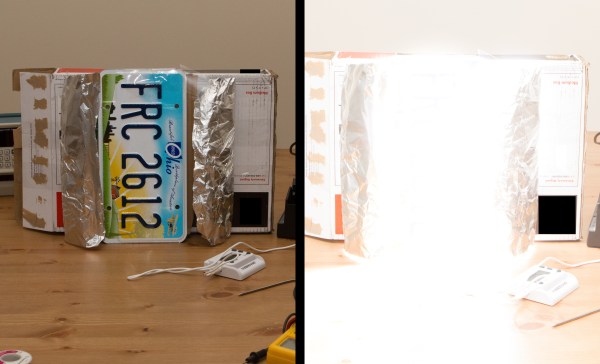
Don’t get us wrong, we drive very carefully as it’s the most dangerous thing we do on a regular basis. But even a careful driver can get caught by bad traffic and a red light camera. These are devices that monitor intersections. If you get caught in the middle when the light goes red they take a picture and you get a ticket in the mail. Well, that’s the way it used to be. This traffic camera countermeasure puts it to an end. As you can see, the noPhoto uses a flash of its own to overexpose traffic camera images.

The image above shows the prototype. The foil is reflecting a flash on either side onto the license plate using a flash sensor which acts as the trigger. According to the demo video after the break, the system can even defeat the pre-flash, and dual-photo types of cameras.

There are pretty tight restrictions on using lights on your vehicles (colors, placement, etc.). We wonder if this passes muster?

Continue reading “Traffic Camera Countermeasure”

Papercraft Flash Reflector

We never use the flash on our point-and-shoot. It has a way of washing out every image we take. But [Joey] has a different solution to the problem. He shows us how to make a papercraft flash reflector that will still light up your subject without washing out everything in the foreground.

[Joey] is perfectly aware that at first glance it would seem you need to have a reflective forehead for this to work. But the reflector is actually set up to aim the flash toward the ceiling. Since most ceilings are white this will reflect the light back into the room, dispersing it at the same time. His write-up includes a link to a PDF of the pattern. After cutting it out, one side is coated in black electrical tape, the other is left white to reflect the light. The design includes a tab that slides into the hot shoe of his Nikon DSLR to position it in front of the pop-up flash.

How To Add Audio In To The Sony NEX-5 Line Of DSLR Cameras

[Tynan] loves his Sony NEX-5 camera but he’s fed up with not being able to choose any external microphone when recording video. Recently he set out to remedy that, and managed to add an audio in jack without modify the camera itself.

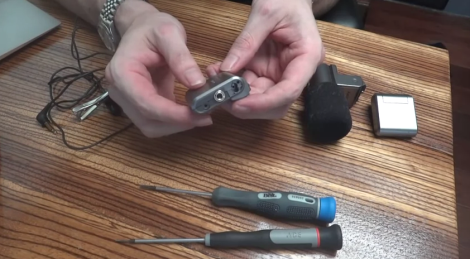
The real trick here is to modify how a microphone accessory connects to the camera. In [Tynan’s] tutorial video (embedded after the break) he uses the enclosure from a flash module as a connector. After removing the electronics he’s left with plenty of room for the guts of a Sony microphone accessory. Those include the PCB and wiring, but not the microphone element itself. A 3.5mm audio jack is added to the flash case, and soldered to the microphone cable. Now he has a modular audio-in jack. The only problem is that his tinkering resulted in mono only. If you don’t mind spending a bit more time reverse engineering the scrapped microphone we bet you can parlay that into a true stereo option.

Continue reading “How To Add Audio In To The Sony NEX-5 Line Of DSLR Cameras”

Optical Fiber Twin-flash Adapter

[Marcell] has always been turned off by the price tag of commercially available double flash adapters. He decided to see what kind of performance he could get out of a flash adapter which he built himself.

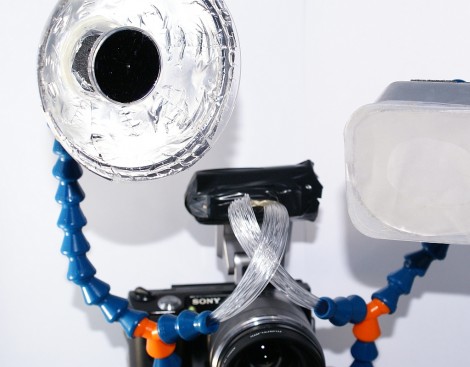
The raw materials used should seem quite familiar. The optical fibers act as a conduit to redirect the light from the flash, but he needed a way to hold them in place. He chose to use locline. It’s a product we often see in CNC mill builds to blow debris away from the cutter head. It’s hollow, and holds its position. This is perfect because it allows for easy adjustment and provides a channel through which the fibers can be routed. The Y adapters used here run to a hard board base which connects to the mounting lug on the bottom of the camera. [Marcell] suggests using a T-piece if available because the Y fitting made it a bit more difficult to push the fibers through.

Hacking A Parallel Port Flash Memory Programmer

[Pulko Mandy] doesn’t use his flash ROM programmer very often, but he does use it. When he tried to get support for a new chip and the manufacturer suggested he just buy a newer version he decided to hack the programmer and it’s software instead.

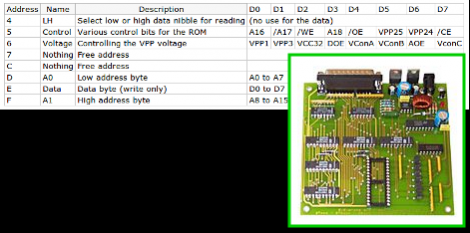
This device connects to the parallel port and was intended for use with MS-DOS systems (no wonder there’s no longer support from the company). The board uses logic chips to add read and write function. So the first step was to analyze how they connect together and come up with a set of commands. While at it he also made some changes to the board to bring the voltage more in spec and ensure the logic levels on the parallel port met the correct voltages.

His plan was to use the board with a Linux system so the parallel port interface can stay. He used what he learned from the hardware inspection to write his own interface in C++. It works with a chip he was able to use under the MS-DOS software, but he hasn’t gotten it to work with the chip that sparked this adventure. If you’re familiar with how the AT29C040A works please consider lending a hand.

Safe-Sync Protects Your Camera From Older High-voltage Flash Modules

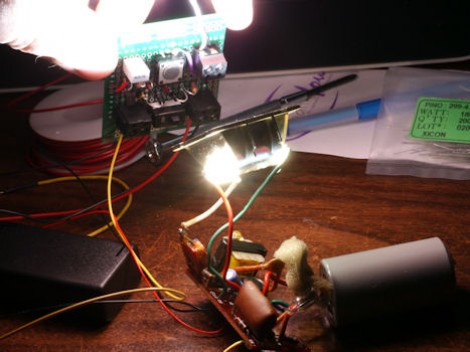
Since we’re not high-end camera aficionados it was a surprise to us that the hot shoe that allows a camera to interface with a flash module has changed rather dramatically over the years. Apparently the interface used to be mchanical-electrical in that the camera would use mechanical means to connect two electrodes from the hot shoe. It didn’t matter the voltages it was switching because the camera didn’t have an electrical system connected to the interface. The problem is that connecting a modern camera to what [David Cook] calls ‘legacy’ flash hardware could damage it. So he developed the Safe-Sync to interface modern cameras with older flash modules.

You can see the board which he’s holding up in the image. It includes a lot of nice features, like the ability to be powered from the external flash, or from a battery. There’s also an optional momentary push switch which can be used to test the flash control (or hack it for other purposes). In addition to providing protection with older equipment, this could also be used to interface flash modules from different manufacturers with your camera.