Brick Layer Post-Processor, Promising Stronger 3D Prints, Now Available

Back in November we first brought you word of a slicing technique by which the final strength of 3D printed parts could be considerably improved by adjusting the first layer height of each wall so that subsequent layers would interlock like bricks. It was relatively easy to implement, didn’t require anything special on the printer to accomplish, and testing showed it was effective enough to pursue further. Unfortunately, there was some patent concerns, and it seemed like nobody wanted to be the first to step up and actually implement the feature.

Well, as of today, [Roman Tenger] has decided to answer the call. As explained in the announcement video below, the company that currently holds the US patent for this tech hasn’t filed a European counterpart, so he feels he’s in a fairly safe spot compared to other creators in the community. We salute his bravery, and wish him nothing but the best of luck should any lawyer come knocking.

So how does it work? Right now the script supports PrusaSlicer and OrcaSlicer, and the installation is the same in both cases — just download the Python file, and go into your slicer’s settings under “Post-Processing Scripts” and enter in its path. As of right now you’ll have to provide the target layer height as an option to the script, but we’re willing to bet that’s going to be one of the first things that gets improved as the community starts sending in pull requests for the GPL v3 licensed script.

There was a lot of interest in this technique when we covered it last, and we’re very excited to see an open source implementation break cover. Now that it’s out in the wild, we’d love to hear about it in the comments if you try it out.

Continue reading “Brick Layer Post-Processor, Promising Stronger 3D Prints, Now Available”

This GCode Post-Processor Squeezes Lines Into Arcs

When the slicer software for a 3D printer model files into GCode, it’s essentially creating a sequential list of connected line segments, organized by layer. But when the features of the original model are dense, or when the model is representing small curves, slicers end up creating a proliferation of teeny segments to represent this information.

This is just the nature of the beast; lots of detail translates into lots of teeny segments. Unfortunately, some printers actually struggle to print these models at the desired speeds, not because of some mechanical limitation, but because the processor cannot recalculate the velocities of these segments fast enough. The result is that some printers simply stutter or slow down the print, resulting in print times that are much higher than they should be.

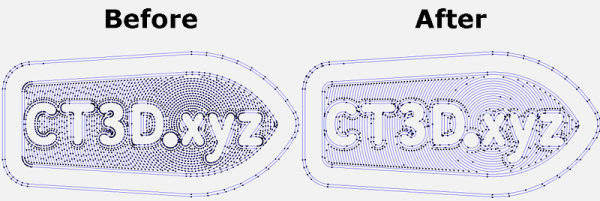
Enter Arc Welder, a GCode compression tool written by [FormerLurker] that scrutinizes GCode files, hunts for these tiny segments, and attempts to replace contiguous clusters of them with a smaller number of arcs. The result is that the number of GCode commands needed to represent the model drop dramatically as connected clusters of segment commands become single arc commands.

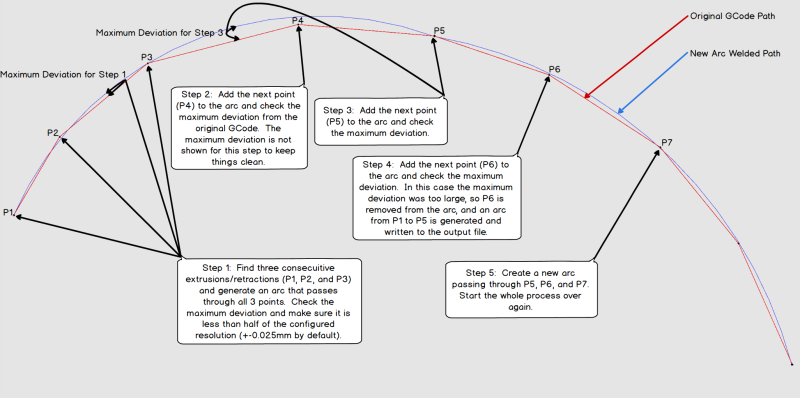
“Now wait”, you might say, “isn’t an arc an approximation of these line segments?” And yes–you’re right! But here lies the magic behind Arc Welder. The program is written such that arcs only replace segments if (1) an arc can completely intersect all the segment-to-segment intersections and (2) the error in distance between segment and arc representation is within a certain threshold. These constraints act such that the resulting post-processing is true to the original to a very high degree of detail.

A concise description of Arc Welder’s main algorithm as pulled from the docs

This whole program operates under the assumption that your 3D printer’s onboard motion controller accepts arc commands, specifically G2 and G3. A few years ago, this would’ve been uncommon since, technically, 3D printing and STL file only requires moving in straight line segments. But with more folks jumping on the bandwagon to use these motion control boards for other non-printing applications, we’re starting to see arc implementations on boards running Marlin, Smoothieware, and the Duet flavor of RepRap Firmware.

For the curious, this program is kindly both well documented on operating principles and open source. And if [FormerLurker] seems like a familiar name before–you’d be right–as they’re also the mind behind Octolapse, the 3D printing timelapse tool that’s a hobbyist crowd favorite. Finally, if you give Arc Welder a spin, why not show us what you get in the comments?

Thanks for the tip [ImpC]!

Signal The End Of A Print With MIDI Of Your Choice

The end of every 3D print should be a triumphant moment, and deserves a theme song. [FuseBox2R] decided to make it a reality, and wrote tool for converting MIDI tracks to G-code that uses the buzzer on your 3D printer.

The tool is up on GitHub, and uses the M300 speaker command that is available in Marlin and some other 3D printer firmware packages. It takes the form of a static HTML page with in-line JavaScript that converts a midi track to series of speaker commands with the appropriate frequency and duration parameters, using the Tone.js framework. Simply add to your slicer G-code to add a bit of spice to your prints. You can also build a MIDI jukebox using the RAMPS board and LCD you probably have gathering dust somewhere. See the video after the break for a demonstration, including a rendition of the DOOM theme song, and off course Mario Bros.

For more quarantine projects, you can also play MIDI using the stepper motors on your printer, or build a day clock if time is becoming too much of a blur.

Continue reading “Signal The End Of A Print With MIDI Of Your Choice”

3D Printering: Non-Planar Layer FDM

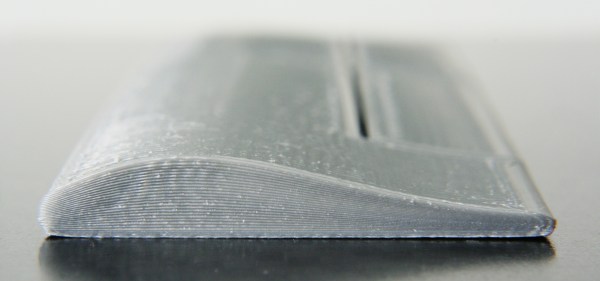
Non-planar layer Fused Deposition Modeling (FDM) is any form of fused deposition modeling where the 3D printed layers aren’t flat or of uniform thickness. For example, if you’re using mesh bed leveling on your 3D printer, you are already using non-planar layer FDM. But why stop at compensating for curved build plates? Non-planar layer FDM has more applications and there are quite a few projects out there exploring the possibilities. In this article, we are going to have a look at what the trick yields for us.

Continue reading “3D Printering: Non-Planar Layer FDM”