Hacklet 38 – 6502 Projects

The 6502 CPU is probably the most famous of all the 8-bit processors out there, whether in the form of bare chips for homebrew computers, or as slightly modified derivative chips found in everything from the C64, the NES, and the BBC Micro. For this edition of the Hacklet, we’re taking a look at all the 6502-based builds on hackaday.io.
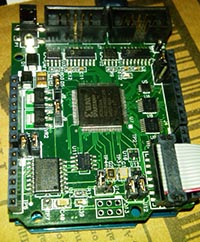

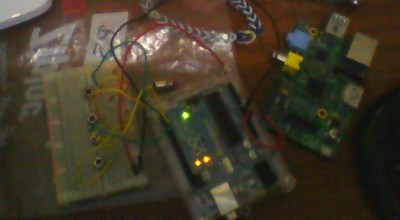
6917521396192751941There aren’t many transistors on a 6502, making it perfect for implementing on an FPGA. [Michael A. Morris] has an Arduino FPGA shield, and his soft-6502 project is called Cameleon. There’s a bunch of SPI Flash and FRAM on board, and the 128kB of (parallel) SRAM on the board is more than enough to handle any computational task you can throw at it.

Since the Cameleon is built on programmable logic, [Michael] thought it would be a good idea to put some of those unused opcodes to use. There are instructions for coprocessor support, and a bunch of instructions specifically designed to make the Forth implementation easier.
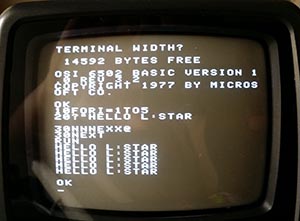

4244551421640813832Maybe programmable logic isn’t your thing, and you’d just like a simple computer like the Ohio Scientific or the Apple I. The L-Star is for you. That’s [Jac Goudsmit]’s build featuring a 6502, a Parallax Propeller, and little else.

The Parallax Propeller is a powerful (multi-core!) chip that’s easily capable of handling video out, keyboard in, and serving up the ROM and RAM of a computer. [Jac]’s build does it all beautifully, and if you’re looking for the easiest way to run code on a 6502, this is how you do it.


6502s were found in just about everything, and while poking around at the local e-waste recycler, he stumbled upon something rather interesting. The case badges screamed, “BS medical device”, but after poking around a bit, he figured out this was an MTU-130 system, a machine that was apparently the top of the line in its day.

There’s some weird stuff going on in this machine – 18-bit addressing and 80kB of RAM. So far [Eric] has managed to dump the ROM, and he’s taking a look at the floppy controller board to see if he can figure out how it’s mapped. It’s one thing to figure out what’s broken on an Apple II or C64; those are well documented machines. It’s another thing entirely to figure out a machine very few people have heard of, and we tip our hat to [Eric] and his efforts.
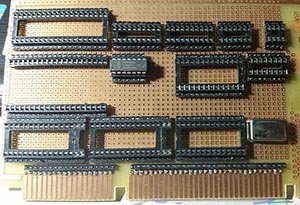

4000511410347834190Here’s a build that both does and doesn’t have a 6502 in it. [BladeRunner]’s SheMachine is a single board computer that has a 65c816 in it. The ‘816 is an interesting beast that operates as a standard 6502 until a bit is flipped in one of its registers. After that, it has a 24-bit address space for addressing 16 Megabytes of memory, 16-bit registers, but is still completely backwards compatible with the 6502. Yes, it does have weird interleaved address pins, but we can only imagine what the world would be like if this chip came out a few years earlier…

[BladeRunner] is designing the SheMachine with 1MB of SRAM – more than enough, really – and is mapping all the memory through a CPLD. That’s how you should do it, anyway.

Hacklet 37 – Nixie Projects

Nothing quite beats the warm glow of a tube. What better way to enjoy that glow than to use it to read numbers? Nixie tubes were created by Haydu Brothers Laboratories, and popularized by Burroughs Corp in 1955. The name comes from NIX I – or “Numeric Indicator eXperimental No. 1”. By the mid 1970’s, seven segment LED’s were becoming popular and low-cost alternatives to Nixies, but they didn’t have the same appeal. Nixie tubes were manufactured all the way into the 1990’s. There’s just something about that tube glow that hackers, makers, and humans in general love. This week’s Hacklet highlights the best Nixie (and Nixie inspired) projects on Hackaday.io!

temperatureDisplayWe start with [Sascha Grant] and Nixie Temperature Display. [Sascha] mixed an Arduino, a Dallas DS18B20 Temperature sensor, and three IN-12A Nixie tubes to create a simple three digit temperature display. We really love the understated laser-cut black acrylic case. An Arduino Pro Micro reads the Dallas 1-wire sensor and converts the temperature to BCD. High voltage duties are handled by a modular HV power supply which bumps 9V up to the required 170V.  Controlling the Nixie tubes themselves are the classic K155ID1 BCD to decimal converter chips – a favorite for clock builders.


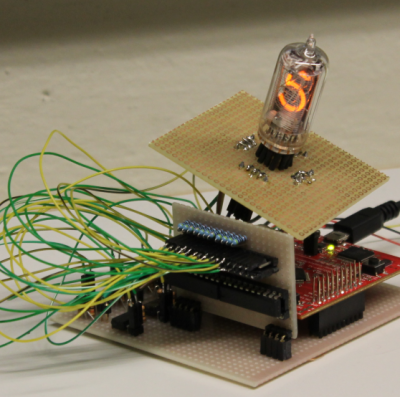
driverNext up is [Christoph] with Reading Datasheets and Driving Nixie Tubes. Chips like the K155ID1, and the 74141 make driving Nixie tubes easy. They convert Binary Coded Decimal (BCD) to discrete outputs to drive the cathodes of the Nixie. More importantly, the output drivers of this chip are designed to handle the high voltages involved in driving Nixie tubes. These chips aren’t manufactured anymore though, and are becoming rare. [Christoph] used more common parts. His final drive transistor is a MPSA42 high voltage NPN unit. Driving the MPSA42’s is a 74HC595 style shift register. [Christoph] used a somewhat exotic Texas Instruments TPIC6B595 with FET outputs, but any shift register should work here. The project runs on a Stellaris Launchpad, so it should be Arduino compatible code.

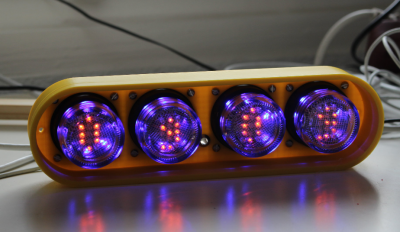
fixietube[Davedarko] has the fixietube clock. Fixietube isn’t exactly a Nixie. It’s an LED based display inspired by Nixie tubes. Modern amber LEDs aren’t quite the same as classic Nixies, but they get pretty darn close. [Dave] designed a PCB with a 3×5 matrix of LEDs to display digits. A few blue LEDs add a bit of ambient light. The LEDs are driven with a 74HC595 shift register. The entire assembly mounts inside a tiny glass jam jar, giving it the effect of being a vacuum tube. The results speak for themselves – fixietubes certainly aren’t Nixies, but they look pretty darn good. Add a nice 3D printed case, and you’ve got a great project which is safe for anyone to build.

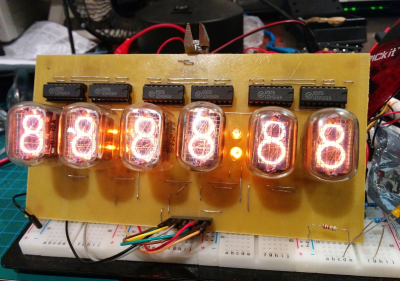
openNixieFinally, we have [Johnny.drazzi] with his Open Nixie Clock Display. [Johnny] has been working on Open Nixie for a few years. The goal is to create a Nixie based clock display which can be driven over the SPI bus. So far, [Johnny] has 6 Russian IN-12 tubes glowing with the help of the ubiquitous K155ID1 BCD to decimal converter. The colons of the clock are created with two INS-1 neon indicators. [Johnny] spends a lot of time analyzing the characteristics of a Nixie tube – including the strike voltage, and steady state current. If you’re interested in building a Nixie circuit yourself, his research is well worth a read!

Not satisfied? Want more Nixie goodness? Check out our Nixie tube project list!

That’s about all the time we have for this week’s Hacklet. As always, see you next week. Same hack time, same hack channel, bringing you the best of Hackaday.io!

Hacklet 36 – Oscilloscope Projects

Oscilloscopes are one of the most often used tools of the engineer, hacker, or maker. Voltmeters can do a lot, but when you really need to get a good look at a signal, a good scope is invaluable. This week’s hacklet is triggered by the rising slope of some of the best Oscilloscope projects on Hackaday.io!

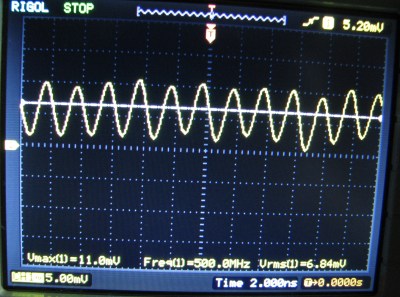
rigol500We start with [DainBramage’s] recent project Stretching the Limits of a Rigol DS-1102E Scope. The new Rigol ds1054z may be getting all the press lately, but the older DS-1102E (100 MHz) model is still a very capable scope. [DainBramage] broke out his vintage Singer CSM-1 service monitor to generate frequencies all the way up to 500 MHz. The Rigol did admirably well, detecting a sine wave all the way up to 500 MHz. This is in part due to the scope’s 1 gigasample-per-second sampling rate. Once things got beyond the specified limit of 100 MHz though, the signal began to attenuate.  Not bad for pushing a low-end scope way beyond its limits!


cornel-scopeNext up is [Bruce Land] with his PIC32 oscilloscope. Microcontroller scope projects are nothing new, but one that runs at nearly 1 MHz sampling rate while generating NTSC composite video is nothing to sneeze at. [Bruce] pulled this off by using Direct Memory Access (DMA) to move the data from the ADC to memory, and to get the video data from memory to the I/O pins used to generate video. The video itself is created by a resistor tree DAC. All you need to make black and white video is three resistors and two I/O pins. [Bruce] says the entire scope cost about $4.00 us in parts!

scope-hand[Jacob Christ] mixed art and science with his chipKIT Oscilloscope Plotter. [Jacob] used a Microchip PIC32 based Fubarino to draw patterns on his scope. To do this the scope must be set to X-Y mode. [Jacob] paired his Fubarino with a MCP4902 Digital to Analog Converter (DAC). Using a dedicated DAC is a great way to do this. [Jacob’s] images are a testament to that, as they’re some of the cleanest “scope art” drawings we’ve seen. Much like [Bruce Land], [Jacob] used his project as the basis for a college class. In fact, the image to the left was created by one of his students!

Want more scope goodness? Check out our new Oscilloscope Projects List!

Hackaday.io Update!

Hackaday.io is getting new features every day. Our dev team has just rolled out a new gallery view. Just click on a project’s featured image, or the “View Gallery” button, and you will be taken to a gallery view of every image used in the project – including log images. YouTube videos will render in the gallery as well. It’s a great way to view a timeline of progress for some of the projects on hackaday.io. For a great example of this, check out OpenMV’s gallery.

In other Hackaday.io news, check out the Caption CERN Contest! Every week we put up a new image from CERN’s archives. The Hackaday.io user who comes up with the funniest caption wins a T-Shirt from The Hackaday Store!

Looks like we’ve hit the end of the trace for this Hacklet. Same hack time, same hack channel, bringing you the best of Hackaday.io!

Hacklet 34 – Satellite Projects

Space. The final frontier. Every tinkerer, hacker, and maker has dreamed of flying out of Earth’s atmosphere and into the heavens. Last year one hard-working team got a chance to fly a member to space by winning the Hackaday prize. For the rest of us, we can still experience some of that excitement by contacting satellites in orbit, or even sending a bit of our own hardware into space. This week’s Hacklet focuses on the best satellite projects on Hackaday.io!

basicSatWe start with [movax] and Your satellite devkit and launch. Chipsat is a tiny satellite which runs BASIC code. Yes, BASIC in space! Chipsats will be stacked into a launcher and sent off into space in groups. The idea is to eventually have them launched from the International Space Station. Power is provided by a small solar cell which charges up a pair of super capacitors. When the capacitors are charged, the satellite will run for a few seconds. Connectivity with the ground is via a 433 MHz link. Chipsat doesn’t just float in space, three coils give it the ability to control its attitude and rotation. Chipsat will sense the space around it with a magnetometer and a light sensor.


satnogsv2

No satellite-themed Hacklet would be complete without [Pierros Papadeas] and his team’s work on SatNOGS – Global Network of Ground Stations. SatNOGS aims to create a global network of connected satellite ground stations. Think of it as a grass-roots version of NASA’s deep space network for satellites in earth orbit. This is more than just a great idea, as SatNOGS won the 2014 Hackaday Prize. You can check out our coverage of the project back in November, 2014. Since then, the SatNOGS team has been busy! They’ve just deployed the first SatNOGS V2 system above their hackerspace in Athens, Greece.

trsiNext up is TRSI PocketQub Satellite, another project by [movax]. TRSI is a satellite that sends data via images which can be viewed with a simple RTL-SDR stick using Hellschreiber mode. Hell mode means that images can be directly viewed in the waterfall display of whichever SDR application is running the receiver. Numbers or entire images snapped with TRSI’s cell phone style camera module can be encoded and displayed. Power is of course provided by solar cells, and the communications link will be on the coordinated 433 MHz band. The original TRSI hardware has actually morphed into a deployment machine for ChipSat, [morvax’s] other satellite project. He’s put the main TRSI program on hold until after the ChipSat campaign is complete.

pocketquRounding out our satellite special is [OzQube] with his project QubeCast Max. QubeCast is the first Australian version of the PocketQube PQ60 satellite form factor. After watching the success of $50Sat project, [OzQube] wanted to design a satellite of his own. Since he wanted to add sensors and send more data back to Earth than previous efforts, he needed a higher data rate than the current crop of satellites. This meant going to a high-powered radio. To achieve this, he’s using a  NiceRF RF4463F30 radio module. The module is based upon a Silicon Labs Si4463 RF ISM band chip, coupled with a power amplifier. The module outputs 1 watt, which is quite a bit of power for a tiny satellite!

Want more satellite goodness? Check out Hackaday.io’s freshly minted Satellite List.

The countdown is almost at 0, so that’s just about all the time we have for this episode of the Hacklet. See you next week.  Same hack time, same hack channel, bringing you the best of Hackaday.io!

Hacklet 33 – Minecraft Projects

Minecraft hit the PC gaming scene as an alpha release on May 17, 2009. Something about the open world, the crafting system, and the various modes of gameplay made it an instant hit. Since then Minecraft become one of the best selling video games of all time, inspiring thousands of hacks, mods, and projects. This week’s Hacklet highlights some of the best Minecraft projects on Hackaday.io!

clawWe start with [Toulon] and his MineCraft Sidecar Keypad. The Mystify Claw was originally designed as an alternative input device for First Person Shooter (FPS) games. It may look like a mouse, but the claw has no balls or lasers. It provides a 10 button “cradle” for the left hand. Some folks liked the claw, but for many it quickly became a dust collector. [Toulon] resurrected this old input device as an awesome Minecraft controller. He started by yanking all the old electronics, replacing the claw’s brain with the Teensy 2.0, a favorite of keyboard hackers everywhere. New buttons and a slew of new Teensy code made things perfect for mining.

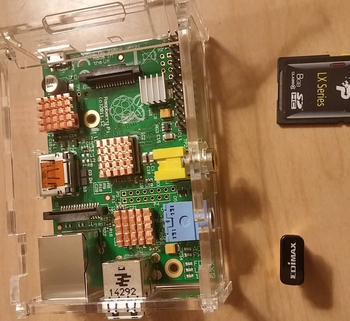
rappiNext up is [Thomas] and his Raspberry Minecraft Server. The Raspberry Pi has long been a hacking platform for Minecraft. The official Raspberry Pi edition of Minecraft is easy to get running, and great for hours of fun. You can also run a Minecraft server on the Pi, which is exactly what [Thomas] is doing. He’s set his Raspberry Pi up with a WiFi dongle and a battery pack. With a bit of configuration, this allows the Pi to become the center of a wireless Lan party. On batteries, the Pi will run for about five hours of continuous gaming. Details for [Thomas’] project are a bit light right now, but that’s only because he just literally started documenting and uploading his project as we’re going to press. Give him a few days and he’ll have everything filled in!

gppk[GPPK] brings a bit of Minecraft into the real world with Full Size Wireless Redstone Lamp. Inspired by smaller models of the Minecraft redstone lamp, [GPPK] decided to build a life-sized version. “Life-sized” in this case is about 1 cubic meter. That’s a BIG lamp! [GPPK] designed the shell of the lamp in Sketchup, and cut the sides out using a gantry style CNC machine. The structure will be held together with 3D printed connectors, while a Raspberry Pi will provide the brains. Turning the lamp on will be as simple as turning on a switch in-game in Minecraft. [GPPK] has been a bit slow lately with updates on the project. If you know [GPPK] let ’em know that we’re anxiously awaiting some info!

pipyFinally, we have [Simon] and Raspberry Pi Python Controller. One of the best ways to get kids hooked on hacking and electronics is to show them how simple circuits can lead to big changes. What better way to do that than wiring up a simple push button controller for Minecraft? [Simon] used an Arduino paired to a Raspberry Pi with a serial over USB connection. Buttons wired to the Arduino are sent through the serial link to the Pi, where a python script fires off actions based on the serial data. [Simon] has tested his script with Mincraft Pi Edition, and is happy to report back that it works great.

Do you know what’s missing from this Hacklet? Your Minecraft project! It’s not too late though – upload your info to Hackaday.io, and we might just add it to our brand new Minecraft Projects List!

Well, it’s just about quitting time here in the Hackaday Mine. As long as the creepers don’t get us, we’ll be back next week. Same hack time, same hack channel, bringing you the best of Hackaday.io!

Hacklet 32 – LED Persistence Of Vision Displays

Blinking LEDs are good. Moving, spinning things are good too. Put them both together and you get a Persistence of Vision (POV) display. Hackers have been building these displays for years. This week’s Hacklet focuses on some of the best LED POV displays on Hackaday.io!

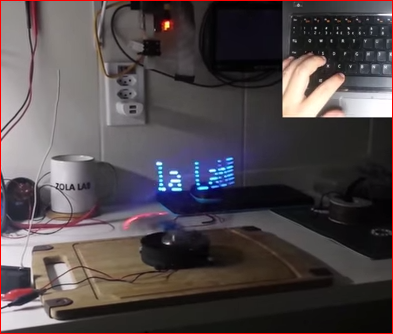
povtypeWe start with [EduardoZola] and POV as you type, write on the air. [Eduardo] used an Arduino Nano, a pair of 433 MHz radios, some blue LEDs and a motor to create a simple spinning display. A hall effect sensor keeps everything in sync. The entire display is powered by a 500 mAh LiPo battery. The awesome thing about this display is the interactive aspect. The transmitter module connects to a laptop via an on-board USB to serial converter. Typing into any serial terminal sends the text directly to the POV display, where the letters appear to hang in the air.


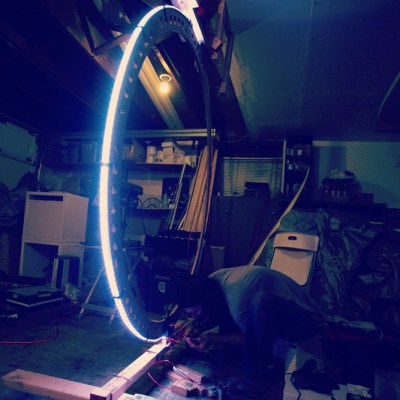
deathringNext up is [boolean] with Silent Orchestra POV aka “Death Ring”. [boolean] didn’t want to just create a POV ring, he wanted a huge 5 foot diameter display for his local Burning Man decompression. Death Ring is an aluminum ring spun by a 3HP motor. A hall effect sensor keeps everything synced up, and keeps Death Ring’s 3 horsepower motor in check. Light is provided by a PixelPusher and WS2812 RGB strips. The system is designed to be interactive, controlled with a Leap Motion controller or a Microsoft Kinect. An MPU-6050 keeps acceleration in check while processing maps video to the LED strip. An Arduino Yun allows the entire system to be controlled via WiFi. [boolean] and his team have taken Death Ring through several revisions. Judging by the quality of their aluminum welding though, they’re on the right track to an awesome end result!

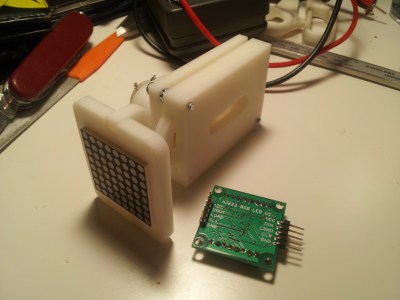
locoHackaday.io power user [Davedarko] has been working on a POV display of a different sort. His Locomatrix is an 8×8 LED matrix which moves in and out on the Z axis. [Dave] originally created Locomatrix as his entry in the 2014 Hackaday Prize. We have to admit this is the first time we’ve seen this sort of display, but the idea is sound. In fact, [Bruce Land] posted in the comments to let [Dave] know that he’d seen a similar technique used with a CRT display back in 1964. We’re betting Dave’s 3D printed gears and LED matrix display will be more robust than a CRT tube slamming two and fro at several hundred pulses per minute!

CPOVFinally, we have Hackaday’s own [Mike Szczys] with CPOV – a Crappy Persistence of Vision display . CPOV is a proof of concept made from upcycled parts which [Mike] threw together in a couple of hours. He grabbed the motor from an old cassette deck, some plywood, perfboard, and of course LEDs to build his display. The processor is an ATtiny2313 running Adafruit’s MiniPOV 3 firmware. The system display doesn’t have a sync input, so [Mike] uses a novel form of Human-in-the-loop PWM control to keep the motor speed in check. CPOV is proof that Hackaday.io isn’t just for polished projects, but for proof of concepts, fails, and just plain research. Even if your project isn’t perfect, documenting it will help you learn from it. It might even inspire someone else to move forward and continue where you left off!

Want more POV goodness? Check out our new POV display list!

Our LEDs are going dim, so that’s about all the time we have for this Hacklet. As always, see you next week. Same hack time, same hack channel, bringing you the best of Hackaday.io!

Hacklet 31 – Software Tools

For every computer error, there are two human errors, and one of them is blaming the computer. Whenever a human blames a computer for something, there are two tools, and one of them is the computer.

Not all of your nifty tools need to be fancy robots, CNC machines, or nifty Robertson screwdrivers; a computer is equally capable of being a fantastic tool, provided it has the right software. For this week’s Hacklet, we’re going through some of the best software tools on hackaday.io.

6653681421957570397[Alan] was inspired to build a software tool for making sewing patterns. Sewing patterns are usually designed for the ‘average’ person, but if you’re making custom wearables, you should end up with a piece of clothing that fits perfectly.

The first project [Alan] is using this tool for is a fleece cap that fits the contour of his head. He captured a 3D mesh of his head, imported the mesh into Blender, and unwrapped the resulting mesh. The two halves of the hat were then plotted with a Silhouette Cameo, cut out of fleece, and sewn together. The result is a beanie that fits perfectly around [Alan]’s head. It’s an extremely cool and novel application of 3D modeling, and if you ever need to wrap a 3D object with a 2D material, this is the project you want to check out.

5869061407871295021 And you thought the autorouter in Eagle was bad.
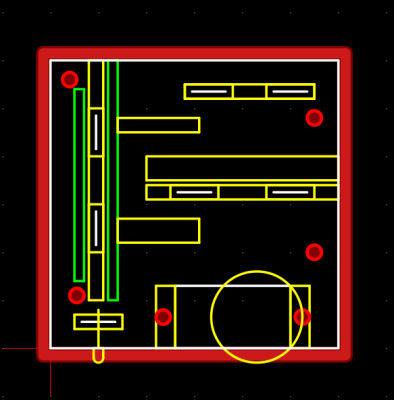
[Anderson] built a tool called Pyrite that will take a schematic and build a layout in three-dimensional space. He calls them Volumetric Circuits, and it’s basically the point-to-point wiring found in old radios and amplifiers taken to the next level. We featured this project before, and there haven’t been many updates since then. Maybe giving [Anderson]’s project a few skulls will help motivate him to get back to the project.

133031421839442989 Not satisfied with the existing free and open source CAM programs, [Snegovick] started work on his own.

[Snegovick] calls his project BCAM, and it’s exactly what you need to mill holes in PCBs, cut gears with a CNC router, engrave plastic, and anything else a 2.5 axis CNC machine can do. The project is written in Python, and yes, the source is available. Supported operations include drilling, path following, offset path following, and pocketing.

Write enough microcontroller projects, and you’ll eventually come up with your own library of common code that does one thing and one thing well. If you’re smart, you’ll reuse that code in future projects. [ericwazhung] is cutting through the hard part of developing all this code and released some things that are useful in a whole lot of projects.

Included in the commonCode library are the usual ‘heartbeat LED’, non-blocking input, a standard interface for AVR timers, bitmaps of text characters, DC motor control, and a whole bunch more. Extremely useful in any event.

That’s it for this round of the Hacklet, bringing you the best hackaday.io has to offer.