Morse Code: Paris In The Mint Box

TinyLilyThumbnail[Rob Bailey] likes to build things and he likes ham radio. We are guessing he likes mints too since he’s been known to jam things into Altoids tins. He had been thinking about building a code practice oscillator in a Altoids Smalls tin, but wasn’t sure he could squeeze an Arduino Pro Mini in there too. Then he found the TinyLily Mini. The rest is history, as they say, and 1CPO was born.

The TinyLily Mini is a circular-shaped Arduino (see right) about the size of a US dime. most of the pads are arranged around the circle and there is a small header that takes a USB programmer. A small rechargeable battery can run the device for a long time.

Continue reading “Morse Code: Paris In The Mint Box”

The Minima Is An All-Band HF Transceiver For Under $100

If you have ever browsed an amateur radio magazine you could be forgiven for receiving the impression that it is a pursuit exclusively for the wealthy. Wall-to-wall adverts for very large and shiny transceivers with hefty price tags abound, and every photograph of someone’s shack seems to sport a stack of them.

Of course, this is only part of the story. Amateur radio is and always has been an astonishingly diverse interest, and away from the world of shiny adverts you’ll find a lot of much more interesting devices. A lot of radio amateurs still design and build their own equipment, and the world of homebrew radio is forever producing new ideas.

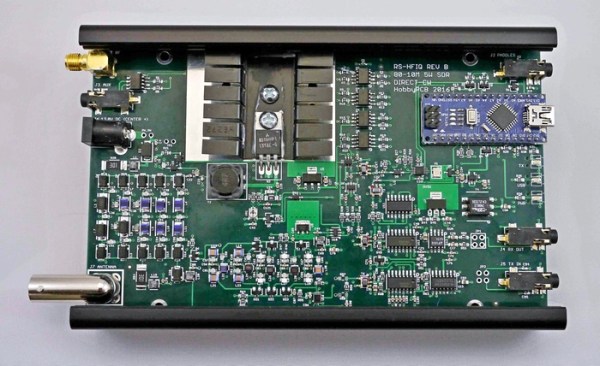
One such project came to our attention recently, the Minima, an all-band HF SSB transceiver. It’s an interesting device for several reasons, it uses readily available components, it’s an impressively simple design, and it should cost under $100 to build. This might sound a little far-fetched, were it not from the bench of [Ashhar Farhan, VU2ESE], whose similarly minimalist BITX single band SSB transceiver set a new standard for accessible SSB construction a few years ago.

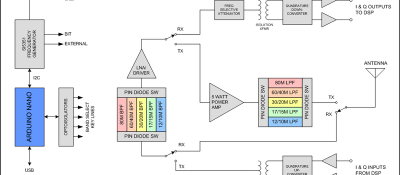
The circuit shares some similarities with the tried-and-tested BITX, using bi-directional amplifier building blocks. The mixers are now FETs rather than diodes, the intermediate frequency has moved from 9MHz to 20MHz, and the local oscillator is now an Arduino-controlled clock generator. The whole thing is designed to be built dead-bug-style if necessary, and two prototypes have been built. We’d expect this design to follow a similar evolution to the BITX, with the global community of radio amateurs contributing performance modifications, and no doubt with some kit suppliers producing PCBs and kits. We think this can only be a good thing, and look forward to covering some of the results.

We’ve featured [Ashhar]’s work here at Hackaday before, when we covered a BITX build. if you’re left wondering what this amateur radio business is all about, we suggest you have a read of [Bill Meara]’s guest post on the subject.

Thanks [Seebach] for the tip.

Homebrew Multimode Digital Voice Modem

There’s an old saying that the nice thing about standards is there are so many of them. For digital voice modes, hams have choices of D-Star, DMR, System Fusion, and others. An open source project, the Multimode Digital Voice Modem (MMDVM), allows you to use multiple modes with one set of hardware.

There are some kits available, but [flo_0_] couldn’t wait for his order to arrive. So he built his own version without using a PCB. Since it is a relatively complex circuit for perf board, [flo_0_] used Blackboard to plan the build before heating up a soldering iron. You can see the MMDVM in action below.

Continue reading “Homebrew Multimode Digital Voice Modem”

SDR Cape For BeagleBone

In the old days if you wanted to listen to shortwave you had to turn a dial. Later, you might have been able to tap in a frequency with a keypad. With modern software-defined radio (and the right hardware) you can just listen to the entire high-frequency spectrum at one time. That’s the idea behind KiwiSDR, an open source daughterboard (ok, cape) for the BeagleBone.

The front end covers 10 kHz to 30 MHz and has a 14-bit converter operating at 65 MHz. There is a Xilinx Artix-7 A35 FPGA onboard and a GPS, too. The design is open source and on GitHub.

The interface uses the OpenWebRX project for a powerful HTML 5 interface. You can see a video of its operation below or, if you can get one of the four available slots, you can listen online. From a network point of view, the demo station in Canada worked best for us. However, there are also stations in New Zealand and Sweden.

Continue reading “SDR Cape For BeagleBone”

How Low Can You Go? The World Of QRP Operation

Newly minted hams like me generally find themselves asking, “What now?” after getting their tickets. Amateur radio has a lot of different sub-disciplines, ranging from volunteering for public service gigs to contesting, the closest thing the hobby has to a full-contact sport. But as I explore my options in the world of ham radio, I keep coming back to the one discipline that seems like the purest technical expression of the art and science of radio communication – low-power operation, or what’s known to hams as QRP. With QRP you can literally talk with someone across the planet on less power than it takes to run a night-light using a radio you built in an Altoids tin. Now that’s a challenge I can sink my teeth into.

Continue reading “How Low Can You Go? The World Of QRP Operation”

Teensy 3.1 Controlled VFO

[Tom Hall], along with many hams around the world, have been hacking the Silicon Labs Si5351 to create VFOs (variable frequency oscillators) to control receivers and transmitters. You can see the results of his work in a video after the break.

vfo board[Tom] used a Teensy 3.1 Arduino compatible board, to control the Si5351 mounted on an Adafruit breakout board. An LCD display shows the current frequency and provides a simple interface display for changing the output. A dial encoder allows for direct adjustment of the frequency. The ham frequency band and the frequency increment for each encoder step are controlled by a joystick. When you get into the 10 meter band you definitely want to be able to jump by kHz increments, at least, since the band ranges from 28 MHz to 29.7 MHz.

So what is the Si5351? The data sheet calls it an I2C-Programmable Any-Frequency CMOS Clock Generator + VCXO. Phew! Let’s break that down a bit. The chip can be controlled from a microprocessor over an I2C bus. The purpose of the chip is to generate clock outputs from 8 kHz to 160 MHz. Not quite any frequency but a pretty good range. The VCXO means voltage controlled crystal oscillator. The crystal is 25 MHz and provides a very stable frequency source for the chip. In addition, the Si5351 will generate three separate clock outputs.

[Tom] walks through the code for his VFO and provides it via GitHub. An interesting project with a lot of the details explained for someone who wants to do their own hacks. His work is based on work done by others that we’ve published before, which is what hacking is all about.

Continue reading “Teensy 3.1 Controlled VFO”

A Geek’s Revenge For Loud Neighbors

It seems [Kevin] has particularly bad luck with neighbors. His first apartment had upstairs neighbors who were apparently a dance troupe specializing in tap. His second apartment was a town house, which had a TV mounted on the opposite wall blaring American Idol with someone singing along very loudly. The people next to [Kevin]’s third apartment liked music, usually with a lot of bass, and frequently at seven in the morning. This happened every day until [Kevin] found a solution (Patreon, but only people who have adblock disabled may complain).

In a hangover-induced rage that began with thumping bass at 7AM on a Sunday, [Kevin] tore through his box of electronic scrap for every capacitor and inductor in his collection. An EMP was the only way to find any amount of peace in his life, and the electronics in his own apartment would be sacrificed for the greater good. In his fury, [Kevin] saw a Yaesu handheld radio sitting on his desk. Maybe, just maybe, if he pressed the transmit button on the right frequency, the speakers would click. The results turned out even better than expected.

With a car mount antenna pointed directly at the neighbor’s stereo, [Kevin] could transmit on a specific, obscure frequency and silence the speakers. How? At seven in the morning on a Sunday, you don’t ask questions. That’s a matter for when you tell everyone on the Internet.

Needless to say, using a radio to kill your neighbor’s electronics is illegal, and it might be a good idea for [Kevin] to take any references to this escapade off of the Internet. It would be an even better idea to not put his call sign online in the future.

That said, this is a wonderful tale of revenge. It’s not an uncommon occurrence, either. Wikihow, Yahoo Answers and Quora – the web pages ‘normies’ use for the questions troubling their soul – are sometimes unbelievably literate when it comes to unintentional electromagnetic interference, and some of the answers correctly point out grounding a stereo and putting a few ferrite beads on the speaker cables is the way to go. Getting this answer relies entirely on asking the right question, something I suspect 90% of the population is completely incapable of doing.

While [Kevin]’s tale is a grin-inducing two-minute read, You shouldn’t, under any circumstances, do anything like this. Polluting the airwaves is much worse than polluting your neighbor’s eardrums; one of them violates municipal noise codes and another is breaking federal law. It’s a good story, but don’t do it yourself.

Editor’s Note: Soon after publishing our article [Kevin] took down his post and sent us an email. He realized that what he had done wasn’t a good idea. People make mistakes and sometimes do things without thinking. But talking about why this was a bad idea is one way to help educate more people about responsible behavior. Knowing you shouldn’t do something even though you know how is one paving stone on the path to wisdom.
–Mike Szczys