Big Jacobs Ladder

11,000 Volt Jacob’s Ladder Sounds Like A Lightsaber

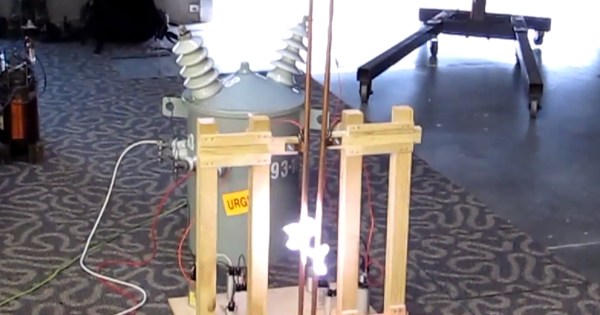
In the high-voltage world, a Jacob’s ladder is truly a sight to behold. They are often associated with mad scientist labs, due to both the awesome visual display and the sound that they make. A Jacob’s ladder is typically very simple. You need a high voltage electricity source and two bare wires. The wires are placed next to each other, almost in parallel. They form a slight “V” shape and are placed vertically. The system acts essentially as a short-circuit. The voltage is high enough to break through the air at the point where the wires are nearest to each other. The air rises as it heats up, moving the current path along with it. The result is the arc slowly raising upwards, extending in length. The sound also lowers in frequency as the arc gets longer, and once [Gristc] tuned his system just right the sound reminds us of the Holy Trilogy.

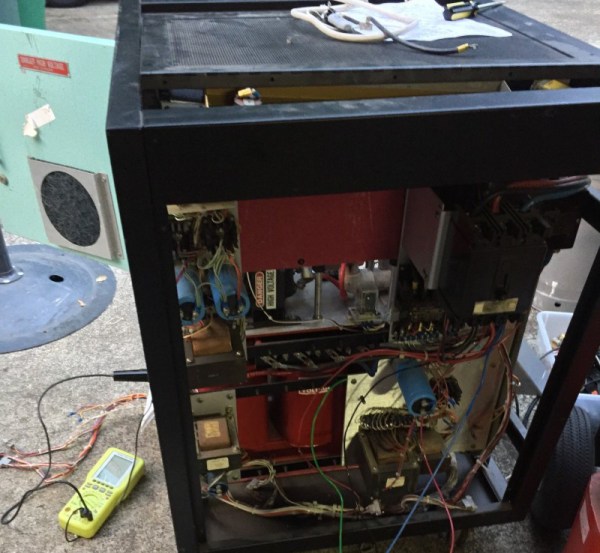
We’ve seen these made in the past with other types of transformers that typically put out around 15,000 Volts at 30mA. In this case, [Gristc] supersized the design using a much beefier transformer that puts out 11,000 Volts at 300mA. He runs the output from the transformer through eight microwave oven capacitors as a ballast. He says that without this, the system will immediately trip the circuit breakers in his house.

In the demo video below, you can see just how large the arc is. It appears to get about 10 inches long before breaking with a sound different from any Jacob’s ladders we’ve seen in the past as well. Continue reading “11,000 Volt Jacob’s Ladder Sounds Like A Lightsaber”

Low-Voltage Tesla Coil Uses A Relay Instead Of A Spark Gap

[Teodor] writes in with a unique Tesla coil he designed and built. Unlike most Tesla coils, [Teodor]’s design is able to run with a fairly low input voltage because it doesn’t use a static spark gap like most Tesla coils. Instead, his coil uses a relay in place of a spark gap.

[Teodor] built his coil using leftover components from his old school, making good use of some parts that might have otherwise been thrown away. The most critical component of his circuit, the relay, is just a standard normally-closed relay that is rated at 20A. [Teodor] wired the relay so that it energizes its own coil whenever it is shut. This causes the relay to briefly open every time the coil is energized, creating a resonant circuit. The resonant circuit charges a tank capacitor and places it in series with the primary coil inductor every time the relay closes, forming the tank circuit of his design.

With [Teodor]’s design, the resonant frequency of the secondary is nearly identical to that of the primary. This creates a significant voltage boost, helping produce very high voltages from such a low input voltage. The only downside to this design that [Teodor] recently discovered is that the relay contacts get red-hot after a few minutes of operation. Not optimal, but it still works! Check out [Teodor]’s writeup for more details and instructions on how to build your own.

Wimshurst

3D Printed Wimshurst Machine

Steampunk extraordinaire [Jake von Slatt] has released his latest creation. This time he’s built a Wimshurst machine from mostly 3D printed parts. The Wimshurst machine is an electrostatic generator and was originally invented in the late 1800’s by James Wimshurst. It uses two counter-rotating disks to generate an electrostatic charge which is then stored in two Leyden jars. These jars are also connected to a spark gap. When the voltage raises high enough, the jars can discharge all at once by flashing a spark across the gap.

[Jake’s] machine has a sort of Gothic theme to it. He designed the parts using Autodesk’s 123D Design. They were initially printed in PLA. Skate bearings were used in the center of the disks to ensure a smooth rotation. The axle was made from the fiberglass shaft of a driveway reflector. The vertical supports were attached the base with machine screws.

The Leyden jars were made from sections of clear plastic tube. The caps for the jars were 3D printed and are designed to accept a short length of threaded 1/8″ pipe. Copper wire was used for the interior contacts and are held in place with electrical tape. The metal sectors on each disk were made from pieces of cut aluminum tape.

You may be wondering how this machine works if it’s almost entirely made out of plastic. [Jake] actually painted most of the parts with a carbon paint. This makes them electrically conductive and he can then use the parts to complete electrical circuits. Unfortunately he found this to be rather ineffective. The machine does work, but it only produces sparks up to 1/2″ in length. For comparison, his other machine is capable of 6″ sparks using similar sized Leyden jars.

[Jake] actually tried rebuilding this project using ABS, thinking that the PLA may have been collecting moisture from his breath, but the result is still only 1/2″ sparks. He suspects that the bumpy surface of the plastic parts may be causing the charge to slowly leak away, preventing a nice build up. He’s released all of his designs on Thingiverse in case any other hackers want to give it a whirl.

Artisanal Vacuum Tubes: Hackaday Shows You How

Homemade Vacuum Tube

About a decade ago I started a strange little journey in my free time that cut a path across electronics manufacturing from over the last century. One morning I decided to find out how the little glowing glass bottles we sometimes call electron tubes worked. Not knowing any better I simply picked up an old copy of the Thomas Register. For those of you generally under 40 that was our version of Google, and resembled a set of 10 yellow pages.

I started calling companies listed under “Electron Tube Manufacturers” until I got a voice on the other end. Most of the numbers would ring to the familiar “this number is no longer in service” message, but in one lucky case I found I was talking to a Mrs. Roni Elsbury, nee Ulmer of M.U. Inc. Her company is one of the only remaining firms still engaged in the production of traditional style vacuum tubes in the U.S. Ever since then I have enjoyed occasional journeys down to her facility to assist her in maintenance of the equipment, work on tooling, and help to solve little engineering challenges that keep this very artisanal process alive. It did not take too many of these trips to realize that this could be distilled down to some very basic tools and processes that could be reproduced in your average garage and that positive, all be it rudimentary results could be had with information widely available on the Internet.

Continue reading “Artisanal Vacuum Tubes: Hackaday Shows You How”

Play Music On A High Voltage Keyboard

[Matt] works at a neon sign power supply company. When a vendor error left him with quite a few defective high voltage transformers, he couldn’t bring himself to toss them in the bin. [Matt] was able to fix the transformers well enough to work, and the idea for a high voltage keyboard began to brew. Unfortunately, the original transformers were not up to the task of creating a musical arc. At that point the project had taken on a life of its own. Matt grabbed some higher power transformers and started building.

The keyboard has 25  keys, each connected to an individual high voltage circuit with its own spark gap. The HV circuit is based upon a IR2153D self-oscillating half-bridge driver. (PDF link). The 2153D is modulated by a good old-fashioned 555 timer chip. No micros in this design, folks! The output of the IR2153D switches a pair of N-channel MOSFETS which drive the flyback transformers.

[Matt] created 25 copies of his circuit and built them up on individual PCBs. He assembled everything on a wooden board shaped roughly like a grand piano. The final project looks great – though [Matt] admittedly has no musical ability, so we can’t hear AC/DC flying out of those spark gaps just yet.

If you do want to hear sparks playing music, check out the OneTesla project we saw at MakerFaire NY 2013.

Continue reading “Play Music On A High Voltage Keyboard”

Solid State Tesla Coil Plays Music

If you’ve ever wanted to build a Tesla coil but found them to be prohibitively expensive and/or complicated, look no further! [Richard] has built a solid-state Tesla coil that has a minimum of parts and is relatively easy to build as well.

This Tesla coil is built around an air-core transformer that steps a low DC voltage up to a very high AC voltage. The core can be hand-wound or purchased as a unit. The drive circuit is where this Tesla coil built is set apart from the others. A Tesla coil generally makes use of a spark gap, but [Richard] is using the Power Pulse Modulator PWM-OCXi v2 which does the switching with transistors instead. The Tesla coil will function with one drive circuit but [Richard] notes that it is more stable with two.

The build doesn’t stop with the solid-state circuitry, though. [Richard] used an Arduino with software normally used to drive a speaker to get his Tesla coil to play music. Be sure to check out the video after the break. If you’re looking for a Tesla coil that is more Halloween-appropriate, you can take a look at this Tesla coil that shocks pumpkins!

Continue reading “Solid State Tesla Coil Plays Music”

Jacob’s Ladder Using A 10kV Oil Transformer

Jacob's ladder using an Oil Furnace Transformer

Jacob’s Ladders are a staple experiment in any self-respecting mad scientist’s lair — err, a hacker’s workshop. And why not? High voltage, arcing electricity, likely more than enough to kill you even — brilliant! But in all their awesomeness, Jacob’s ladders really aren’t that complex.

In [Kevin Darrah’s] latest tutorial he shows us how to make one out of a transformer taken from an oil furnace. Why exactly does an oil furnace even have a high voltage transformer in the first place? They’re actually used as the ignition source, like a pilot light!

The one [Kevin] has is a 110VAC to 10,000VAC transformer, which puts out about 20mA (probably enough to kill you). And to turn it into a Jacob’s Ladder, you’ll just need a two long stiff wires (copper is a good candidate). The wires are closest at the bottom where the transformer can easily arc — this arc then ionizes and heats the air causing it to rise, carrying the arc with it. As the arc continues up the ladder it gets longer and longer as the wires become farther apart, becoming more and more unstable until it breaks. When this happens the arc forms again at the lowest point of resistance — the bottom.

Continue reading “Jacob’s Ladder Using A 10kV Oil Transformer”