Arduino Based Ambient Lighting Improvements

[Simon] improved upon an existing hack by making this Arduino ambient lighting system that has four different color regions. He was inspired by [Roy’s] processing-based setup which we saw a few weeks ago. That system used processing to determine the average color of the currently displayed image, then it displayed the color on a single RGB LED strip. [Simon] was thinking a little bit bigger.

He purchased a lighting strip that could be cut into different sections and then set out to develop his own software for multiple color regions. He had little or no experience with Processing so he went one abstraction layer lower and used Java to code his interface. It’s got a lot of nice settings where you can tweak how, when, and why colors are displayed. In the end he has four independently addressable color strip on the left, right, top-left, and top-right of the screen. The best part is that the Java suite he developed can be used on different platforms, having been already tested on Windows and Linux.

Arduino + Java + Joystick

Interfacing your own hardware with a Java app couldn’t be easier than this example. [Pn] created this proof-of-concept using an Arduino, an analog joystick from a gaming controller, and a few lines of Java code. The Arduino reads an ADC value from the joystick’s x-axis and transmits it over the serial connection ten times a second. The Java program triggers on every serial event, parsing the data based on the @ symbol that the Arduino sends as a start and end condition.

We like this kind of example because there’s nothing extra involved. It lets you take the concept and run with it in any project imaginable. Be it a more complicated Joystick, or simple sensors that you’d like to interface with.

Data Confirmation With RF Communications

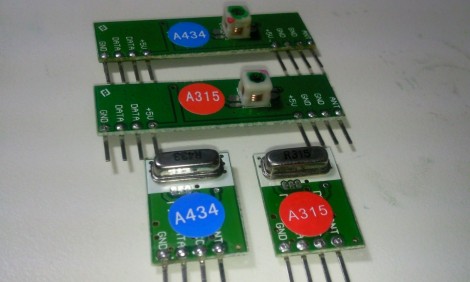
[Rafael] built a system that uses radio frequency for communications. The code he was using with the inexpensive receiver/transmitter pairs already had some error correction but from time to time an entire message would be missed by the receiver. He set out to make these RF communications more robust.

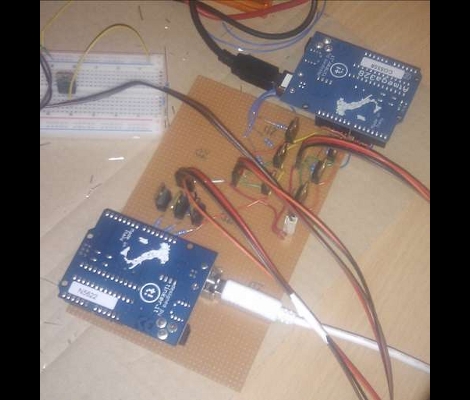
A little more than a year ago we looked at using these same transmitters with an Arduino. [Rafael] has a similar setup but since they are unidirectional he chose to use two pairs for bidirectional communication (each operating at a different frequency to avoid interference). On one end, a computer transmits data to the Arduino which is in a remote location. His confirmation protocol relies on a randomly generated message identifier. The computer will continually transmit the same message. The Arduino continually receives these messages, comparing them with the last successfully received message. If they match, it is considered a successful data transfer and the Arduino transmits a confirmation back to the computer which then starts transmitting the next message.

This isn’t an application-specific protocol. For demonstration purposes [Rafael] built a quick home automation setup that uses it to operate a house lamp.

Android Oscilloscope

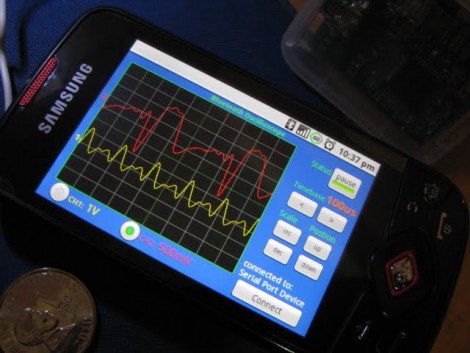
Here’s a 2-channel Oscilloscope for your Android phone. It uses a base module driven by a dsPIC for signal processing. From there, an LMX9838 Bluetooth module broadcasts the data to the phone so that the waveform can be displayed. [Yus] ported some Python code he had been using over to a set of Java and XML files in order to get it working on Android. This was actually the first time he worked with the SDK… we’d say he’s a quick learner. See it in action after the break.

Continue reading “Android Oscilloscope”

Open Source Artillery

[youtube=http://www.youtube.com/watch?v=zPm84nxa2dk]

Thanks to [Josh, Kyle, and Mike], it is now possible to wage (Nerf) war with an Arduino. The turret designed around it is capable of shooting 6 foam projectiles in close succession, between reloads. The faux weapon interfaces with a computer through the Arduino’s onboard serial link (via USB). Software on the PC sends commands to the Arduino, which then executes functions, such as panning, tilting, firing, and rotating the cylinder. The power for the firing itself comes from a 5 gal, 80 psi air compressor. The Java software on the host PC also does smarter things, like show streaming video from the turret’s webcam and even performs basic object tracking (with mixed success). All the code for building the brute is available on [Josh’s] website.

DIY Cell Phone Alti-variometer

AltiVarioFront

[Vlad-Andre] used some of his free time to build an alti-variometer. He does some para-gliding near restricted air space and wanted a backup altitude warning that would help keep him below the mandated altitude. His solution uses the SparkFun Weather Board in conjunction with their BlueSMiRF dongle to measure altitude and transmit it via Bluetooth. From there, he wrote a program to grab the transmitted data with his cell phone and display the information. His application also has the ability to set altitude warnings and log changes over time.

Using this system he is able to get altitude data with 3.5 inch accuracy. Because the capture application is written in Java it should be easy enough to make this work on other cell phone models. The project is clean and works well but we estimate the cost of the parts to be between $250-300, making it out of reach for those who don’t have a specific need for these types of measurements. This is especially true for paragliders who have much less expensive options available to them.
[Thanks Carl-Emil]

XMPP And Home Automation

xmpp_office_lights

[Matthias] from Intuity Media Lab put together a nice bit on controlling office lights with XMPP from his Android phone. In the article, he explains the components involved in the project, why he chose XMPP, and lists everything you need to replicate it. The project makes use of a wide variety of tools and libraries, weaving together code from multiple languages to achieve its goal. Overall, his project is a welcome change in a world full of Twitterbased solutions.