[riskable]'s clacky magnetic switches

Mag-Lev Switches Are The Future Of Clacking

While there’s probably a Cherry MX clone born every year or so, it’s not often that such a radically different type of switch comes along. These “Void” switches are Hall-effect magnetic levitation numbers devised by keyboard connoisseur and designer [riskable]. Can you imagine how satisfying it is to clack on switches that actuate with magnets? They have adjustable tactility and travel thanks to even more tiny magnets. But you won’t be able to get these in a group buy or anything. If you want some of these babies, [riskable] says you’ll have to print and assemble ’em yourself.
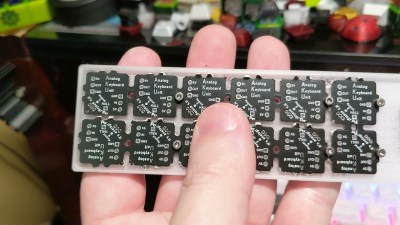
These attractive switches don’t have a Cherry MX footprint, either, so you’ll need some of [riskable]’s AKUs, or Analog Keyboard Units (YouTube) to actually use them. [riskable] predicts that unlike the switches, the AKUs will likely be available to buy at some point in the future. (Okay good, because we really would love to know what these feel like in a keyboard!)

So, how do they work? As explained in the first video embedded below, there is one magnet in the slider and another in the housing. These two are attracted to each other, so actuating the switch separates them, which is where the Hall effect comes in. A third magnet in the keycap acts as the levitator to help return the switch to open position. The tactility of these switches is determined by the thickness of the plastic between the two lovebird magnets, so you could totally dial that in to whatever you want, in addition to all the other customization that 3D printing affords.

Tour and Teardown
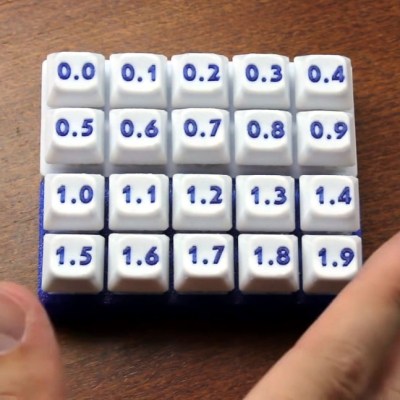
The inimitable [Chyrosran22] featured these mag-nificent switches in one of his teardown videos, which is embedded below. One of the things [riskable] sent was a tactility sampler that ranges from an unimaginably tactile 0.0 mm of plastic in between them to not quite 2 mm.

In case you’re wondering, the video is remarkably safe-for-work, which is surprising given the content creator’s propensity for long strings of creative and hyphenated curses. We suppose [Chyrosran22] saves that stuff for the bad keyboards, then.

Stick around after the rightfully glowing review for [riskable]’s tour of a hand-wired analog macro pad using these switches. When you have a few extra minutes, check out the video build journey of these switches on [riskable]’s YouTube channel.

So, would these switches make the clickiest keyboard ever? Maybe, but consider this striking solenoid setup.

Continue reading “Mag-Lev Switches Are The Future Of Clacking”

Keycap Customizer Brings All Your Caps To The Board

With bright colors and often intricate designs, after the physical shape of a keyboard the most conspicuous elements are surely the keycaps. Historically dictated by the stem of the key switch it attaches to, keycaps come in a variety of sizes, colors, profiles, and designs. As they necessarily include small features with tight tolerances to fit the stem of their key switch, injection molding is the classic manufacturing technique for a keycap. But as hobbyist 3D printing matures and resin printers become more accessible, home keycap manufacturing is increasingly good option. Instead of designing each cap by hand, consider trying [rsheldiii]’s KeyV2 OpenSCAD script to create custom caps with ease.

To cover the basics, KeyV2 can generate full keycap sets with Cherry or Alps stems, in the SA, DSA, DCS profiles (and more!) for any typically sized keyboard. Generating a particular cap of arbitrary profile, position, and size is just a short chain of function calls away. But standard keycap sets aren’t the highlight of this toolset.

If you’re not an OpenSCAD aficionado yet, visit [Brian Benchoffs] great getting-started guide or our other coverage to get a feel for what the tool can do. Part of OpenSCAD’s attraction is that it is the the paragon of parametric modeling. It’s declarative part files ensure that no parameter goes undefined, which is a perfect fit for KeyV2.

The root file upon which all caps are based on has about 150 keycap parameters which can be tweaked, and that’s before more elaborate customization. Making simple “artisan” caps is a snap, as the magic of OpenSCAD means the user can perform any Boolean operations they need on top of the fully parameterized keycap. Combining an arbitrary model with a keycap is one union() away. See the README for examples.

For the prospective user of KeyV2 worried about complexity; don’t be, the documentation is a treat. Basic use to generate standard keycaps is simple, and there are plenty of commented source files and examples to make more complex usage easy. Thinking about a new keyboard? Check out our recent spike in clacky coverage.

Switch Tester Servo-Slaps Them ’til They Fail

[James] is designing an open-source 3D printed keyboard switch, with the end goal of building a keyboard with as many printed parts as possible. Since keyswitches are meant to be pressed quite often, the DIY switches ought to be tested just as rigorously as their commercial counterparts are at the factory. Maybe even more so.

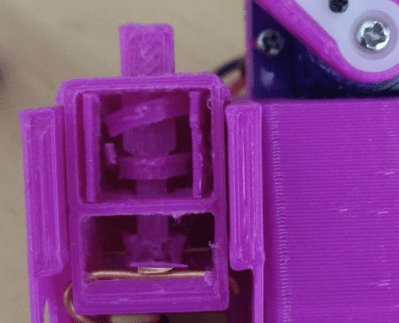
The broken spring after 13,000+ automated boings.

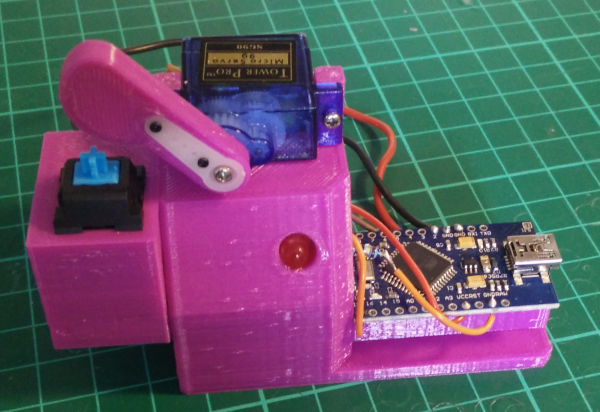
Rather than wear out his fingers with millions of actuations, [James] built a robot to test switches until they fail. All he has to do is plug a switch in, and the servo-driven finger slowly presses the slider down until the contacts close, which lights the LED.

The system waits 100ms for the contacts to stop any tiny vibrations before releasing the slider. That Arduino on the side tracks the contact and release points and sends them to the PC to be graphed. If the switch fails to actuate or release, the tester stops altogether.

We love that this auto-tester works just fine for commercial switches, too — the bit that holds the switch is separate and attaches with screws, so you could have one for every footprint variant. [James] recently did his first test of a printed switch and it survived an astonishing 13,907 presses before the printed coil spring snapped.

One could argue that this doubles as a servo tester. If you want a dedicated device for that, this one can test up to sixteen at a time.

Continue reading “Switch Tester Servo-Slaps Them ’til They Fail”

A Custom Keyboard At Maximum Effort

No one loves hacked keyboards more than Hackaday. We spend most of our workday pressing different combinations of the same 104 buttons. Investing time in that tool is time well spent. [Max] feels the same and wants some personality in his input device.

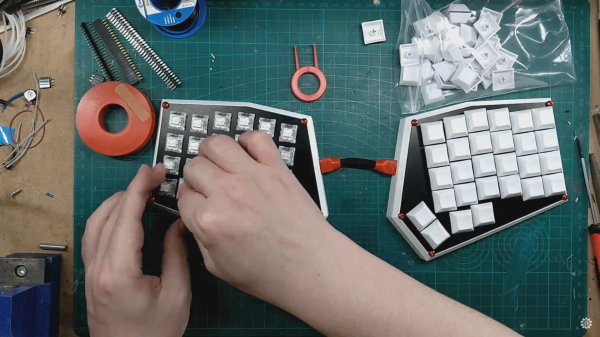
In the first of three videos, he steps us through the design and materials, starting with a layer to hold the keys. FR4 is the layer of fiberglass substrate used for most circuit boards. Protoboards with no copper are just bare FR4 with holes. Homemade CNC machines can glide through FR4, achieving clean lines, and the material comes in different mask colors so customizing an already custom piece is simple. We see a couple of useful online tools for making a homemade keyboard throughout the videos. The first is a keypad layout tool which allows you to start with popular configurations and tweak them to suit your weirdest desires. Missing finger? Forget one key column. Extra digit? Add a new key column. Huge hands? More spaces between the keys. [Max] copied the Iris keyboard design but named his Arke, after the fraternal sister to Iris which is fitting since his wrist rests are removable. Continue reading “A Custom Keyboard At Maximum Effort”

Nixies And Raspis For A Modern Vintage Calculator

There are a few very rare and very expensive calculators with Nixie tube displays scattered about calculator history, but so far we haven’t seen someone build a truly useful Nixie calculator from scratch. [Scott] did just that. It’s a complete, fully-functional electronic calculator with all the functions you would expect from a standard scientific calculator.

The calculator uses IN-12 Nixies, the standard for anyone wanting to build a clock or other numerical neon discharge display. Each Nixie is controlled by a K155D driver chip, with the driver chip controlled by an I2C IO expander.

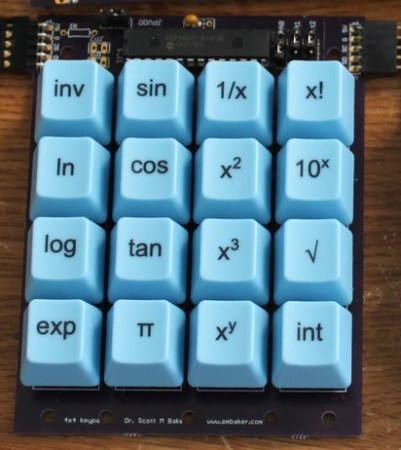
The keypad is where this gets interesting; electronics are one thing, but electromechanicals and buttons are a completely new source of headaches. [Scott] ended up using Cherry MX Blue switches, one of the more common switches for mechanical keyboards. By using a standard keyboard switch [Scott] was able to get custom keycaps made for each of the buttons on his calculator.

The brains of the calculator is a Raspberry Pi, with the I2C pins going off to listen in on the several IO expanders on the device. A Raspi might be a little overkill, but an Internet-connected calculator does allow [Scott] to send calculations off to WolframAlpha, or even the copy of Mathematica included in every Pi.

[Scott] has put his project up on Kickstarter. Videos below.

Continue reading “Nixies And Raspis For A Modern Vintage Calculator”