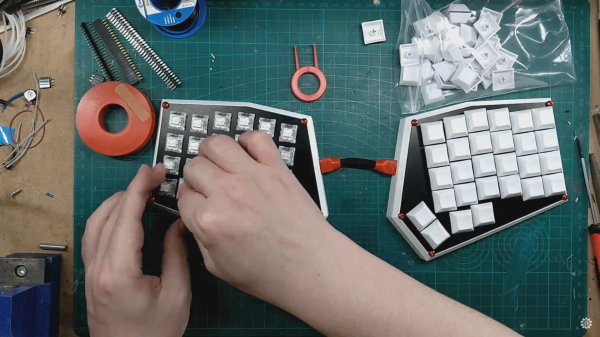
Colorful Split Keyboard Uses VGA Connections

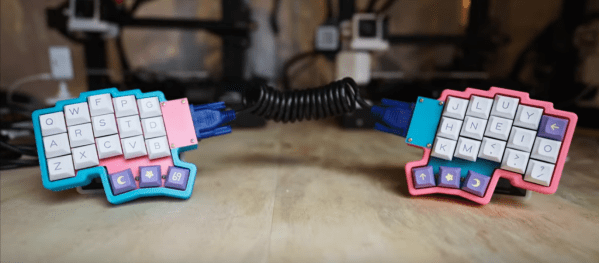
When it comes to building a split keyboard, you have a lot of options when it comes to the cable. Many will use a standard 3.5 mm TRRS cable, and others might use something more esoteric like RJ-45 to run between the halves. This only works if you’re using two controllers; if you only want one controller, you have to pass the matrix from one side to the other, which typically requires more than the four wires offered by the aforementioned choices. While rummaging around, [Joe Scotto] found a VGA cable and thought, why not use that?

This lovely Barbie-themed peripheral is a split version of an earlier board he built called the ScottoFly, which is a monoblock split with a void in the middle. As with that one, this is hand-wired using thicc brass insulated with heat-shrink, uses a solid 3D-printed plate, and a printed case. And like a madman, [Joe] coiled the cable.

Unfortunately, this proved to be problematic in the wire breakage sense, or so he thought. The real problem turned out to be that the middle row of pins on a VGA connector all act like ground, so they can’t be used to pass rows and columns. However, there were still enough viable pins to send the 4×5 matrix across. Be sure to check out the build video after the break.

Continue reading “Colorful Split Keyboard Uses VGA Connections”

Retro Portable Computer Packs Printer For The Trip

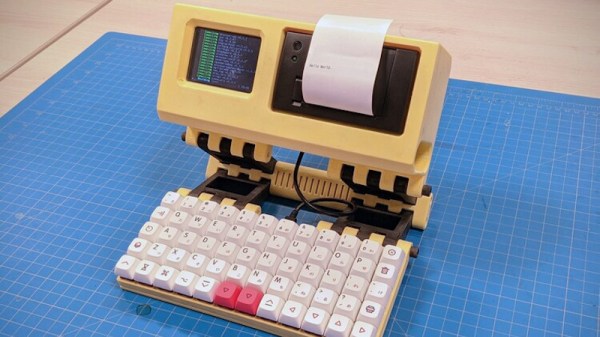
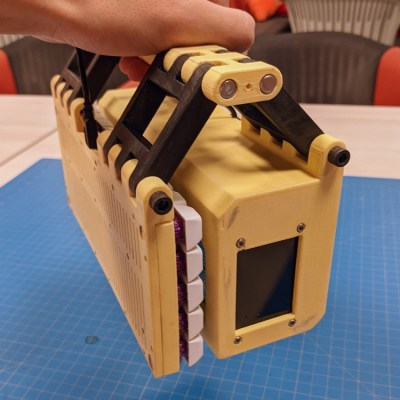
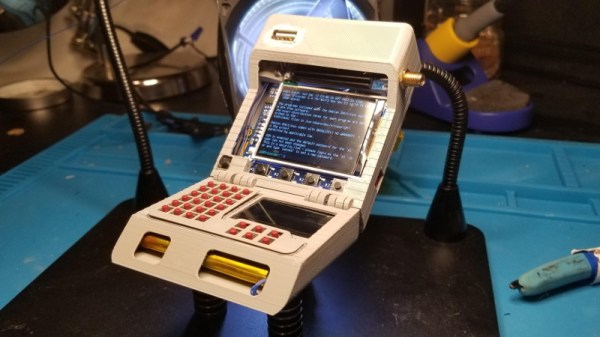
Looking like it dropped out of an alternate reality version of the 1980s, the Joopyter Personal Terminal is a 3D printed portable computer that includes everything you need for life in the retro-futuristic fastlane: a mechanical keyboard, a thermal printer, and the obligatory tiny offset screen. It’s a true mobile machine too, thanks to it’s onboard battery and a clever hinge design that lets you fold the whole thing up into something akin to a PLA handbag. You won’t want to leave home without it.

This gorgeous machine comes our way from [Gian], and while the design isn’t exactly open source, there’s enough information in the GitHub repository that you could certainly put together something similar if you were so inclined. While they might not serve as documentation in the traditional sense, we do love the faux vintage advertisements that have been included.

The upper section of the Joopyter holds a Raspberry Pi Zero W (though the new Pi Zero 2 would be a welcome drop-in upgrade), an Adafruit PiTFT 2.8″ display, a CSN-A2 panel mount thermal printer, and a Anker PowerCore 15600 battery to keep it all running. On the opposite side of the hinge is a hand wired keyboard powered by a Raspberry Pi Pico running KMK.

Speaking of that printed hinge, [Gian] says it comes on loan from [YARH.IO], which Hackaday readers may recall have produced a number of very slick 3D printed portable Linux machines powered by the Raspberry Pi over the last couple of years.

Continue reading “Retro Portable Computer Packs Printer For The Trip”

Huge Hand-Wired Ortho Is A Beautiful Battleship Keyboard

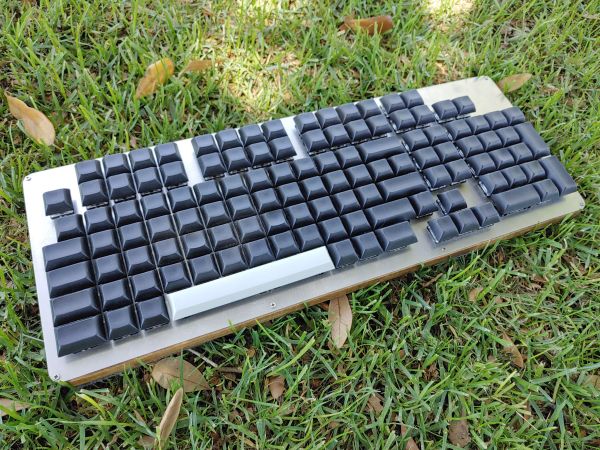
There are all sorts of reasons to build your own keyboard, and we would argue that the more custom the layout, the easier it is to justify the time and expense. At least, that’s what we’re going with for this post about [GoldenSights]’ big, beautiful custom ortholinear called Nearer, as in nearer to perfect. Just look at this battleship!

[GoldenSights] has long wanted a mechanical keeb, but has never been into any of the commercial offerings. That goes double since none of them seem to have a vertical Home/End cluster, which [GoldenSights] has become quite attached to thanks to a space-saving Logitech rectangle keeb. But if you’re going to make your own keyboard, you should go all out, right? Right. So [GoldenSights] started by adding another 12 F keys and making it ortholinear. Then things got personal with an extra Backspace where Num Lock usually lives, and dedicated keys for switching between English, Korean, and Chinese.

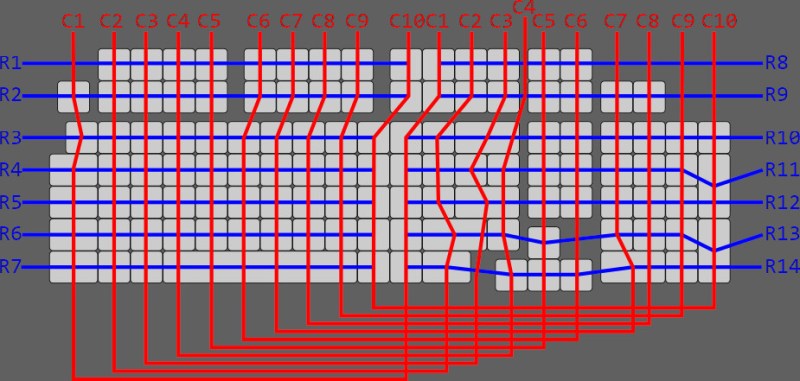
[GoldenSights] wanted USB-C and so they used an Elite-C microcontroller, but there’s one big problem — it only has 24 pins, and according to the matrix math, the board needs 27 total. Rather than using an I/O expansion chip or a second microcontroller, they wired it up as duplex matrix. This is an alternative way of wiring up a matrix so that it’s closer to being square by doubling up the rows and halving the number of columns.

We don’t think [GoldenSights] gives themselves enough credit here. They say that they lean toward calling it assembly rather than a build, but we disagree with that assessment. [GoldenSights] broke in this giant keeb with giant write-up of the build, so go see for yourself. There’s a ton of build pictures and a fair amount of hot glue, so be warned.

Let’s talk about those keycaps for a second. The space bar was supposed to be black PBT like the others, but the keycap manufacturer didn’t have a 6u space bar in black and sent a gray one instead. Honestly, we like the way it looks. And we love that [GoldenSights] painstakingly laid out the keys on foam board before committing to a laser-cut metal switch plate.

Want a space-saving ortholinear that doesn’t feel too cramped? Check out this wafer-thin keyboard that’s designed to squat over your inferior laptop keys.

Via KBD and r/mk

Tightly Packed Raspberry Pi Tricorder Impresses

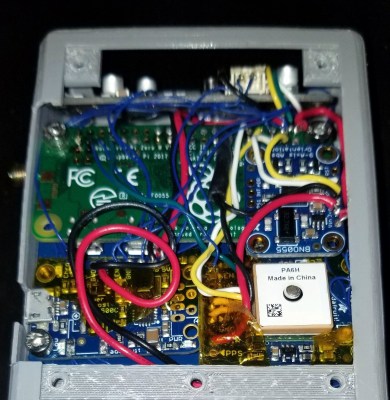
We’ll say upfront that we don’t have nearly as much information about this 3D printed Star Trek: The Next Generation tricorder as we’d like. But from the image galleries [Himmelen] has posted we know it’s running on the Raspberry Pi Zero W, has a color LCD in addition to a monochrome OLED, and that it’s absolutely packed with gear.

So far, [Himmelen] has fit an NESDR RTL-SDR dongle, a GPS receiver, an accelerometer, and the battery charging circuitry in the top half of the case. Calling it a tight fit would be something of an understatement, especially when you take into account all the wires snaking around in there. But as mentioned in the Reddit thread about the device, a custom PCB backplane of sorts is in the works so all these modules will have something a little neater to plug into.

There are a lot of fantastic little details in this build that have us very excited to see it cross the finish line. The female USB port that’s been embedded into the top of the device is a nice touch, as it will make it easy to add storage or additional hardware in the field. We also love the keyboard, made up of 30 individual tact switches with 3D printed caps. It’s hard to imagine what actually typing on such an input device would be like, but even if each button just fired off its own program or function, we’d be happy.

Judging by the fact that the LCD shows the Pi sitting at a login prompt in all the images, we’re going to go out on a limb and assume [Himmelen] hasn’t gotten to writing much software for this little gadget yet. Once the hardware is done and it’s time to start pushing pixels though, something like Pygame could be used to make short work of a LCARS-style user interface that would fit the visual style of The Next Generation. In fact, off the top of our heads we can think of a few turn-key projects out there designed for creating Trek UIs, though the relatively limited computational power of the Pi Zero might be a problem.

We’ve seen several projects that tried to turn the iconic tricorder into a functional device. Some have focused on the arguably more recognizable Next Generation style such as this one, and others have targeted the more forgiving brick-shaped unit from Kirk and Spock’s era. The Wand Company is even working on a officially licensed tricorder that will supposedly be as close to we can get to the real thing with modern tech and a $250 USD price tag, though we’d wager COVID has slowed progress down on that one. In any event, whether you build it or buy it, the tricorder seems destined to become reality before too long.

Heavy Metal Cyberdeck Has An Eye Towards Expansion

Whether we’re talking about Gibson’s Sprawl or our increasingly dystopian reality, one of the defining characteristics of a cyberdeck is that it can be easily customized and upgraded over time. While a few of the builds we’ve covered over the last couple of years have focused more on style than substance, we really appreciate the designs that embrace the concept of modularity to make sure the system can evolve to meet the changing demands of hacking on the go.

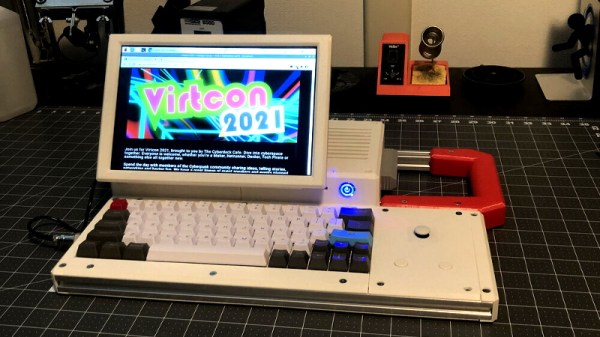
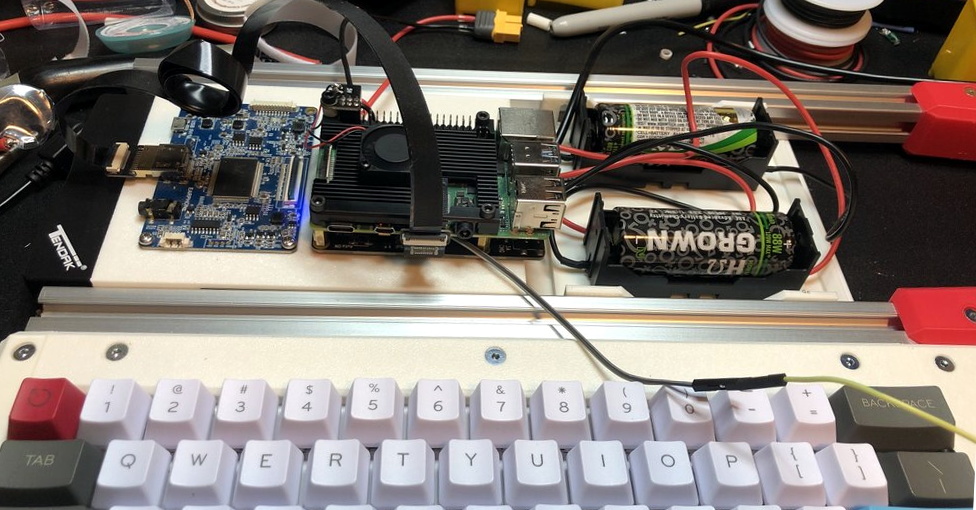
To that end, the M3TAL from [BlastoSupreme] is a perfect example of what a cyberdeck should be. Naturally it’s got the cyberpunk aesthetics we’ve come to expect, but more importantly, it’s designed so modifications and repairs are as quick and painless as possible. The trick is the use of a 2020 aluminum extrusion frame, which allows external panels and components to be attached anywhere along the length of the deck using T-Nuts. Similarly, by mounting internal components to “sleds” that ride between the pieces of extrusion, the electronics can easily be removed or swapped out as complete modules.

The M3TAL is currently outfitted with a Raspberry Pi 4 and a pair of 26650 batteries.

Furthering the idea of expandability, [BlastoSupreme] included an authentic 3.5 floppy drive on the M3TAL that allows him to pack an incredible 1.44 MB onto each rugged and portable disk. OK, so maybe the floppy drive isn’t terribly impressive compared to 2021 tech, but it does seem oddly appropriate for a cyberdeck. On the opposite side of the deck there’s a RetroCART slot, which cloaks modern USB devices in clunky faux cartridges. This provides a unified physical format for everything from removable storage to microcontrollers and software defined radio receivers.

Continue reading “Heavy Metal Cyberdeck Has An Eye Towards Expansion”

The Zen Of Mechanical Keyboard Wiring

Mechanical keyboards are all the rage right now, but the vast majority of them are purchased commercially. Only the most dedicated people are willing to put in the time and effort required to design and assemble their own custom board, and as you might imagine, we’ve featured a number of such projects here on Hackaday in the past.

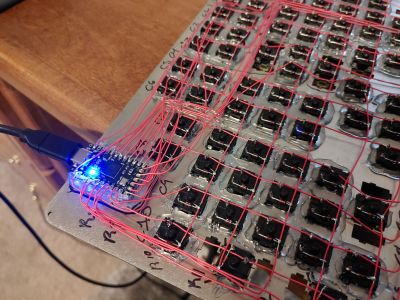
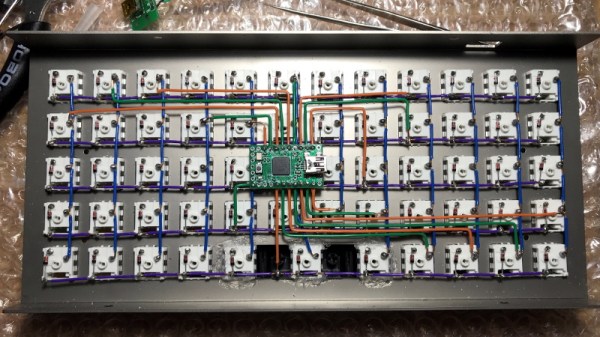
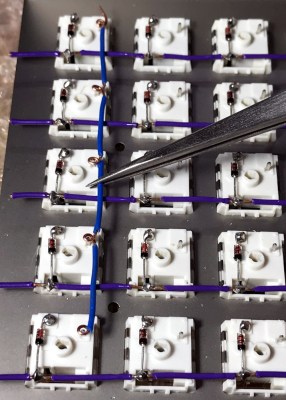
But what makes this particular mechanical keyboard build from [kentlamh] so special isn’t the final product (though it’s certainly quite nice), but the care he took when hand-wiring all of the switches to the Teensy 2.0 microcontroller that serves as its controller. There’s no PCB inside this custom board, it’s all rainbow colored wires, individual diodes, and the patience to put it all together with tweezers.

[kentlamh] takes the reader through every step of the wiring process, and drops a number of very helpful hints which are sure to be of interest to anyone who might be looking to embark on a similar journey. Such as bending the diode legs en masse on the edge of a table, or twisting them around a toothpick to create a neat loop that will fit over the pin on the back of the switch.

He also uses a soldering iron to melt away the insulation in the middle of the wires instead of suffering through hundreds of individual jumpers. We’ve seen this trick before with custom keyboards, and it’s one of those things we just can’t get enough of.

Some will no doubt argue that the correct way to do this would be to use an automatic wire stripper, and we don’t necessarily disagree. But there’s something undeniably appealing about the speed and convenience of just tapping the wire with the iron at each junction to give yourself a bit of bare copper to work with.

Even if you aren’t enough of a mechanical keyboard aficionado to travel all the way to Japan to attend the official meetup or discuss the finer points of their design at the Hackaday Superconference, there’s an undeniable beauty to this custom board. With a little guidance from [kentlamh], perhaps it will be your own handwired masterpiece that’s next to grace these pages.

[Thanks to Psybird for the tip.]

A Custom Keyboard At Maximum Effort

No one loves hacked keyboards more than Hackaday. We spend most of our workday pressing different combinations of the same 104 buttons. Investing time in that tool is time well spent. [Max] feels the same and wants some personality in his input device.

In the first of three videos, he steps us through the design and materials, starting with a layer to hold the keys. FR4 is the layer of fiberglass substrate used for most circuit boards. Protoboards with no copper are just bare FR4 with holes. Homemade CNC machines can glide through FR4, achieving clean lines, and the material comes in different mask colors so customizing an already custom piece is simple. We see a couple of useful online tools for making a homemade keyboard throughout the videos. The first is a keypad layout tool which allows you to start with popular configurations and tweak them to suit your weirdest desires. Missing finger? Forget one key column. Extra digit? Add a new key column. Huge hands? More spaces between the keys. [Max] copied the Iris keyboard design but named his Arke, after the fraternal sister to Iris which is fitting since his wrist rests are removable. Continue reading “A Custom Keyboard At Maximum Effort”