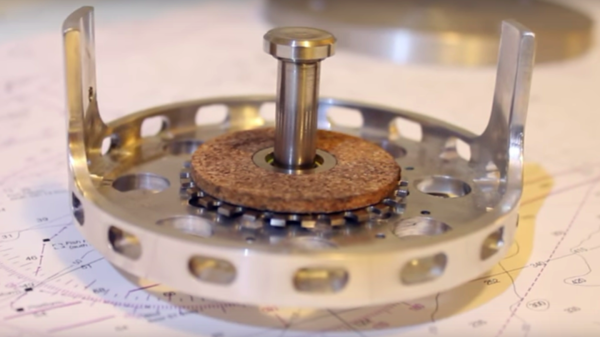
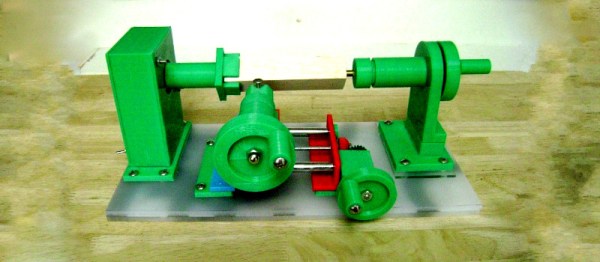
High-end Headphones Fixed With High-end CNC Machine

Warranty? We don’t need no stinking warranty! We’re hackers, and if you have access to a multi-million dollar CNC machine and 3D CAM software, you mill your own headphone replacement parts rather than accept a free handout from a manufacturer.

The headphones in question, Grado SR325s, are hand-built, high-end audiophile headphones, but [Huibert van Egmond] found that the gimbal holding the cups to the headband were loosening and falling out. He replicated the design of the original gimbal in CAM, generated the numeric code, and let his enormous Bridgeport milling machine loose on a big block of aluminum. The part was drilled and tapped on a small knee-mill, cut free from the backing material on a lathe, and bead-blasted to remove milling marks. A quick coat of spray paint – we’d have preferred powder coating or anodization – and the part was ready to go back on the headphones.

Sure, it’s overkill, but when you’ve got the tools, why not? And even a DIY CNC router could probably turn out a part like this – a lot slower, to be sure, but it’s still plausible.

Continue reading “High-end Headphones Fixed With High-end CNC Machine”

Super Cheap Super Simple DRO

If you have an old manual lathe, mill, or even a drill press, a digital readout (DRO) is a very handy tool to have. A DRO gives you a readout of how far you’ve cut, milled, or drilled into a piece of work without having to stoop to caveman levels and look down at a dial. Here’s a stupidly cheap DRO for all your machine tools. It should only cost five bucks or so, and if you need it, you already have the tools to manufacture it.

This build is inspired by an earlier build using the same single component – a digital tread depth gauge. This digital tread depth gauge is commonly found in countries that don’t use the US penny as currency to measure the depth of tread on a tire. The throw isn’t that large – only about 27mm – but with a few modifications it can fit on any machine tool.

The modifications include a small bit of metal glued to the back and four tiny neodymium magnets.  For the ‘tool head’ of this DRO, only a tiny plastic collar and another deo magnet are needed.

This digital tire depth gauge looks like – and probably is – the same mechanism found in those super cheap calipers from the far east. In theory, it should be possible to extend this modification to those digital calipers, making for a simple DRO with a much larger throw.

Thanks [Ben] for sending this one in.

The Best Gingery Lathe Video Series To Date

[Makercise] has been working on a Gingery Lathe since September last year. His videos on the process are by far the most detailed, clearly shot, and complete series on making a Gingery lathe we’ve come across.

For those who aren’t familiar, the Gingery series of books describe how to build an entire machine shop’s worth of bench top tools using only the hardware store, dumpster dives, charcoal, and simple skills. The series of books start out with the charcoal foundry. [Makercise] has built a nice oil fired foundry already so it’s off to the next book, Gingery 2,  is the metal lathe.

The Gingery books and, really, most DIY books from that era are: not well laid out, well written, or even complete. All but the most recent prints of the series still looked like photocopies of typewritten documents with photos glued on. The series provided just enough detail, drawings, and advice to allow the hobbyist to fill in the rest. So it’s really nice to see someone work through the methods described in the book visually. Seeing someone using a scraper made from an old file on aluminum to true the surface is much more useful than Gingery’s paragraph or two dedicated to the subject.

[Makercise] is fast approaching the end of his lathe build. We’re not certain if he’ll move onto the Shaper, mill, drill press, brake, etc. after finishing the lathe, but we’re hopeful. The playlist is viewable after the break.

Continue reading “The Best Gingery Lathe Video Series To Date”

Machine Tool Build Is Anything But Boring

“So just like every other great story in history, ours is going to start at the lathe.” Truer words were never spoken, and thus begins the saga of turning a bar of chrome-moly steel into a shop-built boring head.

You may have a few questions regarding [ThisOldTony]’s effort. First, unless you’re familiar with machine tooling, you may wonder what exactly a boring head is. The video below makes it plain, but the short answer is that it’s a tool to make holes. A boring head spins a boring bar with a cutting tool, and the head can be offset to spin the bar through an adjustable diameter. They’re great for making large holes of precise diameters – skip to around 25:30 to see it in action.

The other question might be: why does he spend so much time and effort building something he can just buy off the shelf? If you have to ask that question, we think you may be missing the point. [Tony] seems mainly interested in building tools; using them to make non-tool things is merely a happy accident. We totally respect that, and besides, just look at the quality of the tool he makes. We find his videos very entertaining, too – he’s got a great sense of humor and the video production quality is top-notch. Just watch out for banana peels and space-time continuum issues.

We love tools, and we really love tools that are custom made with this level of craftsmanship. For more quality toolmaking, check out this guitar-fretting jig or this belt grinder.

Continue reading “Machine Tool Build Is Anything But Boring”

Micro Tesla Turbine Is An Engineering Tour De Force

A corollary to Godwin’s Law ought to be that any Hackaday post that mentions Nikola Tesla will have a long and colorful comment thread. We hope this one does too, but with any luck it’ll concentrate on the engineering behind this tiny custom-built Telsa turbine.

For those not familiar with Mr. Tesla’s favorite invention, the turbine is a super-efficient design that has no blades, relying instead on smooth, closely spaced discs that get dragged along by the friction of a moving fluid. [johnnyq90]’s micro version of the turbine is a very accomplished feat of machining. Although at first the build appears a bit janky, as it progresses we see some real craftsmanship – if you ever doubt that soda can aluminum can be turned, watch the video below. The precision 25mm rotor goes into a CNC machined aluminum housing; the way the turned cover snaps onto the housing is oddly satisfying. It looks like the only off-the-shelf parts are the rotor bearings; everything else is scratch-made. The second video ends with a test spool-up that sounds pretty good. We can’t wait for part 3 to find out how fast this turbine can turn.

Size matters, and in this case, small is pretty darn impressive. For a larger treatment of a Tesla turbine, see this one made of old hard drive platters.

Continue reading “Micro Tesla Turbine Is An Engineering Tour De Force”

Fixing A Broken Bandsaw With A Custom Steel Part

When a large bandsaw broke down due to a cast iron part snapping in two, [Amr] took the opportunity to record the entire process of designing and creating a solid steel replacement for the broken part using a (non-CNC) mill and lathe.

For those of us unfamiliar with the process a machinist would go through to accomplish such a thing, the video is extremely educational; it can be sobering both to see how much design work happens before anything gets powered up, and just how much time and work goes into cutting and shaping some steel into what at first glance looks like a relatively uncomplicated part.

Continue reading “Fixing A Broken Bandsaw With A Custom Steel Part”

Making Springs At Home

[This Old Tony] teaches us how to make springs on a lathein this video done in the style of How It’s Made. Mixed in with snark, in his usual style, is a lot of useful information.

The Machinery’s Handbook certainly has all the information one would need to design the basic spring shapes, but it’s not always necessary. [Tony] points out that cheating is entirely acceptable. For example, if you need a spring that’s close to the dimensions of a standard spring, simply copy over the values from the standard spring. He explains all the terminology needed to decrypt the pages in your engineering tome of choice.

He shows the basics of winding a spring on a mandrel (or that round metal thing, if you want to use the industry term). First wind the inactive coils, then set your lathe to the desired spring pitch. Engage it as if threading, then disengage and wind the final inactive coils. A quick trip to the sander squares the ends of a standard coil spring. However, the tools can also be used to make torsion springs, or even exotic combination springs.

For a good… educational laugh, watch the whole video after the break.

Continue reading “Making Springs At Home”