Google ADK Project Shows Just How Easy It Is To Use

first_adk_project

[yergacheffe] was able to get his hands on a shiny new Google ADK board about a week before it was announced at I/O, and got busy putting together a neat project to show off some of the ADK’s features. His idea was to meld together the ADK and Google’s new music service, two items he says complement each other very well.

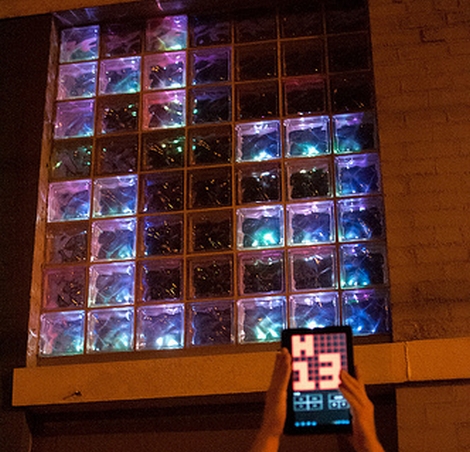
He had a handful of LED matrices left over from last year’s Maker Faire, which he decided to use as a Google music metadata display. The base of the display is made from laser-cut acrylic, with a few spare ShiftBrites lighting up the Google music beta logo.

He says it took literally just a couple lines of code to get his Android handset to talk with the display – a testament to just how easy it is to use the ADK.

Pretty much anyone can walk up, attach their phone, and see their current music track on the display with zero fuss, which you can see in the video demo below.

Continue reading “Google ADK Project Shows Just How Easy It Is To Use”

Photon Banner

The Revision 2011 demo party that brought us” table for two” a little while ago along with some super demos for PC’s, retro, and state of the art, has also brought us the Photon Banner(google translate). The Photon Banner is a 96X24 led matrix that was made with (of course) 2304 5mm leds, and a atmega 644 clocked at 20MHz.

The end result is a 192cm X 48cm display area that uses the single micro controller, that has been beefed up with 2 megs of SPI flash memory, 6 driver boards, and took about a month just to construct. The software to drive the show took another 15 days, and it is pretty darn impressive.

The website above contains a bunch of photos, parts lists, and schematics. Before you go running off you should join us after the break for a couple of quick videos.

Continue reading “Photon Banner”

Papydoo Is Watching You!

Papydoo spends most of its time sleeping, but if startled by vibration it will wake up and stare you down with a cold and unnerving robo-gaze like you have not seen before. Or it might just do something crazy like display a scrolling Space Invaders character marquee.  That’s the thing with Papydoo, you just never know.

Vibration sensing is accomplished with a piezo element harvested from an old horn speaker that is simply sandwiched between the project enclosure and the surface it is sitting on. A MCP601 op-amp is used to amplify the weak potentials from the piezo element and feed them to the ADC of a Zilog Z8F083A microcontroller. When sufficient vibration is detected, the MCU wakes up and displays one of a number of different animations on the front panel 32X8 LED matrix. The various display modes can also be manually selected using a small button on the back of the enclosure.

Power consumption is reduced to 150uA while sleeping by only briefly waking the MCU once per second to check the current vibration level. Nearly all of this power draw can be attributed to the op-amp, and although there are much more efficient models available, sometimes the best choice is just the one you already have on hand in your parts bin. Regardless, the power consumption is low enough to run the device off of a set of AA batteries.

We could imagine that similar setup could be used for a number of different low-powered messaging applications that would only “wake up” when someone was near enough to read and interact with. Add a loud speaker and this might even make a good alarm to keep pesky coworkers out of your “cube”. What would you do with a Papydoo?

Thanks for the tip [Laurence]! If you happen to read this, we are dying to know: why “Papydoo”?

Short video after the break.

Continue reading “Papydoo Is Watching You!”

Pong Clocks Using LED Matrix Modules

We love Pong clocks because they’re showpieces. This particular offering, called the Wise Clock, is the third hardware revision of the project. The LED display is dead simple since they’re using a 32×16 bi-color module from Sure Electronics. If you don’t want to design and build your own multiplexing display this is a somewhat inexpensive and high-performance alternative.

After the break you can see that the paddle movements look very realistic. They move like a human player might, which is quite often not the case with these clocks. If you want to see how that’s done, check out the code which was originally developed by [123led] for a different project.

Continue reading “Pong Clocks Using LED Matrix Modules”

Web-enabled LED Pegboard

[Norm Santos] whipped up an LED light board that you can draw on through their web interface. We tried it out but unfortunately the live feed is currently offline. That doesn’t diminish our appreciation for the time-lapse build video after the break. Indeed it was a mountain of hot glueing and a couple of days of soldering. Our only beef is that for every LED on the board there are three empty peg holes. To us this is just begging to be augmented with blue, green, and white LEDs for a more spectacular result. What they have now encompases 350 LEDs managed by five microcontrollers, which took about two days to solder (for five people) and to hammer out some code. Continue reading “Web-enabled LED Pegboard”

Ikea LED Matrix

8x8

[Spikenzie] has created an 8×8 LED array that fits inside an ikea frame. He multiplexed the 64 red LEDs on a PCB with connections on the back. He then used a MAX7129, an LED multiplexer and driver, driven by a PIC over SPI to do animations and play pong. He then encased the array in laser-cut cardboard and white acrylic to get large dots. This entire assembly was then placed inside an Ikea RIBBA picture frame. The result is an aesthetic homebrew display that is easy to control.

Related: 64pixels are enough

64pixels Are Enough

64pixel

[Alex] put together this lovely minimal LED project. The square pixel matrix is soldered directly to the microcontroller in the same style as EMSL’s Micro-Readerboard. During the prototyping phase he used resistors to limit the current from the programming board. The final product doesn’t use resistors and manages the current draw by only turning on a single pixel line at a time. The illustrated assembly guide is very thorough and should help your create an equally compact device. Check out a video of it in motion below.

Continue reading “64pixels Are Enough”