LED Strip Cape Drives Kilometers Worth Of LEDs

led-strip-cape

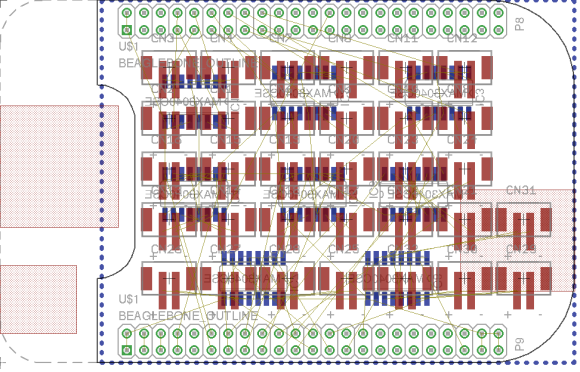
[Hudson] is looking to drive a lot of LEDs. A driver that effectively addresses kilometers worth of LED strips isn’t an easy thing to come by. So he’s in the process of designing his own BeagleBone Cape to do the work. Above you can see the board layout he’s working with. Notice the set of repeating red footprints in the center? Those are pads for 32 RS485 connectors!

Of course this is all in preparation for Burning Man where the mantra seems to be: he who has the most LEDs wins. Well, unless you’re the sort that likes to work with flames. But we digress. The scaling problem that [Hudson] is dealing with hinges around his desire not to include ridiculous numbers microcontrollers and the need to beef up the 3.3V logic levels of the BeagleBone to travel further on the data bus of the strips. By leveraging the RS485 protocol — which is designed to carry data over long distances — he can get away with a single processing unit by adding an RS485 translator at each remote strip connector. He plans to use the BeagleBone’s Programmable Realtime Units feature to address the eight drivers on the cape. But first he has to solve what looks like a doozy of a trace routing problem

Make Your Own Electronic Children’s Toys

diy-childrens-toys

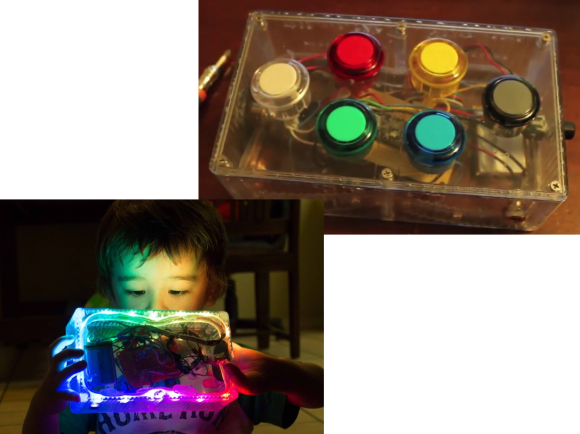
[Miria Grunick’s] son nephew is two years old. If you’ve ever looked at that age range in the toy aisle we sure you’ve noticed that there’s a mountain of cheap electronic stuff for sale. Manufactures are cramming LEDs and noise makers into just about all kids stuff these days. But [Miria] thought why not just make him something myself? She calls this the Blinky Box. It’s an acrylic enclosure stuffed with pretty LEDs that is controlled with a few buttons.

It’s driven by a Teensy 3 board which monitors a half dozen colorful buttons, a mode selector on the side, and an on/off switch. The device is powered by a Lithium battery that recharges via USB. And of course there’s a strip of individually addressable RGB LEDs inside.

The demo shows that one mode allows you to press a button color and have the LEDs change to it. But there are other features like fade and scroll. She also mentions that since it can be reprogrammed the toy can grow with hime. Maybe it’ll be a Simon Says game. But eventually she hopes he’ll use it to learn the basics of programming for himself.

Continue reading “Make Your Own Electronic Children’s Toys”

Is An LED Bow Tie Ironic Or Awesome?

led-bowtie

We’re not exactly trend setters when it comes to wardrobe. And so the recent revival of the bow tie as an accepted dress item confounds us. We’re even more confused by [Arichter’s] LED bow tie. Sure, the hobby electronics part of it is a win… but when it comes to fashion is he making fun of the bow tie wearers, or setting a new standard?

The tie is made of three PCBs, which lets the wings sit on a bit different plane than the center. He populated the boards with about 100 RGB LED modules which he desoldered from a couple of meters of LED strip. They draw a lot of juice and to supply that he uses a boost converter. A standard Arduino UNO board controls the lights.

If you’re still sold on the bow tie form factor we’d like to direct your attention to this long-tie version. It doesn’t just show patterns, but plays a wicked game of Tetris with you as the game board.

[via Reddit]

WS2811 Can Be Addressed At 800kHz Using A 8MHz Clock

ws2811-running-at-8mhz

Timing is everything and that’s why most communication protocols require a very accurate clock source. The WS2811 LED strip controllers are no different. But [Danny] figured out a way to drive them reliably with an 8MHz clock source.

The WS2811 has become one of the most popular controllers for RGB pixels and strips alike. We’ve seen several hacks used to address them, including the 16MHz AVR technique that inspired [Danny] to take on this project. He planned to use that library but the 25-day shipping time for a 16MHz crystal drove home to invent a way to use the internal oscillator instead.

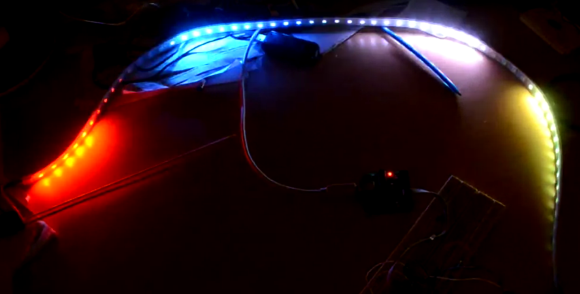
The gist of the hack is that he wrote assembly code to handle pairs of binary bit values. With a code block for each of the four possible combinations in hand he had to find a way to craft the conditional jumps to preserve accurate timing. After hitting the wall trying to solve this puzzle by hand he wrote a C++ program to solve it for home. The proof is in this video which shows one chip driving multiple Larson scanners on a single strip.

Continue reading “WS2811 Can Be Addressed At 800kHz Using A 8MHz Clock”

Update: Live Video Played On LED Strip Display

update-live-video-on-led-strip-display

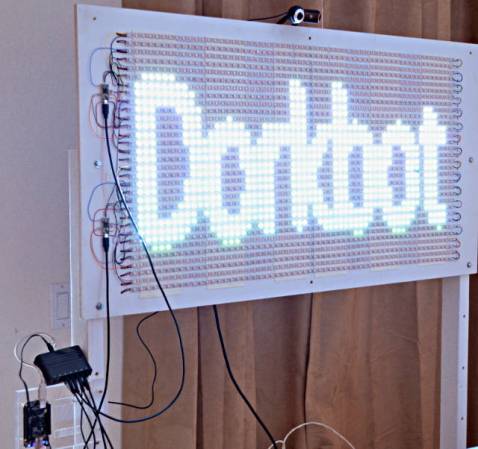
[Paul] took this LED display along with him to Maker Faire. To give it some interactivity he figured out a way to make it play live video. It is also activated using some stomp actuators built from piezo speaker elements and rubber floor mats.

This moves his original project in new directions. Back in February he was showing off the RGB LED strip display. He had it playing video but that was all dependent on using previously processed files. This upgrade uses a BeagleBone Black (the newest rendition of the ARM-based development board). [Paul] had tried using a Raspberry Pi board but had trouble with the webcam (mounted above the LED display) dropping frames. With the new board he is able to use the Video4Linux API to capture 30 frames per second and push them out to the display.

So far he’s had five out of the 1920 LEDs die on him. This shows off a couple of good things about using strips like this. A dead pixel doesn’t affect its neighbors. And replacement is as easy as cutting the ribbon on either side of the bad component, then soldering a new segment in place.


Lighting Up A Workspace Twofer

desks

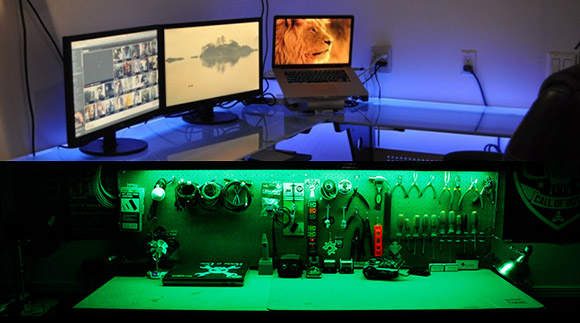
Sometimes a pair of extremely similar builds hit the Hackaday tip line within hours of each other. We’re not one to play favorites, so here’s two projects that put RGB LED strips in a desk and workbench.

[Charles] over at The Makers Workbench has long needed a lighting solution for his workspace. Flourescent lights are alright, but for real geek cred nothing but LED strips will do. He picked up an RGB strip on Amazon for $20 and now has a lighting solution that’s able to change colors above his workstation. Check out the video of his RGB workbench rave.

A computer desk is a workbench too, right? [Will] had the idea of letting people on the Internet control the lighting color of his desk. He’s asking people to head over to this site and asking people to schedule the color of his desk for an entire day. A Raspi pulls each day’s color off the server. With a few transistors, an RGB strip, a custom shield, and faking three PWM channels, [Will] has a new color at his desk every day.

Building Huge Displays With LED Strips

Building RGB LED displays is one of the most interesting programming and engineering challenges we see here on Hackaday. Not only do the creators of large displays and LED cubes have to deal with the power requirements of driving a whole bunch of LEDs, but there’s also the issue of getting the frame rate high enough to display video. It’s a non-trivial task, but [Paul Stoffregen] has an interesting solution. He wrote an LED strip library that can control eight meter-long LED strips that can also be used on daisy chained Teensy 3.0 microcontrollers for really large displays.

[Paul]’s LED library works with LED strips based on the WS2811 LED controller IC. These chips are the most common controller chips for the individually controllable LED strips you can find at Adafruit or hundreds of Chinese resellers. The library requires DMA transfer to display images, so if you’re looking to build a ginormous RGB LED display, you might want to pick up a few of [Paul]’s Teensy 3.0 boards

[Paul] also created a Processing app that takes a video file and turns it into serial data for his LED strip library. You can check out a video of this app, library, and a 60×32 RGB LED display after the break.

Continue reading “Building Huge Displays With LED Strips”