Doubling Down On A Big LED Display

Last year at the 2014 NC Maker Faire, Manical Labs brought a large LED display. Blinking LEDs and pixel animations are always welcome, but at 24 inches square this build was impressive, but it wasn’t impressive enough. This year, [Adam] at Manacal Labs wanted to go bigger. Much bigger. This build is called Colossus, and at two square meters and with 1250 individual LEDs, this LED display is a colossal build.

When building a big LED display, an enormous amount of planning pays off in dividends. The backbone of this project is a sheet of 3/8″ plywood, ripped down to 1 meter by 2 meters. 1250 half-inch holes are drilled in this sheet over four or five very long and very tedious evenings. The LEDs are installed in the thousand or so holes, and a grid of foam core board encases each individual LED.

One of the biggest problems with large arrays of LEDs is the sheer scale of it all. If one LED pixel draws 60mA, 1250 pixels means a draw of 75 Amps. This current will melt most wires, so the power is delivered over custom made copper bus bars. Driving this display with a reasonable refresh rate is another important consideration; WS2812 lights, with an 800kHz signal over one wire, is far too slow for a huge display. Instead of the 2812s, [Adam] went with LPD8806 LEDs that can be clocked at 30MHz. This is controlled with two AllPixels, effectively making this two displays acting as one. It all comes together in a very big LED display. You can check out a video of it below.

Continue reading “Doubling Down On A Big LED Display”

Notification Cube

LED Notification Cube Is A Good First Project

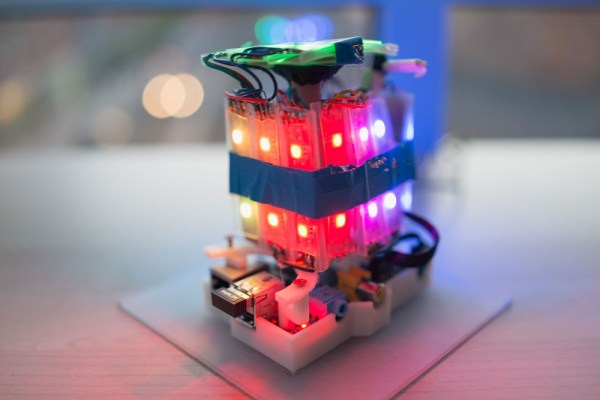
Two years ago, [Matt] made a move away from his software hacks and into the physical world. He was part of a pilot program to provide mentorship to children as part of the Maker Education Initiative. This program gave him access to 3D printers, CNC machines, and laser cutters within the New York Hall of Science makerspace. [Matt] chose to build an illuminated notification cube for his first physical project. The idea being that smart phones have so many alerts, many of which are unimportant. His project would help him to visualize and categorize each alert to better understand its importance.

The brain of the system is a Raspberry Pi. [Matt] found a Python library that allowed him to directly control an RGB LED strip based on the LPD8806 chip. He wired the data pins directly to the Pi and used an old 5V cell phone charger to power the LEDs. The strip was cut into smaller strands. Each face of the cube would end up with three strands of two LEDs each, or six LEDs per side. [Matt] found a mount for the Pi on Thingiverse and used a 3D printer to bring it into existence. The sides were made of frosted laser cut acrylic. The frosted look helps to diffuse the light from the LEDs.

Over time [Matt] found that the cube wasn’t as useful as he originally thought it would be. He just didn’t have enough alerts to justify the need. He ended up reprogramming the Pi to pull weather information instead, making use of the exact same hardware for another, more useful purpose.

Teaching The Word Clock Some New Tricks

wordclock2014

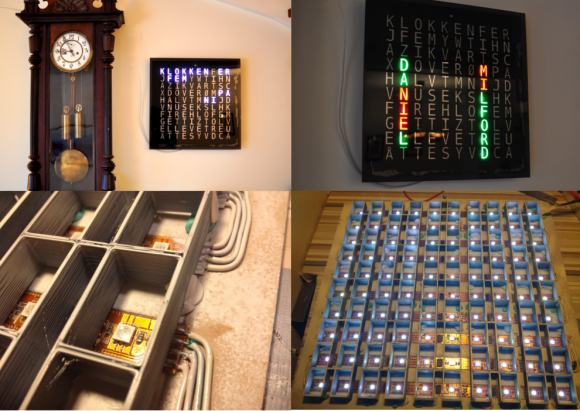
[Joakim] has built a clock that spells out the time in words. Wait a second – word clock, what is this, 2009? Word clocks are one of those projects that have become timeless. When we see a build that stands out, we make sure to write it up. [Joakim’s] clock is special for a number of reasons. The time is spelled out in Norwegian, and since the clock is a birthday gift for [Daniel], [Joakim] added the his full name to the clock’s repertoire.

One of the hard parts of word clock design is controlling light spill. [Joakim] used a simple 3D printed frame to box each LED in. This keeps the spill under control and makes everything easier to read. The RGB LED’s [Joakim] used are also a bit different from the norm. Rather than the WS2812 Neopixel, [Joakim] used LPD8806 LED strips. On the controller side [Joakim] may have gone a bit overboard in his choice of an Arduino Yun, but he does put the ATmega328 and Embedded Linux machine to good use.

The real magic happens at boot. [Daniel’s] name lights up in red, with various letters going green as each step completes. A green ‘D’ indicates an IP address was obtained from the router’s DHCP server. ‘N’ switches to green when four NTP servers have been contacted, and the Linux processor is reasonably sure it has the correct time. The last letter to change will be the ‘E’, which reports ambient light.

[Joakim] added a web interface to trigger his new features, such as a rainbow color palette, or the ability to show minutes by changing the color of the letters K,L,O,K. The final result is a slick package, which definitely brings a 2009 era design up to 2014 standards!

Thinking Cap Is Also Party Hat

The Thinking Cap is a piece of wearable signage that lets you display what’s on your mind. The hat uses a Teensy 2.0 connected to a Bluetooth radio to allow the wearer to update the message on the fly, letting the room know what their thinking at that instant.

This hack is based off of LPD8806 controlled LED strips, which are becoming very popular for adding lots of LEDs to anything. There are five strips that need to be controlled over SPI, but the Teensy only has one SPI peripheral.

This lead to the use of multiplexer to allow for controlling each strip individually. The hat uses an interesting and low cost scheme to multiplex five channels using two 744052 dual 4 channel multiplexors and a 7400 inverter.

The Teensy can receive messages using the Bluetooth serial port protocol. The 5 x 7 pixel characters are stored in a framebuffer, and shifted around the hat to create the animation.

The result is a bright message circling around the user’s head, which can be updated with a smartphone over Bluetooth. Check out a video demo of the hat after the break.

Continue reading “Thinking Cap Is Also Party Hat”

StarGate Eggbeater

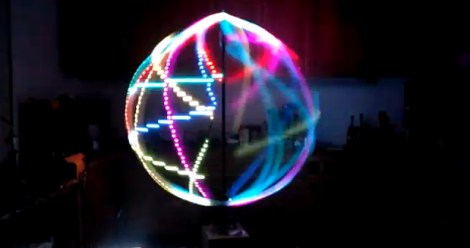
[Jason] used a strip of 142 Adafruit LPD8806 Addressable RGB LEDs to create the StarGate Eggbeater persistence of vision display. The LED strips are controlled by an Arduino Mega, which is used to control the strip and provides 21 bit color control for each LED. The strip is housed into a ring-shaped tube which is mounted onto a rod and bearing to allow it to spin. A 1/4 HP motor is used to spin the ring at 250 RPM creating the POV effect.

One issue when controlling a spinning object is making electrical connections to a spinning object. The LPD8806 requires four connections: power, ground, clock, and data. To make the connections, [Jason] used a MOOG Slip Ring. This allows for the four connections to be made while the ring spins at 250 RPM.

Of course POV demos need videos, so check one out the “boss program” video after the break.

Via Adafruit

Continue reading “StarGate Eggbeater”

Back Up The Band With Some RGB Stage Lights

Fresh off the 72-hour madness of the Red Bull Creation contest some of the folks a North Street Labs took on a stage lighting project. It’s for a local performing venue that just opened up, and despite the time crunch the team pulled off another great build.

Sixteen meters of LED strip make the electronics for the project a whole lot easier. The strips run up the center of a cabinets built as stand-alone columns which will end up at the back of the stage. Each cabinet has its own 5V 4A power supply (note the burnout issues they mention when using cheap eBay PSUs). Each column has its own Arduino Uno driving the LEDs, with an RS485 shield to connect back to a main Arduino Mega 2560 controller. It uses a PSX controller to switch between different lighting modes.

The seven towers boasting 688 LEDs isn’t all that’s shedding light on the show. There’s also about 300 feet of EL wire at work.

Continue reading “Back Up The Band With Some RGB Stage Lights”