How A Quarter Shrinker Works

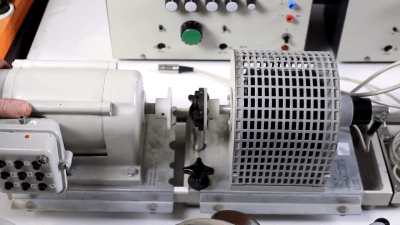
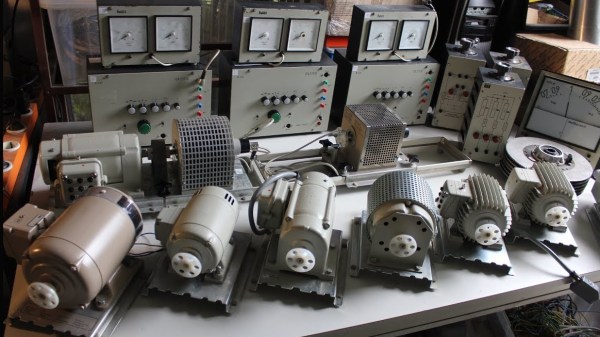
This machine is capable of shrinking coins. What you’re looking at is actually a 3D model of the Geek Groups impulse generator, which is called Project Stomper. The model is used to explain how induction shrinks a quarter to the size of a dime.

The grey chamber to the left is a reinforced containment device. It’s a safety feature to keep people in the same room as the Stomper safe from flying particles which may result from the forces this thing can put out. You see, it uses a mountain of magnetic energy to compress the edges of a coin in on itself.

As the video after the break illustrates, the main part of the machine on the right starts off by boosting mains voltage using a microwave oven transformer. This gets the AC to 2000V, which is then rectified and boosted further to get to 6000V DC. This charges three huge parallel capacitors which are then able to source 100,000A at 6 kV. When it comes time to fire, the charge is dumped into a coil which has the coin at its center. The result is the crushing magnetic field we mentioned earlier.

This isn’t a new concept, we featured a different coin crusher build in the early years of Hackaday’s existence.

Continue reading “How A Quarter Shrinker Works”

Reading Credit Cards With A Tape Head

A company called Square is giving out free credit card readers that turn any iPhone or iPad into a Point of Sale terminal. [Steve] got a hold of one of these tiny peripherals and did what any sane person would do: tear it apart and learn how it works. This bit of hardware is a little unimpressive; unsurprising because Square is giving them away. With simplicity comes an ease in understanding, and [Steve] was able to successfully read his own credit card with this tiny and free credit card reader.

[Steve]’s work in decoding credit card data builds off [Count Zero]’s article from the bbs days. Basically, each credit card has two or three tracks. Track three is mostly unused, whereas track one contains the card holder name, account number, cvc code and other ancillary data. Track two only contains the credit card number and expiration date.

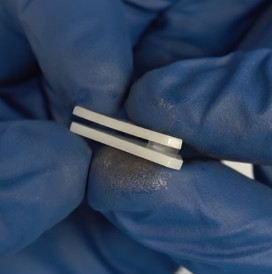
The only components in the Square card reader are a head from a tape player and a 1/8″ microphone jack. The magnetic head in the Square card reader is positioned to only read track two. With a small shim, it’s possible to re-align the head to get the data from track one. After recording an audio file of him sliding his card though the Square reader, [Steve] looked at the number of times the waveform flipped from positive to negative. From this, he was able to get the 1s and 0s on the card and converted them to alphanumeric using the 6-bit ANSI/ISO alpha format.

[Steve] isn’t going to share the code he wrote for Android just yet, but it should be relatively easy to replicate his work with the Android tutorial he used. Also, yes, we did just pose the question of how these Square credit card readers work just hours ago. Good job being on the ball, [Steve]. Tips ‘o the hat go out to [Bobby], [Leif], [Derek] and anyone else we might have missed.

EDIT: [Stephen] sent in his teardown minutes after this post went live. Hackaday readers are too fast at this stuff.

Building A Magnetic Rotary Encoder

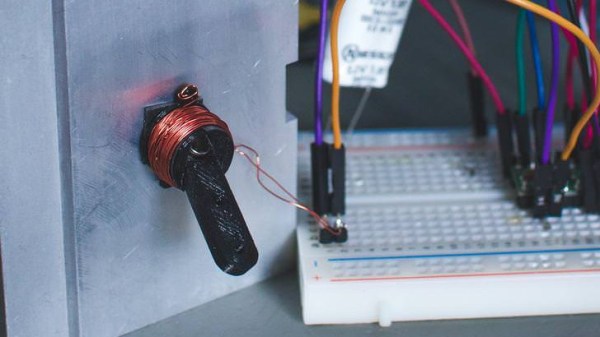
[Long Haired Hacker] has undertaken a high-resolution 3D printer build. He got his hands on some motors to drive the build platform but it doesn’t have a built-in encoder. He knows that optical encoder wheels can have problems due to dirt and grim as well as ambient light so he set out to find a better way of providing feedback to the controller. He ended up building his own magnetic rotary encoder which is shown above.

At the heart of the system is an AS5043 magnetic rotary sensor. The chip, which runs from $6.50-$11, can detect and report the rotation of a magnetic field with great precision. The rotation data can be read out in degrees using SPI, but it sounds like there’s also grey code output on a few pins if that suits your needs a bit better. The magnet which the chip measures is mounted in a sleeve milled to seat inside of a bearing ring.

The 3D printing method [Long Haired Hacker] has chosen uses a projector and light-cured resin to achieve the kind of results seen in this other hi-res printer.

Controlling Muscles With High Intensity Magnetic Pulses


ben_krasnows_transcranial_magnetic_stimulation

We’re not quite sure what’s going on with our fellow hackers lately, but they all seem quite interested in finding inventive ways to scramble their brains. [Ben Krasnow] has put together a pair of videos detailing his experiments in transcranial magnetic stimulation, a process that looks like it would go quite nicely with the Brainwave Disruptor we showed you just yesterday.

Instead of building a coil gun with a set of supercapacitors he had on hand, [Ben] decided to build a magnetic coil that can be used to stimulate his brain through his skull. Once his capacitor bank is charged, a high current pulse is sent through the coil held against his head. This pulse generates a strong magnetic field in the coil, which in turn produces neuron stimulation in his primary motor cortex.

Be sure to watch both videos embedded below, as the first one mostly covers the theory behind his experiments, while the second video gives us the goods.

[Ben’s] day job involves working with professional grade TMS devices, so he has some experience with this technology. Before you try this on your own, be sure that you are doing this safely, because a misdirected pulse of 1700 volts to the head does not sound like a fun time at all.

Continue reading “Controlling Muscles With High Intensity Magnetic Pulses”

Enhance Your Magnetic Silly Putty With Personal Lubricants

better_magnetic_putty_with_personal_lubricant

Instructables user [killbox] seems to have come across a process that actually makes magnetic silly putty “better”, depending on your specific needs. He had tons of fun making a batch of magnetic putty, but thought that the addition of iron oxide made it stiff and a bit slow moving for his tastes.

He tried to find a household item that could act as silly putty thinner, but after trying various oils, gylcerin, and rubbing alcohol, he came up empty handed. Undeterred, he researched how silly putty itself is made, and based on its list of ingredients, decided to seek out some sort of silcone-based lubricant.

He headed out to the local sex shop, and spent some time browsing through the “personal lubricant” section, in hopes of finding what he needed. He settled on ”Gun Oil”, a silicone lubricant that also contained Dimethicone, an item on the ingredient list of the lubricant he initially used to make the batch of magnetic putty.

After adding the lubricant, he found that the putty retained its texture, but flowed far more easily. The thinner putty also consumes rare earth magnets more quickly than its unaltered brethren, as you can see in the picture above.

We’re not sure how far you could push the ferro-putty before it would become a mess, but it’s certainly warrants further experiments.

[Thanks, Mike]

Magnetism Makes Silly Putty Fun Again

The image above is a screen capture from a video clip where the black ooze gobbles up that rare-earth magnet. It’s actually a blob of Silly Putty which was slightly altered to add magnetic properties. [Mikeasaurus] grabbed some ferric iron oxide powder from an art supply store and donned gloves and a dust mask while massaging it into the silicone polymer. If you get the right mix of the two materials you end up with a flowing substance that performs mysteriously when exposed to a magnetic field.

Check out the video after the break to see some of the tricks that [Mikeasaurus] can do. The putty really looks like it has a life of its own. It will stretch a remarkable distance to get close to the magnets (amorphous stretch). If left in contact with one it will fully engulf it and then form an orb.

Now, is there any way to use this with electromagnetic fields to build a morphing robot?

Continue reading “Magnetism Makes Silly Putty Fun Again”

Magnetic SMD Pick And Place

magnetic_pick_and_place

[svofski] sent us this pick and place robot (Google translation) that he found , and it’s quite unique. The majority of the components that make up this pick and place have been recycled from old computer equipment. The X-axis motion is accomplished using old printer parts, while an old CD-ROM drive was gutted to provide motion along the Y-axis. Floppy drive components were ultimately chosen to give the pick and place Z-axis motility.

What makes this pick and place unique however is the way in which components are moved. Most pick and place devices we have seen rely on suction in order to lift and carry components, but this one uses a magnet instead. The machine is used to build small circuit boards for a robotics platform offered on the builder’s web site, which primarily utilizes SMD parts. Once they realized that the majority of their small components were ferromagnetic, they built a hand-wound electromagnet to lift them. While the design limits the usage of the device to strictly ferromagnetic parts, they have a very specific need, which this fills perfectly.

Another unique aspect of this pick and place is the grooved table that sits under the workpiece. It is used to route up to four reels of SMD components, with the placement head providing all of the reel motion instead of relying on separate motors.

If you have a few minutes, be sure to check out the video of the pick and place at work.