Affordable Ground-Penetrating Radar

While you might think of radar pointing toward the skies, applications for radar have found their way underground as well. Ground-penetrating radar (GPR) is a tool that sends signals into the earth and measures their return to make determinations about what’s buried underground in much the same way that distant aircraft can be located or identified by looking for radar reflections. This technology can also be built with a few common items now for a relatively small cost.

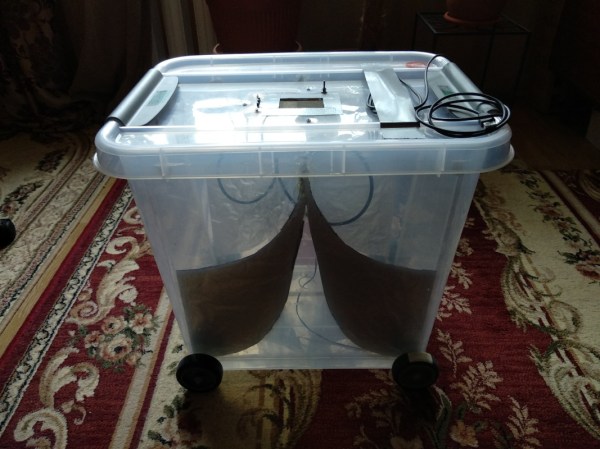
This is a project from [Mirel] who built the system around a Arduino Mega 2560 and antipodal Vivaldi antennas, a type of directional antenna. Everything is mounted into a small cart that can be rolled along the ground. A switch attached to the wheels triggers the radar at regular intervals as it rolls, and the radar emits a signal and listens to reflections at each point. It operates at a frequency range from 323 MHz to 910 MHz, and a small graph of what it “sees” is displayed on an LCD screen that is paired to the Arduino.

Using this tool allows you to see different densities of materials located underground, as well as their depths. This can be very handy when starting a large excavation project, detecting rock layers or underground utilities before digging. [Mirel] made all of the hardware and software open-source for this project, and if you’d like to see another take on GPR then head over to this project which involves a lot of technical discussion on how it works.

Open-Source Robotic Arm For All Purposes

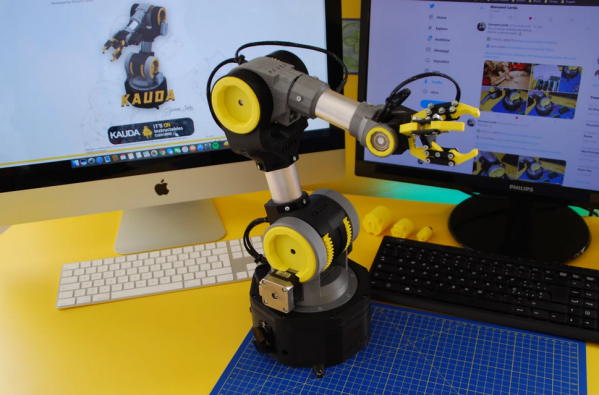
A set of helping hands is a nice tool to have around the shop, especially if soldering or gluing small components is a common task. What we all really want, though, is a robotic arm. Sure, it could help us set up glue or solder but it can do virtually any other task it is assigned as well. A general-purpose tool like this might be out of reach of most of us, unless we have a 3D printer to make this open-source robotic arm at home.

The KAUDA Robotic Arm from [Giovanni Lerda] is a five-axis arm with a gripping tool and has a completely open-source set of schematics so it can be printed on any 3D printer. The robot arm uses three stepper motors and two servo motors, and is based on the Arduino MEGA 2560 for control. The electrical schematics are also open-source, so getting this one up and running is just an issue of printing, wiring, and implementing some software. To that end there are software examples available, and they can easily be modified to fit one’s robotic needs.

A project like this could be helpful for any number of other projects, or also just as a lesson in robotics for yourself or even in a classroom, since many schools now have their own 3D printers. With everything being open-source, this is a much simpler endeavor now than other projects we’ve seen that attempted to get robotic arms running again.

Continue reading “Open-Source Robotic Arm For All Purposes”

Hacklet 26 – Arduino Projects

Arduino is one of those boards that has become synonymous with hacking and making. Since its introduction in 2005, over 700,000 official Arduino boards have been sold, along with untold millions of compatible and clone boards. Hackers and makers around the world have found the Arduino platform a cheap and simple way to get their projects off the ground. This weeks Hacket focuses on some of the best Arduino based projects we’ve found on Hackday.io!

drawingbot[Niazangels] gets the ball – or ballpoint pen – rolling with Roboartist, a robot which creates line drawings. Roboartist is more than just a plotter though. [Niazangels] created a custom PC program which creates line drawings from images captured by a webcam. The line drawings are converted to coordinates, and sent to an Arduino, which controls all the motors that move the pen. [Niazangels] went with Dynamixel closed loop servo motors rather than the stepper motors we often see in 3D printers.

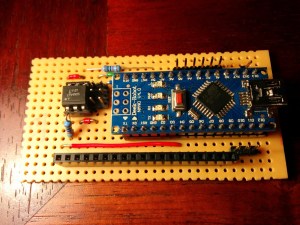
tape[Peter Edwards] is preserving the past with Tapuino, the $20 C64 Tape Emulator. Plenty of programs for the Commodore 64, 128, and compatibles were only distributed on tape. Those tapes are slowly degrading, though the classic Commodore herdware is still going strong. Tapuino preserves those tapes by using an Arduino nano to play the files from an SD card into the original Datasette interface. [Peter] also plans to add recording functionality to the Tapuino, which will make it the total package for preserving  your data. All that’s missing is that satisfying clunk when pressing the mechanical Play button!

infinity

[Dushyant Ahuja] knows what time it is, thanks to his Infinity Mirror Clock. This clock tells time with the help of some WS2812B RGB LED. [Dushyant] debugged the clock with a regular Arduino, but when it came time to finish the project, he used an ATmega328 to create an Arduino compatible board from scratch. Programming is easy with an on-board Bluetooth module. [Dushyant] plans to add a TFT lcd which will show weather and other information when those power-hungry LEDs are switched off.

alarm2[IngGaro] built an entire home alarm system with his project Arduino anti-theft alarm shield. [IngGaro] needed an alarm system for his home. That’s a lot to ask of a standard ATmega328p powered Arduino Uno. However, the extra I/O lines available on an Arduino Mega2560 were just what the doctor ordered. [IngGaro] performed some amazing point-to-point perfboard wiring to produce a custom shield that looks and works great! The alarm can interface with just about any sensor, and can be controlled via the internet. You can even disarm the system through an RFID keycard.

Want MORE Arduino in your life? Check out our curated Arduino List!

That’s about all the millis()  we have for this weeks Hacklet. As always, see you next week. Same hack time, same hack channel, bringing you the best of Hackaday.io!