Breathing New Life Into An Old Key

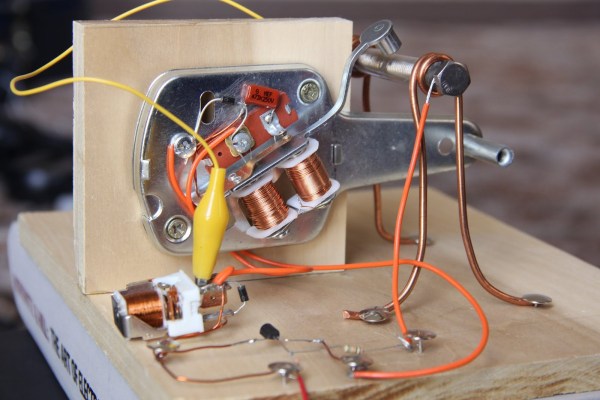
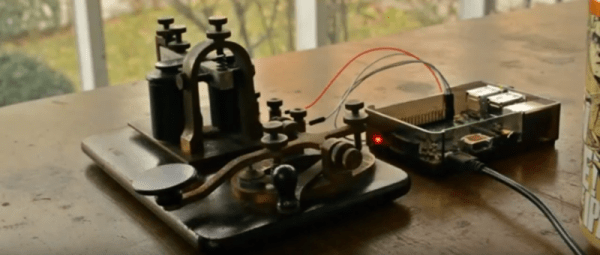
For most of us who have experimented with Morse code, the oldest key we are likely to have used will have been a piece of military surplus kit from the Second World War era. [Kyle Gabriel] however is a lucky man. His grandfather left him his key-on-board telegraph practice set, a vintage key and telegraph sounder arrangement used to learn Morse code in the days when the telegraph was king. Rather than keep the set merely as an heirloom, [Kyle] set about bringing it up to date by interfacing it to a Raspberry Pi and writing a Morse reader program.

Along the way [Kyle] had to contend with debouncing the switching signal from the key, considering an RC network before settling on a software debounce timer. He provides a brief synopsis of the mechanics of Morse decoding software, and a demonstration of the code in action which you can see in the video below the break.

[Kyle’s] decoding software, beatbybeat, is on GitHub. We can see it will be a useful tool for anyone interested in Morse, or who is writing their own Morse software.

Morse code has featured on these pages more than a few times over the years. Of relevance to this piece are an Arduino decoding Morse code, a more up-to-date practice oscillator with a home-made key, and a couple of other vintage telegraphs reading RSS feeds and reading emails.

Continue reading “Breathing New Life Into An Old Key”

Tiny USB Morse Code Beacon

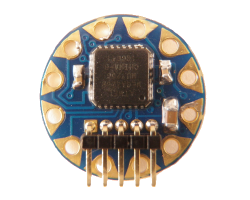
It is reasonably easy to make a microcontroller spit out some Morse code. What makes [pavlin’s] take on this project interesting is that it resides on a tiny USB board with an ARM processor. The design for the board is available with single-sided artwork suitable for production using simple methods like toner transfer.

The STM device has a built-in USB bootloader. It can also act as a serial port, which makes the project very simple. The only external parts are a speaker and an optoisolator. The program provides a command line interface over the serial port that you can use to program the message and set other options like speed and the delay between messages. The code is available on GitHub.

You might argue that a beacon shouldn’t need a USB port, and we’ve seen an alternative that fits the bill. If you want a much larger Arduino-based keyer, we’ve seen those, too.

Free Cell Data Transfer With Slowest Morse Code Ever

Readers of a certain age will remember the payphone trick of letting the phone ring once and then hanging up to get your quarter back. This technique was used with a pre-planned call time to let someone know you made it or you were okay without accruing the cost of a telephone call. As long as nobody answered you didn’t have to pay for the call, and that continues to be the case with some pay-per-minute cellphone plans.

This is the concept behind [Antonio Ospite’s] ringtone data transfer project called SaveMySugar. Don’t judge him, this work has been ongoing for around ten years and started back when cellphone minutes were a concern. We’re just excited to see that he got the excruciatingly slow thing to work.

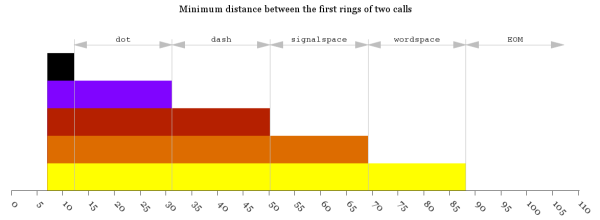
Those wanting to dig down to the nitty-gritty of the protocol (and you should be one of them) will want to read through the main project page. The system works by dialing the cellphone, letting it ring once, then hanging up. The time between redials determines a Morse code dot, dash, or separation between characters. Because you can’t precisely determine how long it will take each connection to read, [Antonio] built ‘noise’ measurement into the system to normalize variations. The resulting data transfer works quite well. He was able to transfer the word “CODEX” in just six minutes and thirty seconds. But it is automatic, so what do you care? See the edge-of-your-seat-action play out in the video below.

If you can’t stomach that baud, here’s a faster Morse code data transmitter but it doesn’t use the phone.

Continue reading “Free Cell Data Transfer With Slowest Morse Code Ever”

Raspberry Pi Communication Via LASER

[Nick Touran] wanted to make two Raspberry Pi’s communicate wirelessly. There are lots of options, but [Nick] used a LASER and a photoresistor, along with Morse code. If you don’t find Morse code fancy enough, you could always refer to it as OOK (on/off keying). The circuit uses a common LASER module and an ordinary photoresistor that varies in resistance based on light. A resistor forms a voltage divider with the photoresistor and an external A/D reads the resulting voltage.

The circuit works, but we couldn’t help but notice a few items. Not all photoresistors are as sensitive to the same light wavelengths, so for the maximum range you’d want to pick a particular photoresistor.  While the analog to digital converter is certainly workable, we couldn’t help but wonder if you couldn’t set up the divider to use the inherent threshold of the Raspberry Pi’s input pins for a simpler circuit. Of course, if you used the same technique with an Arduino, you could use the built-in A/D converter, and the A/D converter is probably easier to get working.

Continue reading “Raspberry Pi Communication Via LASER”

Arduino Teaches Morse Code

You may wonder why anyone would want to learn Morse code. You don’t need it for a ham license anymore. There are, however, at least three reasons you might want to learn it anyway. First, some people actually enjoy it either for the nostalgia or the challenge of it. Another reason is that Morse code can often get through when other human-readable schemes fail. Morse code can be sent using low power, equipment built from simple materials or even using mirrors or flashlights. Finally, Morse code is a very simple way to do covert communications. If you know Morse code, you could privately talk to a concealed computer on just two I/O lines. We’ll let you imagine the uses for that.

In the old days, you usually learned Morse code from an experienced sender, by listening to the radio, or from an audio tape. The state of the art today employs a computer to randomly generate practice text. [M0TGN] wanted a device to generate practice code, so he built it around an Arduino. The device acts like an old commercial model, the Datong D70, although it can optionally accept an LCD screen, something the D70 didn’t have.

You can see the project in operation in the video below. Once you learn how to read Morse code, you might want to teach your Arduino to understand it, too. Or, you can check out some other Morse-based projects.

Continue reading “Arduino Teaches Morse Code”

Hacklet 69 – Morse Code Projects

With over 160 years of history under its belt, Morse code is by far the oldest digital signaling system known to man. Originally developed for telegraph systems, [Samuel Morse’s] code has been sent over wires, via radio, and even with flashes of light. Hackers, makers and engineers have been working with Morse code throughout history. For many years, simple code keys and practice oscillators were the “hello world” of hobby electronics. In fact, a company which started out selling a Morse key has gone on to become one of the largest electronic component distributors in the world. The company still bears the name of that project: Digi-Key. This week’s Hacklet is all about some of the best Morse code projects on Hackaday.io!

key1We start with [voxnulla] and Morse key HID + ugly hack. [voxnulla] found an old key at his favorite thrift store. It was dusty, greasy, and for some reason had been painted hospital green. Once the paint and grime were removed, and the original wooden plate restored, the key actually looked pretty good. [Voxnulla] then decided to turn it into a USB Human Interface Device (HID), emulating the keyboard of his computer. An Arduino converts Morse code characters tapped at the key into keystrokes over USB. As [voxnulla] knows, when butterflies aren’t available, real programmers drive vim with a Morse key!

code2Next up is [Voja Antonic] with Daddy, I don’t have the key. If you didn’t read [Voja’s] article about Hacking the Digital and Social System, check it out! Many apartments have an intercom system where you have to “buzz” someone in, activating a solenoid lock in the door. [Voja] inserted a Microchip PIC12 series microcontroller between the speaker and the unlock button. All a user has to do is tap out the right Morse code password on the call button in the lobby. If the code is accepted, the PIC unlocks the door, and you’re in!


morseterminal[kodera2t] took things into the digital age with Stand-alone Tiny Morse code encoder/decoder. This project grew out of his general purpose Portable tiny IoT device project. [kodera2t] rolled his own Arduino-compatible board for this project. The tiny ATmega1284 powered computer allows him to encode and decode Morse code. A smartphone-sized keyboard and a lilliputian OLED display serve as the user interface, while rotary encoder allows for variable code speed. You can even “tap” Morse out on one of the tactile buttons!


morselightFinally, we have [Yannick (Gigawipf)] with Portable (morsing) 100W led flashlight. 100 watt LEDs have gotten quite cheap these days, and they’re perfect when you absolutely, positively have to blind everyone around you. These LEDs can also be switched on and off quickly, which makes them perfect for Morse code. In years past, mechanical shutters had to be used to perform the same feat. [Yannick] used a 5000mAh 5S Zippy Li-Po to supply electrons to this hungry beast, while a 600 Watt constant current boost converter keeps that power under control. An Arduino running Morse code converter software controls the boost convert and LED.  [Yannick] uses his computer to send a message over the Arduino’s serial link, and the light does the rest, flashing out the message for all to see.

If you want more Morse goodness, check out our brand new Morse code project list! My Morse is a bit rusty, so if I wasn’t able to copy your transmission and missed your project, don’t hesitate to drop me a message on Hackaday.io. That’s it for this week’s Hacklet. As always, see you next week. Same hack time, same hack channel, bringing you the best of Hackaday.io!

The Alexanderson Transmitter: Very-low Frequency Radio Rides Again!

Is your ham radio rig made of iron and steel? Is it mechanically driven? Classified as a World Heritage Site? We didn’t think so. But if you’d like to tune in one that is, or if you’re just a ham radio geek in need of a bizarre challenge, don’t miss Alexanderson Day 2015 tomorrow, Sunday, June 28th

The Alexanderson Transmitter design dates back to around 1910, before any of the newfangled tube technology had been invented. Weighing in at around 50 tons, the monster powering the Varberg Radio Station is essentially a high-speed alternator — a generator that puts out 17.2 kHz instead of the 50-60 Hz  that the electric companies give us today.

Most of the challenge in receiving the Alexanderson transmitter broadcasts are due to this very low broadcast frequency; your antenna is not long enough. If you’re in Europe, it’s a lot easier because the station, SAQ, is located in Sweden. But given that the original purpose of these behemoths was transcontinental Morse code transmission, it only seems sporting to try to pick it up in the USA. East Coasters are well situated to give it a shot.

And of course, there’s an app for that. The original SAQrx VLF Receiver and the extended version both use your computer’s sound card and FFTs to extract the probably weak signal from the noise.

We scouted around the net for an antenna design and didn’t come up with anything more concrete than “few hundred turns of wire in a coil” plugged into the mic input.  If anyone has an optimized antenna design for this frequency, post up in the comments?

Thanks [Martin] for the tip!