64×16 LED MQTT Laundry Display

When you have an MQTT broker receiving messages, you want to be able to see them. [Xose Pérez] already had a system set up that sent him notifications, but he had a pair of 32×16 LED matrices, so he decided to make a big, bright sign to let him know when he got an important message sent to the broker.

[Xose Pérez] had already built a laundry monitor which was sending messages to an MQTT broker so he wouldn’t forget his laundry sitting in the washing machine. To communicate with the broker, he used an ESP-12. He had already ported an Arduino library for the Holtek HT1362C display drivers used by the matrices to work with his driver board.

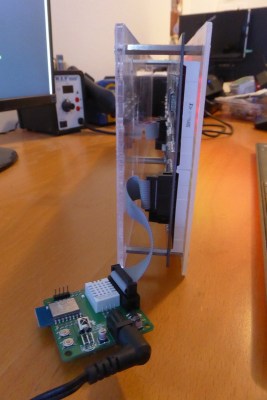
mqtt-led-matrix-driver-boardHe wanted to try out SMD soldering so he built a custom PCB to hold the ESP-12, power supply, passive components, and a connector and he describes his methods and results. Instead of hardcoded messages, he wanted the system to be configurable and display messages coming in, not only from his laundry system, but also from other sensors. A web interface, built with jQuery and WebSockets, running on the ESP-12 allows the user to subscribe to a topic on the broker and show a customized name and value on the display when a payload is available.
All-in-all, [Xose Pérez] has posted a great tutorial in which he goes over the hardware he built, the libraries he used, SMD soldering, how he made the enclosure, and even his choice in IDE (PlatformIO). He also posted the software, board designs and enclosure models software and hardware on bitbucket. The end result is a great looking LED matrix that displays not only his laundry’s status, but also anything else he wants to from his MQTT broker.

If you want to try your hand with MQTT, the ESP8266 is a wonderful device for sensor nodes, and any Linux box (like the Raspberry Pi) makes an easy broker. Check out [Elliot Williams’] Minimal MQTT series and you will be up and running in no time.

We’re Fans Of Dave’s Fans

Hackaday.io contributor extraordinaire [davedarko] gets hot in the summer. We all do. But what separates him from the casual hacker is that he beat the heat by ordering four 120 mm case fans. He then 3D printed a minimalistic tower frame for the fans, and tied them all together with a ULN2004 and an ESP8266. The whole thing is controlled over the network via MQTT. That’s dedication to staying cool.

We really like the aesthetics of this design. A fan made up of fans! But from personal experience, we also know that these large case fans can push a lot of air fairly quietly. That’s important if you’re going to stand something like this up on your desk. While we’re not sure that a desk fan really needs networked individual PWM speed control, we can see the temptation.

Now that they’re individually controlled, nothing stops [davedarko] from turning this into a musical instrument, or even using the fans to transmit data. The only thing we wouldn’t do, despite the temptation to stick our fingers in the blades, is to complicate the design visually. Maybe that would finally teach the cat not to walk around on our desk.

Dumbing Down A Smart Switch

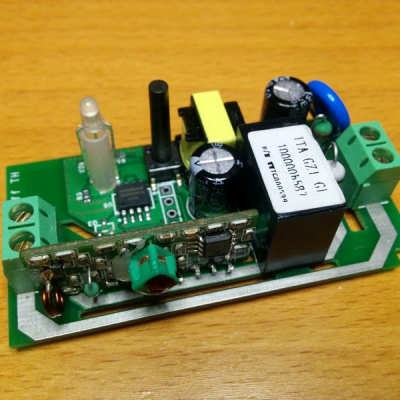
Internet of Everything is the way to go for home automation these days. ITEAD makes an ESP-8266 switch that IoT-ifies your appliances. If you still have an ancient, 433 MHz style radio switch system, they even make one that does WiFi and 433 MHz. But if you’re too cheap to shell out for the dual-mode version, you can always add a $1 433 MHz radio yourself. Or at least, that’s what [Tinkerman] did.

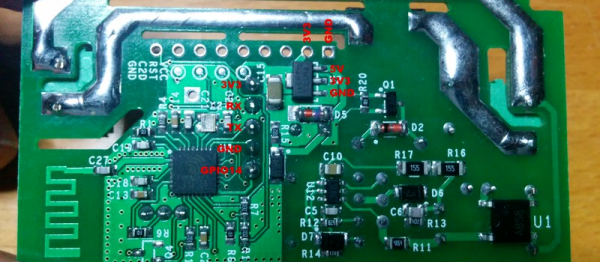
IMG_20160522_163814x_thumbnailAside from the teardown and reverse-engineering of the WiFi-enabled switch, [Tinkerman] also flashed custom firmware into the switch’s ESP-8266, and worked it all into his existing home Node-RED framework. Now he’s got more possible ways to turn on his living-room lights than any person could possibly hope for!
If you want to get into this whole WiFi-based home automation game, you could do worse than to have a look at the series we ran on MQTT just a little while ago. Seeing [Tinkerman]’s Node-RED demo makes us think that we’ll have to give that a look for our home system as well.

Minimal MQTT: Power And Privacy

In this installment of Minimal MQTT, I’m going to cover two loose ends: one on the sensor node side, and one on the MQTT server side. Specifically, I’ll tackle the NodeMCU’s sleep mode to reduce power and step you through bridging MQTT servers to get your data securely out of your home server and into “the cloud”, which is really just other people’s servers.

If you’re just stepping into this series now, you should really check out the other three posts, where I set up a server, then build up some sensor nodes, and then flesh-out a few ways to control everything from your phone or the web. That’s the coolest material, anyway. This last installment just refines what we’ve built on. Let’s go!

Continue reading “Minimal MQTT: Power And Privacy”

Minimal MQTT: Control And Clients

So you’ve built a central server and filled your house with WiFi-connected nodes all speaking to each other using the MQTT protocol. In short, you’ve got the machine-to-machine side of things entirely squared away. Now it’s time to bring the humans into the loop! We’re going to explore a couple graphical user interfaces.

You could build a physical knob and/or LED display for every little aspect of your entire system, but honestly, this is where GUIs really shine. In this installment of Minimal MQTT, we’re going to look at human-friendly ways of consuming and producing data to interact with your connected sensors, switches, and displays. There are a ton of frameworks out there that use MQTT to build something like this, but we’re going to cut out the middle-man and go straight for some GUI MQTT clients.

Continue reading “Minimal MQTT: Control And Clients”

Minimal MQTT: Networked Nodes

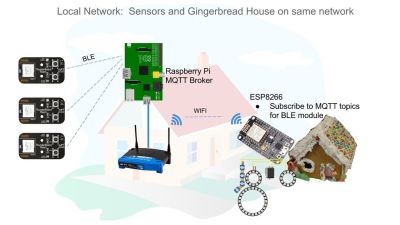
Last time on Minimal MQTT, we used a Raspberry Pi to set up an MQTT broker — the central hub of a home data network. Now it’s time to add some sensor and display nodes and get this thing running. So pull out your ESP-8266 module of choice, and let’s get going.

DSCF8443For hardware, we’re using a WeMos D1 Mini because they’re really cute, and absolutely dirt cheap, but basically any ESP module will do. For instance, you can do the same on the simplest ESP-01 module if you’ve got your own USB-serial adapter and are willing to jumper some pins to get it into bootloader mode. If you insist on a deluxe development board that bears the Jolly Wrencher, we know some people.

NodeMCU: Getting the Firmware

We’re using the NodeMCU firmware because it’s quick and easy to get running. But you’re not stuck with NodeMCU if you want to go it alone: MQTT has broad support. [TuanPM] ported over an MQTT library to the native ESP8266 SDK and of course there’s espduino, a port for an Arduino-plus-ESP combo. He also ported the MQTT module to NodeMCU that we’ll be using today. Thanks, [TuanPM]!

Continue reading “Minimal MQTT: Networked Nodes”

When The Smart Hits The Fan

A fan used to be a simple device – motor rotates blades, air moves, and if you were feeling fancy, maybe the whole thing oscillates. Now fans have thermostats, timers, and IR remotes. So why not increase the complexity by making a smart fan with an IoT interface?

[Casper]’s project looks more like a proof of concept or learning platform than a serious attempt at home automation. His build log mentions an early iteration based on a Raspberry Pi. But an ESP8266 was a better choice and made it into the final build, which uses an IR LED to mimic the signals from the remote so that all the stock modes of the fan are supported. The whole thing is battery powered and sits on a breadboard on top of the fan, but we’ll bet that a little surgery could implant the interface and steal power internally. As for interfaces, take your pick – an iOS app via the SmartThings home automation platform, through their SmartTiles web client, or using an Amazon Echo. [Casper] mentions looking into MQTT as well but having some confusion; we’d suggest he check out [Elliot Williams]’ new tutorial on MQTT to get up to speed.

Continue reading “When The Smart Hits The Fan”