Infrared Controlled Remote Firework Igniter

Firework Igniter

With Independence Day just around the corner, American hackers are likely to find themselves blowing things up in the name of Independence. It’s all great fun but it can also be dangerous. The standard ignition method of “use a lighter and run away really fast” is not exactly safe. Instead of lighting your fireworks the old-fashioned way, why not follow [Facelesstech’s] example and build your own infrared controlled remote igniter?

The first step was to decide how to actually ignite the firework fuse. [Facelesstech] had seen others use a car cigarette lighter for this purpose and he decided to follow in their footsteps. He started by removing the cigarette lighter from his own car and pulling it apart. Only one component was needed for this hack. The main heating element is a small disk with a “stem” on the end. If you apply 12V to the stem and attach the outer edge of the disk to ground, the igniter will quickly become hot.

[Facelesstech] originally thought he could just solder some wires to the device. However, the heating element gets so hot that the solder just melts every time it’s turned on. He then got creative and drilled a hole in a small block of wood that fits the heating element. The element is bolted into the wood and the bolt is used as a conductor for the electrical power.

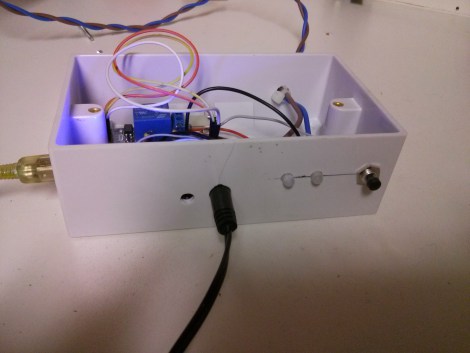
The heating element is powered via a 12V relay. The relay is controlled by an Arduino Nano. The Nano allows two modes of operation. With the first mode, you simply press a button and the Nano will start a five second timer. The idea is to give you enough time to run to a safe distance before the firework is ignited. This isn’t much different from the old-fashioned method, but it does give you a slightly extended fuse. The second mode is where the project really shines. The Nano is also hooked up to an infrared receiver. This allows [Facelesstech] to press a button on an old television infrared remote control to active the igniter. This is a clever solution because it allows you to get to a safe distance without having to run a long wire. It’s also simple and inexpensive. Be sure to watch the video test of the system below. Continue reading “Infrared Controlled Remote Firework Igniter”

Laser Spirograph

laser-spirograph

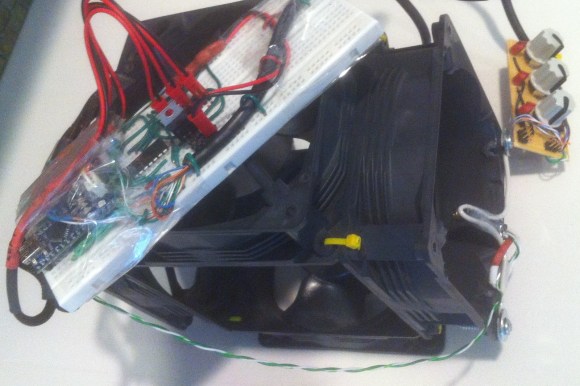
Here’s a weekend junk bin project if we’ve ever seen one. [Pat] used a quartet of computer fans to make his laser Spirograph. Deciding to try this simple build for yourself will run you through a lot of basics when it comes to interfacing hardware with a microcontroller. In this case it’s the Arduino Nano.

The Spirograph works by bouncing a laser off of mirrors which are attached to the PC fans. When the fans spin the slight alignment changes cause the laser dot to bob and weave in visually pleasing ways. You can catch twenty minutes of the light show in the clip after the break.

Three of the fans have mirrors attached, the housing of the fourth is used to host the laser diode and make assembly easier. A TC4469 motor driver is used to connect the fans to the Arduino. The light show can be manually controlled by turning the trio of potentiometers which are read using the Arduino’s ADC.

If you manage your way through this build perhaps you’ll move on to a setup that throws laser light all over the room.

Continue reading “Laser Spirograph”

[David] Hand Soldered A Blinky Ball… And You Can Too!

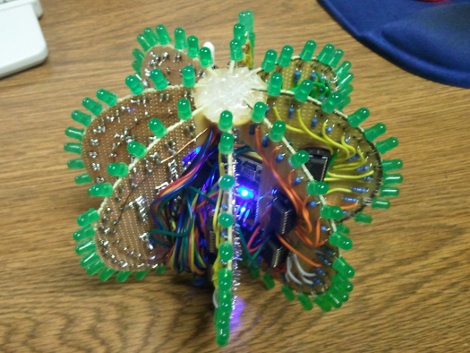
This is a blinky ball that [David] designed, built, and programmed himself. Does it look familiar? It should, he took his inspiration from the original prototype, and the Hackerspace-produced derivative. [David’s] version is not as small, or as blinky, but in our minds the development process is the real reason for building something like this. He took a great idea and figured out how he could pull it off while pushing his skill set, staying within his time and budget constraints.

The project is powered by an Arduino nano which resides in the core of the ball. [David] used protoboard sourced locally for each of the slices, soldering green LEDs along the curved edges, and added shift registers to drive them. The ball is driven by a LiPo battery which can power it for about 45 minutes. You can see the animation designs he coded in the clip after the break.

Continue reading “[David] Hand Soldered A Blinky Ball… And You Can Too!”

Building A Game Clock For Go Or Chess

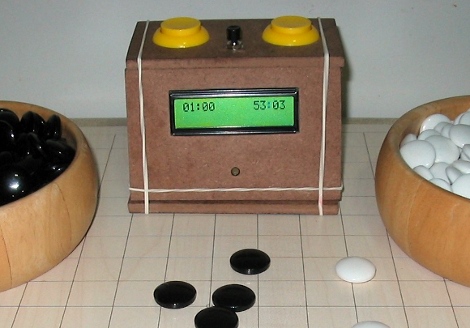
[Matias] is just getting into hobby electronics and decided to push the limits of his skill by building this game clock (site dead try Internet Archive). He comes from a software design background and that really shows through in the UI design seen in the video after the break. We enjoy the journey through his prototyping process which started with an Arduino and a breadboard, and ended with this standalone timer.

After building the first working prototype with four buttons and a character LCD, he migrated to a plastic ice cream container as an enclosure. This worked well enough, but the flimsy case needed an upgrade. As he looked toward the next version he decided to move to an Arduino Nano board to save on space. The rest of the components were soldered to some protoboard, with a pair of pin headers to receive the Nano. The finished board is the same length as the Nano and only about twice as wide.

The box was modeled on the computer (it looks like SketchUp to us be we could be wrong) then cut from pieces of Masonite. It hosts the character LCD with a pair of arcade buttons for each player to shift the time burden to his or her opponent. The middle button pauses the game, and there’s a trimpot on the back to adjust the screen contrast. [Matias] managed to include a surprising number of settings which will make this little box useful for a wide range of game types.

Continue reading “Building A Game Clock For Go Or Chess”

Smother Yourself In Addressable LEDs

Guess where this guy’s headed in his suit of many colors? If you said Burning Man give your self a pat on the back. After making a half-hearted EL suit for the festival in 2010 [Sander] decided he needed to step it up this year. He bought and affixed 200 LED modules to this suit so that he could light up the night.

They’re mounted in a grid, and in order to keep the changing patterns orderly he mapped the physical location of each in his code using a two-dimensional array. The controller uses an Arduino nano to push the patterns out to the array via SPI.

[Sander] included several different visual effects for the controller. One strobes the suit starting from the right cuff when he shakes someone’s hand. There’s also an audio spectrum analyzer chip and microphone that let him pulse the lights to music. You can see how bright this thing is in the image above, but to get the full effect shouldn’t skip the video after the break.

He’s entered the project into the Full Spectrum Laser Cutter giveaway. If he wins, we expect laser cut goodness for next year’s festival!

Continue reading “Smother Yourself In Addressable LEDs”

Repair Stuck IPod Nano Buttons

A system is only as strong as its weakest link and [Roberto Barrios] found that on the sixth generation iPod nano the buttons are the problem. It makes sense that the buttons would be exposed to wear since they’re movable parts. The issue isn’t one of contacts or springs wearing out, but how the buttons are assembled. Each consist of a couple of parts; the tactile piece that you see and press, the electrical switch which converts that force into an electrical signal, and a shim that bridges the gap between the two.

After two months of use the iPod [Roberto] was fixing had stopped responding to presses of the Power button. It turns out that the shims are attached with double-sided tape. Inspection of the internals revealed that the shim had slid to one side and no longer made contact with the electrical system. His solution was to remove the tape and clean off the goo, then reattach the shims using “two-part metal cement”.

With the shim back in place all is well but he made sure to execute this fix on all of the buttons before reassembly.

IPod Nano 6g Closer To Being Cracked

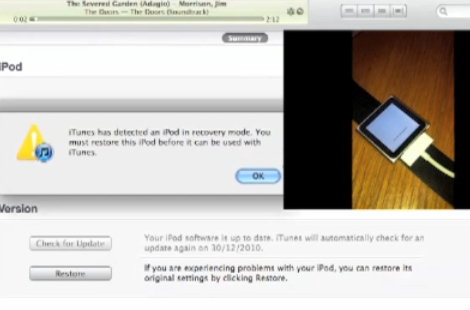
[Steven Troughton-Smith] figured out how to push signed firmware through to the iPod Nano 6g. This is accomplished by modifying iRecovery to recognize the device on the USB after forcing a recovery mode reboot. So no, this doesn’t mean that it has been cracked since it checks the firmware you push and reboots if it’s not approved. But if you can figure out how to craft a custom image that passes the check you can call yourself a jailbreak author.

Continue reading “IPod Nano 6g Closer To Being Cracked”