Thanks For The Great Comments!

Every once in a while, there’s a Hackaday article where the comments are hands-down the best part of a post. This happened this week with Al Williams’ Ask Hackaday: How Do You Make Front Panels?. I guess it’s not so surprising that the comments were full of awesome answers – it was an “Ask Hackaday” after all. But you all delivered!

A technique that I had never considered came up a few times: instead of engraving the front of an opaque panel, like one made of aluminum or something, instead if you’re able to make the panel out of acrylic, you can paint the back side, laser or engrave into it, and then paint over with a contrast color. Very clever!

Simply printing the panel out onto paper and laminating it got a number of votes, and for those who are 3D printing the enclosure anyway, simply embossing the letters into the surface had a number of fans. The trick here is in getting some contrast into the letters, and most suggested changing filament. All I know is that I’ve tried to do it by painting the insides of the letters white, and it’s too fiddly for me.

But my absolute favorite enclosure design technique got mentioned a number of times: cardboard-aided design. Certainly for simple or disposable projects, there’s nothing faster than just cutting up some cardboard and taping it into the box of your desires. I’ll often do this to get the sizes and locations of components right – it’s only really a temporary solution. Although some folks have had success with treating the cardboard with a glue wash, paint, or simply wrapping it in packing tape to make it significantly more robust. Myself, if it ends up being a long-term project, I’ll usually transfer the cardboard design to 3DP or cut out thin plywood.

I got sidetracked here, though. What I really wanted to say was “thanks!” to everyone who submitted their awesome comments to Al’s article. We’ve had some truly hateful folks filling the comment section with trash lately, and I’d almost given up hope. But then along comes an article like this and restores my faith. Thanks, Hackaday!

Giant Brains, Or Machines That Think

Last week, I stumbled on a marvelous book: “Giant Brains; or, Machines That Think” by Edmund Callis Berkeley. What’s really fun about it is the way it sounds like it could be written just this year – waxing speculatively about the future when machines do our thinking for us. Except it was written in 1949, and the “thinking machines” are early proto-computers that use relays (relays!) for their logic elements. But you need to understand that back then, they could calculate ten times faster than any person, and they would work tirelessly day and night, as long as their motors keep turning and their contacts don’t get corroded.

But once you get past the futuristic speculation, there’s actually a lot of detail about how the then-cutting-edge machines worked. Circuit diagrams of logic units from both the relay computers and the brand-new vacuum tube machines are on display, as are drawings of the tricky bits of purely mechanical computers. There is even a diagram of the mercury delay line, and an explanation of how circulating audio pulses through the medium could be used as a form of memory.

All in all, it’s a wonderful glimpse at the earliest of computers, with enough detail that you could probably build something along those lines with a little moxie and a few thousands of relays. This grounded reality, coupled with the fantastic visions of where computers would be going, make a marvelous accompaniment to a lot of the breathless hype around AI these days. Recommended reading!

Happy Birthday, Tetris!

Porting DOOM to everything that’s even vaguely Turing complete is a sport for the advanced hacker. But if you are just getting started, or want to focus more on the physical build of your project, a simpler game is probably the way to go. Maybe this explains the eternal popularity of games like PONG, Tetris, Snake, or even Pac-Man. The amount of fun you can have playing the game, relative to the size of the code necessary to implement them, make these games evergreen.

Yesterday was Tetris’ 40th birthday, and in honor of the occasion, I thought I’d bring you a collection of sweet Tetris hacks.

On the big-builds side of things, it’s hard to beat these MIT students who used colored lights in the windows of the Green Building back in 2012. They apparently couldn’t get into some rooms, because they had some dead pixels, but at that scale, who’s complaining? Coming in just smaller, at the size of a whole wall, [Oat Foundry]’s giant split-flap display Tetris is certainly noisy enough.

Smaller still, although only a little bit less noisy, this flip-dot Tetris is at home on the coffee table, while this one by [Electronoobs] gives you an excuse to play around with RGB LEDs. And if you need a Tetris for your workbench, but you don’t have the space for an extra screen, this oscilloscope version is just the ticket. Or just play it (sideways) on your business card.

All of the above projects have focused on the builds, but if you want to tackle your own, you’ll need to spend some time with the code as well. We’ve got you covered. Way back, former Editor in Chief [Mike Szczys] ported Tetris to the AVR platform. If you need color, this deep dive into the way the NES version of Tetris worked also comes with demo code in Java and Lua. TetrOS is the most minimal version of the game we’ve seen, coming in at a mere 446 bytes, but it’s without any of the frills.

No Tetris birthday roundup would be complete without mentioning the phenomenal “From NAND to Tetris” course, which really does what it says on the package: builds a Tetris game, and your understanding of computing in general, from the ground up.

Can you think of other projects to celebrate Tetris’ 40th? We’d love to see your favorites!

Sometimes It’s Not The Solution

Watching a video about a scratch-built ultra-precise switch for metrology last week reminded me that it’s not always the projects that are the most elegant solutions that I enjoy reading about the most. Sometimes I like reading about hackers’ projects more for the description of the problem they’re facing.

A good problem invites you to brainstorm along. In the case of [Marco Reps]’s switches, for instance, they need to be extraordinarily temperature stable, which means being made out of a single type of metal to avoid unintentional thermocouple joints. And ideally, they should be as cheap as possible. Once you see one good solution, you can’t help but think of others – just reading the comments on that article shows you how inspiring a good problem can be. I’m not worried about these issues in any of my work, but it would be cool to have to.

Similarly, this week, I really liked [Michael Prasthofer]’s deep dive into converting a normal camera into a spectrometer. His solutions were all very elegant, but what was most interesting were the various problems he faced along the way. Things that you just wouldn’t expect end up mattering, like diffraction gratings being differently sensitive across the spectrum when light comes in from different angles. You can learn a lot from other people’s problems.

So, hackers everywhere, please share your problems with us! You think that your application is “too niche” to be of general interest? Maybe it’s another example of a problem that’s unique enough to be interesting just on its own. Let’s see what your up against. A cool problem is at least as interesting as a clever solution.

About Right

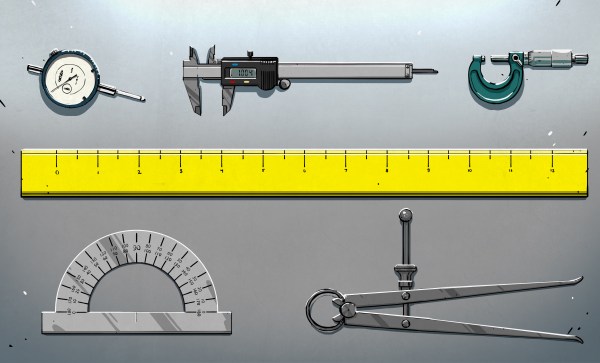
I really enjoyed reading Anne Ogborn’s piece on making simple DIY measurement devices for physical quantities like force, power, and torque. It is full of food for thought, if you’re building something small with motors and need to figure out how to spec them out.

A Push Stick

Aside from a few good examples, what I really took home from this piece is how easy it can be to take approximate measurements. Take the push stick, which is a spring-loaded plunger in a transparent barrel. You use it to measure force by, well, squeezing the spring and reading off how far it deflects. That’s obvious, but the real trick is in calibration by pushing it into a weighing scale and marking divisions on the barrel. That quickly and easily turns “it’s pressing this hard” into an actual numerical force measurement.

The accuracy and precision of the push stick are limited by the quality of your scale and the fineness of the pen tip that you use to mark the barrel. But when you’re just looking to choose among two servo motors, this kind of seat-of-the-pants measure is more than enough to buy the right part. Almost any actual measurement is better than a wild-ass guess, so don’t hold yourself to outrageous standards or think that improvised quantitative measurement devices aren’t going to get the job done.

Al Williams quoted a teacher of his as saying that the soul of metrology is “taking something you know and using it to find something you don’t know”, and that sums up this piece nicely. But it’s also almost a hacker manifesto: “take something you can do and use it to do something that you can’t (yet)”.

Got any good measurement hacks you’d like to share?

Institutional Memory, On Paper

Our own Dan Maloney has been on a Voyager kick for the past couple of years. Voyager, the space probe. As a long-term project, he has been trying to figure out the computer systems on board. He got far enough to write up a great overview piece, and it’s a pretty good summary of what we know these days. But along the way, he stumbled on a couple old documents that would answer a lot of questions.

Dan asked JPL if they had them, and the answer was “no”. Oddly enough, the very people who are involved in the epic save a couple weeks ago would also like a copy. So when Dan tracked the document down to a paper-only collection at Wichita State University, he thought he had won, but the whole box is stashed away as the library undergoes construction.

That box, and a couple of its neighbors, appear to have a treasure trove of documentation about the Voyagers, and it may even be one-of-a-kind. So in the comments, a number of people have volunteered to help the effort, but I think we’re all just going to have to wait until the library is open for business again. In this age of everything-online, everything-scanned-in, it’s amazing to believe that documents about the world’s furthest-flown space probe wouldn’t be available, but so it is!

It makes you wonder how many other similar documents – products of serious work by the people responsible for designing the systems and machines that shaped our world – are out there in the dark somewhere. History can’t capture everything, and it’s down to our collective good judgement in the end. So if you find yourself in a position to shed light on, or scan, such old papers, please do! And then contact some nerd institution like the Internet Archive or the Computer History Museum.

Tool-Building Mammals

It’s often said of us humans that we’re the only “tool-using mammals”. While not exclusive to the hacker community, a bunch of us are also “tool-building mammals” when we have the need or get the free time. I initially wanted to try to draw some distinction between the two modes, but honestly I think all good hackers do both, all the time.

We were talking about the cool variety of test probes on the podcast, inspired by Al Williams’ piece on back probes. Sometimes you need something that’s needle-thin and can sneak into a crimp socket, and other times you need something that can hold on like alligator clips. The infinite variety of jigs and holders that make it easier to probe tiny pins is nothing short of amazing. Some of these are made, and others bought. You do what you can, and you do what you need to.

You can learn a lot from looking at the professional gear, but you can learn just as much from looking at other hackers’ bodge jobs. In the podcast, I mentioned one of my favorite super-low-tech hacks: making a probe holder out of a pair of pliers and a rubber band to hold them closed. Lean this contraption onto the test point in question and gravity does the rest. I can’t even remember where I learned this trick from, but I honestly use it more than the nice indicator-arm contraptions that I built for the same purpose. It’s the immediacy and lack of fuss, I think.

So what’s your favorite way of putting the probe on the point? Home-made and improvised, or purpose-built and professional? Or both? Let us know!