It looks like we have a new space observatory! According to NASA, all the major deployments on the James Webb Space Telescope have been completed successfully. This includes the tricky sunshield deployment and tensioning, which went off this week without much in the way of trouble. The final major deployment, the unfolding of the starboard wing of the primary mirror of the telescope, was completed on Saturday while the spacecraft was still almost 400,000 km from its forever home orbiting Lagrange point L2. Mission controllers had allotted two weeks for the 300-odd deployments needed to turn the packaged machine into a working observatory. The remaining two weeks or so of flight include less dramatic tasks, such as trimming the shape of the primary mirror with servos that subtly alter the position and curvature of each of the 18 segments, plus a bunch of calibration tasks. But it looks like most of the really scary stuff is behind us now.
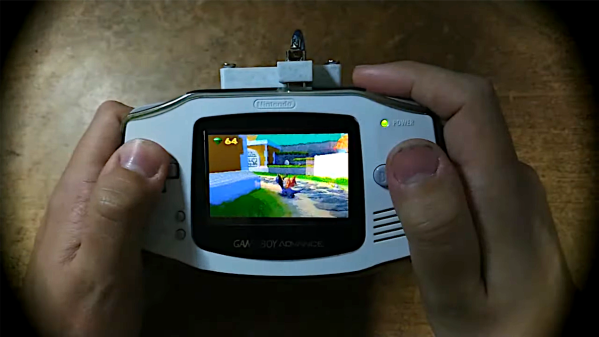
From the “Interesting Innards” department, if you’re a fan of either gaming or industrial CT scans, check out Scan of the Month’s look inside Nintendo handheld game consoles. They’ve put a bunch of games through computed tomography scans, and the results are really interesting, false-colored though they may be. Seeing the progression of technology from the original 1989 Game Boy to the Switch is fascinating. The side notes on the history and tech inside each one are pretty cool too.
A couple of weeks ago we mentioned Andrew Sink’s online low-poly generator, which takes any 3D model and allows you to control the number of polygons used to render it. He dropped us a line to let us know the tool proved popular enough that he had to move it off GitHub and onto a dedicated site. Check it out at its new home.
When something like this pops up in your feed, it seems like the best approach is to share it. It’s called DentalSlim, and claims to be the first intra-oral device designed for weight loss. It’s a hardware lock for your teeth, and it looks perfectly horrifying. The device is designed to be applied by a sadist dentist and effectively locks the lower jaw to the upper with magnets, allowing the wearer to open his or her mouth only enough to take a liquid diet. There’s also a provision for the wearer to unlock the device in an emergency, which is wise — can you imagine catching a stomach bug with your jaw locked shut? — but that seems to defeat the “hardware-enforced willpower” that the device is based on.
Have you got a bunch of filament spools lying around from all that 3D printing? Rather than put them to use rolling up strings of lights from the Christmas tree, here’s another idea: turn them into nice covered bird feeders. All you need to do is apply a rim around one side to hold the seed before hanging them out for the birds. We suppose walling off the space between the sides completely and drilling some holes could also turn them into birdhouses, too.
And finally, if your filament spool bird feeder isn’t attracting the attention of the neighborhood cats, perhaps it’s because they’ve found a nice, cozy spot to soak up some heat. At least that’s what some Starlink users are seeing as their feline friends cuddle up on Dishy McFlatface for a long winter’s nap. You see, the phased array antenna inside the enclosure gets pretty toasty, and cats are pretty much any-port-in-a-storm critters, so it’s only natural. We can’t imagine their choice of basking locale does much for data throughput, and it’s probably quite a laugh when the dish pivots to track a satellite. But it’s hard to feel sorry for something that sleeps 23-½ hours a day.