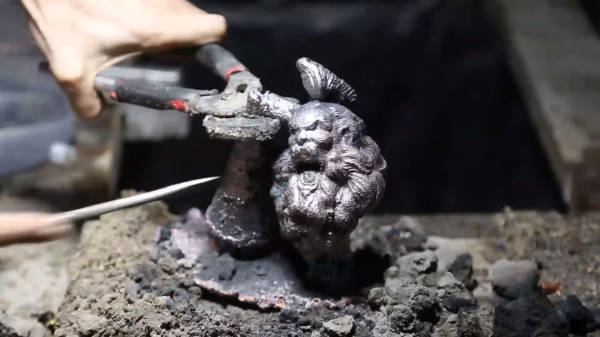
[3DTOPO] does a lot of metal casting (video link, embedded below). That’s obvious by the full and appropriate set of safety gear, a rarity on YouTube.
They had all the equipment to do it the normal way: craft or CNC out a master, produce a drag and a copy, make any necessary cores, and finally; pour the mold. This is a long and tedious process. It has a high rate of error, and there is a parting line.
Another set of methods are the lost ones. With these methods the master is produced out of a material like foam or wax. The master is surrounded by refractory and then melted, burned, or baked out of the mold. Finally the metal is poured in. Theoretically, a perfect reproduction is made without ever having to open the mold. Continue reading “Metal Casting With Single Shelled PLA Masters”→
Being able to print out custom gears is one area where 3D printing can really shine, and [Karl Lew] has been busy doing exactly that with pinion gears printed in PLA and mounted to stepper motor shafts, but there are tradeoffs. Pinion gears need to grip a motor shaft tightly – normally done with a screw through the gear and onto the motor shaft. But a motor and its shaft can get quite warm when doing a lot of work, and a tight screw on a hot motor’s shaft will transmit that heat into the PLA, which can then deform.
On the last day of MRRF, the guys from Lulzbot were printing a vase with some clear Taulman t-glase on their TAZ 6 prototype. It was probably the third or fourth one they had printed, but I was compelled to go over there because they were painting the filament with a blue Sharpie right before it went into the extruder.
It immediately made me think of this video that hit our tips line last fall and fell through the cracks—a short one from [Angus] at Maker’s Muse about creating your own colored filament by spraying clear PLA with cheap spray paint. This is a neat alternative to painting a finished print because the color isn’t going to rub off. The pigment fuses with the PLA in the hot end, providing consistent coloring.
Disclaimer time: [Angus] ran his spray-painted PLA through a WANHAO i3, which is a cheap, modified Prusa that actually has pretty good reviews. The point is, he doesn’t care if the nozzle gets clogged. But the nozzle didn’t clog. Nothing bad happened at all, and the prints turned out great. As you can see in the video after the break, he tried silver and blue separately on short lengths of filament, and then alternated the colors to make the striped Marvin in the main image. [Angus]’ main concern is that the paint probably affects the strength of the print.
Have you tried spray painting filament? How did it go? Let us know in the comments. If you long to print in any color on the cheap but don’t want to seriously risk clogging your hot end, there’s always the drilled-out Sharpie method.
Alongside printers from all walks of manufacturing, one can naturally expect to find people selling different kinds of filament at a 3D printing festival. One of these purveyors of plastic was Proto-pasta out of Vancouver, WA. Proto-pasta prides themselves on unique offerings and complete transparency about their manufacturing processes.
Almost all of their filaments are either PLA or HTPLA with something special added during extrusion. The menu includes steel, iron, carbon, and finely ground coffee. The coffee filament was one of our favorites for sure. The print they brought with them looked solidified light roast and had a transparent kind of lollipop quality to it. I couldn’t detect the coffee scent due to allergies, but [Alex] assured me that printing with this filament will make your house or hackerspace smell terrific.
[Alex] was giving away samples of their stainless steel composite PLA. This one can be polished to a smooth shine with a series of papers that run from 400 to 8,000-grit. Another of their newer offerings is PLA infused with magnetic iron particles. Prints made with this stuff can be rusted to achieve an antique, steampunk, or shabby chic aesthetic.
Proto-pasta also has an electrically conductive composite carbon PLA. This one is great for capacitive applications like making a custom, ergonomic stylus or your own game controller. According to the site, the resistivity of printed parts is 30 ohms per centimeter as measured perpendicular to the layers, and 115 ohms along the layers.
Have you made anything awesome with conductive or magnetic filament? Have you had any problems with unorthodox filaments? Let us know in the comments.
The most popular plastic for 3D printers is PLA – polylactic acid – a plastic that’s either derived from corn starch, inedible plant detritus, or sugar cane, depending where in the world it was manufactured. Being derived from natural materials, PLA is marketed as being biodegradable. You don’t need to worry about low-poly Pokemon and other plastic trinkets filling landfills when you’re printing with PLA, all these plastic baubles will return to the Earth from whence it came.
3D printers have been around for a few years now, and now objects printed in PLA have been around the sun a few times. A few of these objects have been completely forgotten. How’s that claim of being biodegradable holding up? The results are mixed, and as always, more data is needed.
A few weeks ago, [LazyGecko] found one of his first experiments in 3D printing. In 2012, he was experimenting with tie dying PLA prints by putting his prints in a jar filled with water and blue dye. This jar was then placed in the back of his cupboard and quickly forgotten. 3.5 years later, [LazyGecko] remembered his experiment. Absolutely nothing happened, save for a little bit of blue dye turning the print a pastel baby blue. The print looks and feels exactly like the day it came off the printer.
[LazyGecko]’s blog post was noticed by [Bill Waters], and he has one datum that points to PLA being biodegradable. In 2015, [Bill] printed a filter basket for his fish tank. The first filter basket worked well, but made a small design change a week later, printed out another, and put the first print in storage. He now has two nearly identical prints, one in constant use in a biologically interesting environment, the other sitting on a shelf for a year.
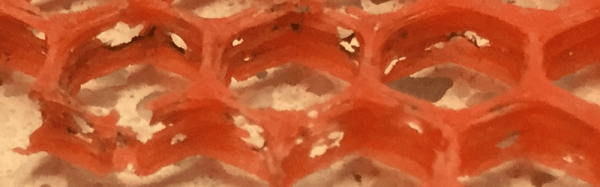
[Bill]’s inadvertent experiment is very close to the best possible experimental design to make the case for PLA biodegradability. The 3D printed filter basket in constant use for a year suffered significant breakdown, and the honeycomb walls are starting to crumble. The ‘inert’ printed filter basket looks like it just came off the build plate.
If that’s not confusing enough, [Bill] also has another print that has spent a year in a fish tank. This end cap for a filter spray bar didn’t see any degradation, despite being underwater in a biologically active environment. The environment is a little different from a filter basket, though; an aquarium filter is designed to break down organics.
To answer the question, ‘is PLA biodegradable,’ the most accurate answer is, ‘maybe’. Three data points in uncontrolled environments isn’t enough to draw any conclusions. There are, undoubtedly, more forgotten 3D prints out there, and more data to back up the claim of PLA being biodegradable.
This is where you come in. Do you have some forgotten prints out there? Your input is needed, the fruits of your labors are evidence, your prints might be decaying and we want to know about it below.
A few years back, there were some studies on the chemical and particle emissions coming out of the hotends of 3D printers. Although they galvanized a lot of people in the community, the science wasn’t entirely conclusive — one paper made it sound like you needed a hazmat suit for 3D printing, and the other suggested that cooking a meal in a kitchen was worse for you. That’s because they were measuring different things.
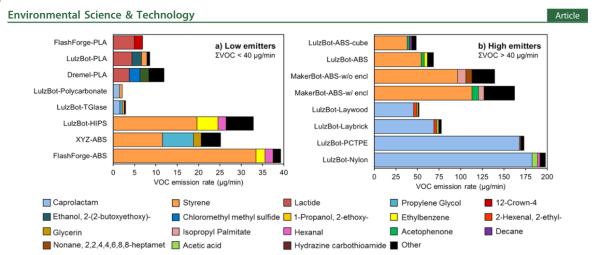
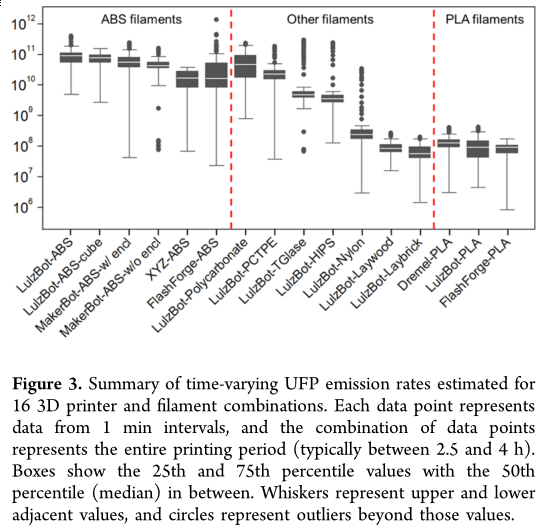
This new research paper on the emissions of 3D printers covers all the bases. They examined a variety of different materials printed in different printers. They also measured both chemical emissions and Ultrafine Particles (UFP) which can be hazardous even when the material itself is not.
We read the paper (PDF) so that you don’t have to. Here’s our takeaways:
There was no significant variation across brands of 3D printers. (Duh?)
ABS and similar materials outgas styrene at levels you should probably be worrying about if you’re running your printer for a few hours a day in an unventilated office.
PLA emitted significantly less overall, and most of it was a non-hazardous chemical, lactide. PLA doesn’t look like a problem.
All of the materials resulted in increased UFP exposure. These levels are above normal household background levels, but lower than certain “microclimates” which (if you follow the references) include principals’ offices with carpet, automobiles, restaurants, and rooms with burning candles or running hair dryers. In short, the UFP exposure doesn’t look like it’s going to be a big deal unless you’re sitting right next to the printer and running it continually.
So what would we do? It now looks like it’s prudent to print ABS only in a well-ventilated room. Or enclose the printer in a box and vent whatever you can outside — which can also help prevent breezes cooling the piece down unevenly and adding to ABS’s warping problems. Or just stick to PLA. It looks essentially harmless.
Despite tuning my extruder steps perfectly, and getting good results instantly on larger prints. I was still having a ton of trouble with smaller parts. PLA is the favored printing material for its low odor, low warping, and decent material properties. It also has many downside, but it’s biggest, for the end user, lies in its large glass transition temperature range. Like all thermoplastics, it shrinks when it cools, but because of this large range, it stays expanded and, getting deep into my reserve of technical terms, bendy for a long time. If you don’t cool it, the plastic will pile up in its expanded state and deform.
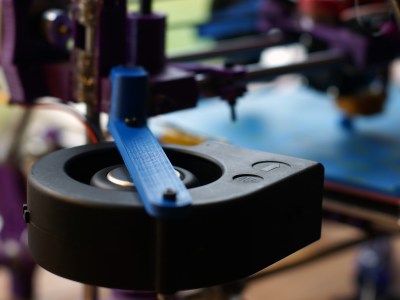
The old cooling fan on my trusty and thoroughly battered Prusa i2.
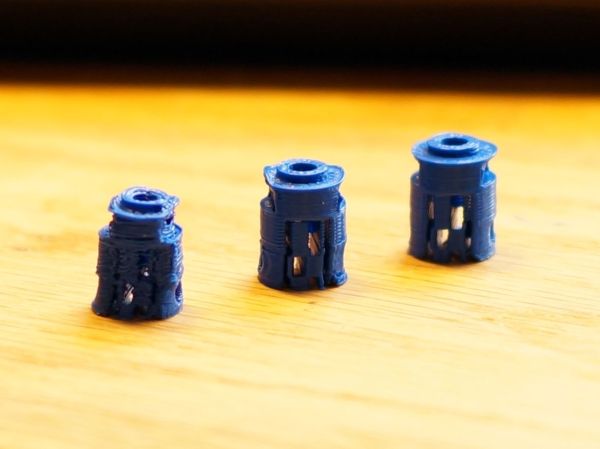
I am working on a project that needs a tiny part, pictured above. The part on the left is what I was getting with my current cooling set-up and temperature settings. It had very little semblance with the CAD file that brought it into this world.
The bond between layers in a 3d print occurs when the plastic has freshly left the nozzle at its melting point. Almost immediately after that, the plastic crosses from the liquid state into a glass state, and like pressing two pieces of glass together, no further bonding occurs. This means that in order to get a strong bond between the print layers, the plastic has to have enough thermal mass to melt the plastic below it. Allowing the polymer chains to get cozy and hold hands. Nozzle geometry can help some, by providing a heat source to press and melt the two layer together, but for the most part, the fusing is done by the liquid plastic. This is why large diameter nozzles produce stronger parts.
What I’m getting at is that I like to run my nozzle temperature a little hotter than is exactly needed or even sensible. This tends to produce a better bond and sometimes helps prevent jamming (with a good extruder design). It also reduces accuracy and adds gloopiness. So, my first attempt to fix the problem was to perhaps consider the possibility that I was not 100% right in running my nozzle so hot, and I dropped the temperature as low as I could push it. This produced a more dimensionally accurate part, but a extraordinarily weak one. I experimented with a range of temperatures, but found that all but the lowest produced goopy parts.
After confirming that I could not get a significant return on quality by fine tuning my temperature, I reduced the speed of the nozzle by a large percentage. By reducing the speed I was able to produce the middle of the three printed parts shown in the opening image. Moving the nozzle very slowly gave the ambient air and my old cooling fan plenty of time to cool the part. However, what was previously a five minute part now took twenty minutes to print. A larger part would be a nightmare.
This will do.
So, if I can’t adjust the temperature to get what I want, and I can adjust the speed; this tells me I just need to cool the part better. The glass state of the plastic is useless to me for two reasons. One, as stated before, no bonding occurs. Two, while the plastic remains expanded and bendy, the new layer being put down is being put down in the wrong place. When the plastic shrinks to its final dimension is when I want to place the next layer. Time to solve this the traditional way: overkill.
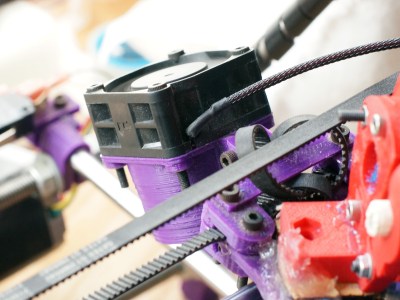
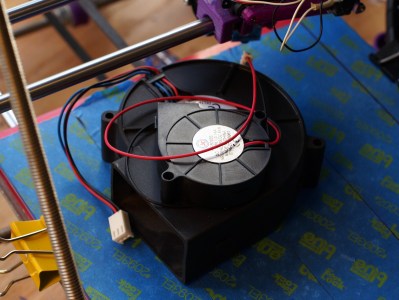
A while back my friend gifted me a little squirrel cage fan he had used with success on his 3d printer. Inspired by this, I had also scrounged a 12v, 1.7A fan from a broken Power Mac G5 power supply. When it spins up I have to be careful that it doesn’t throw itself off the table.
I should have added a rib to this bracket, this fan is heavy!
I printed out mounts for the fans. The big one got attached to the Z axis, and the little one rides behind the extruder. I fired up the gcode from before and started to print, only to find that my nozzle stopped extruding mid way. What? I soon discovered I had so much cooling that my nozzle was dropping below the 160C cold extrusion cut-off point and the firmware was stopping it from damaging itself. My heated bed also could no longer maintain a temperature higher than 59C. At this point I felt I was onto something.
I wrapped my extruder in fiberglass insulation and kapton tape, confidently turned the nozzle temperature up, set the speed to full, and clicked print. With the addition of the overkill cooling I was able to get the part shown to the right in my three example prints. This was full speed and achieved full bond. Not bad! Thus concludes this chapter in my adventures with cooling. I was really impressed by the results. Next I want to try cooling ABS as it prints. Some have reported horrible results, others pretty good ones, I’m interested. I also wonder about cooling the plastic with a liquid at a temperature just below the glass state as it is deposited. Thoughts?