Reverse Engineering Unobtanium

font

If you listen to [Bil Herd] and the rest of the Commodore crew, you’ll quickly realize the folks behind Commodore were about 20 years ahead of their time, with their own chip foundries and vertical integration that would make the modern-day Apple jealous. One of the cool chips that came out of the MOS foundry was the 6500/1 – used in the keyboard controller of the Amiga and the 1520 printer/plotter. Basically a microcontroller with a 6502 core, the 6500/1 has seen a lot of talk when it comes to dumping the contents of the ROM, and thus all the code on the Amiga’s keyboard controller and the font for the 1520 plotter – there were ideas on how to get the contents of the ROM, but no one tried building a circuit.

[Jim Brain] looked over the discussions and recently gave it a try. He was completely successful, dumping the ROM of a 6500/1, and allowing for the preservation and analysis of the 1520 plotter, analysis of other devices controlled by a 6500/1, and the possibility of the creation of a drop-in replacement for the unobtanium 6500/1.

The datasheet for the 6500/1 has a few lines describing the test mode, where applying +10 VDC to the /RES line forces the machine to make memory fetches from the external pins. The only problem was, no body knew how to make this work. Ideas were thrown around, but it wasn’t until [Jim Brain] pulled an ATMega32 off the top of his parts bin did anyone create a working circuit.

The code for the AVR puts the 6500/1 into it’s test mode, loads a single memory location from ROM, stores the data in PORTA, where the AVR reads it and prints it out over a serial connection to a computer. Repeat for every location in the 6500/1 ROM, and you have a firmware dump. This is probably the first time this code has been seen in 20 years.

Now the race is on to create a drop-in replacement of what is basically a 6502-based microcontroller. That probably won’t be used for much outside of the classic and retro scene, but at least it would be a fun device to play around with.

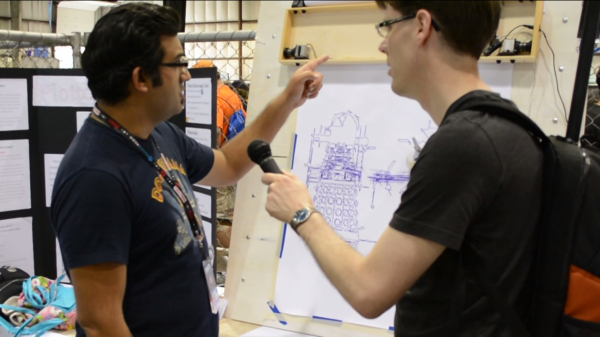
Standing in front of a gravity based pen plotter

Plotterbot Drawing Daleks


Two strings, two motors, and some very creative software. That’s the magic behind the Plotterbot, which was drawing Daleks when we crossed its path at Maker Faire. This is the Mark II, which was built after cannibalizing Mark I. Unfortunately we can’t tell you what the difference is between the two.

The machine itself is a pretty nice little package. There is a box that hangs on the wall with a motor/spool combination at each end. In the middle of those two is an Arduino Mega with a custom driver shield. It takes an SD card with the drawing files on it. There is also a small touchscreen display which allowed for easy selection of what you’d like drawn on that paper taped to the wall below the unit.

Back when we were running the Trinket contest [Jay] used the Plotterbot to draw a Skull and Wrenches made out of a multitude of smaller Skull and Wrenches. He was nice enough bring that piece of art and present it to us at the Faire. Thanks [Jay]!

Continue reading “Plotterbot Drawing Daleks”

Roboartist Draws What It Sees

roboartist-vector-image-machine

The perfect balance of simplicity and complexity have been struck with this automated artist. The Roboartist is a vector drawing robot project which [Niazangels], [Maxarjun], and [Ashwin] have been documenting for the last few days. The killer feature of the build is the ability to process what is seen through a webcam so that it may be sketched as ink on paper by the robotic arm.

The arm itself has four stages, and as you can see in the video below, remarkably little slop. The remaining slight wiggle is just enough to make the images seem as if they were not printed to perfection, and we like that effect!

Above is a still of Roboartist working on a portrait of [Heath Ledger] in his role as Joker from The Dark Knight. The image import feature was used for this. It runs a tweaked version of the Canny Edge Detector to determine where the pen strokes go. This is an alternative to capturing the subject through the webcam. For now MATLAB is part of the software chain, but future work seeks to upgrade to more Open Source tools. The hardware itself uses an Arduino Mega to take input via USB or Bluetooth and drives the quartet of servo motors accordingly.

Continue reading “Roboartist Draws What It Sees”

Old Inkjet Turned Into An SVG Plotter

plotter

What do you do when you have an old printer, a portable CD player, and a handful of other electronics sitting around? Turn it into a plotter, of course.

The frame of the plotter was taken from a ye olde Epson printer, reusing the two stepper motors to move the paper along its length and width. The pen is attached to the laser head of a junked portable CD player. With this, it’s just three stepper motors that allow the Arduino control system to move the pen across the paper and put a few markings down.

The motors on the printer are, in the spirit of reuse, still connected to the printer’s driver board, with a few leads going directly from the Arduino to the parallel port interface. The motor in the CD player is another ordeal, with a single H-bridge controlling the lifting of the pen.

On the software side of things, a Processing sketch reads an SVG file and generates a list of coordinates along a path. The precision of the coordinates is set as a variable, but from the video of the plotter below, this plotter has at least as much resolution as the tip of the pen.

Continue reading “Old Inkjet Turned Into An SVG Plotter”

Fubarino Contest: A Really, Really Old Plotter

DCF 1.0

Decades ago, [Vegipete] found an old drum plotter at a university used equipment sale. This plotter was old in the 80s, so like any great tinkerer, [Vegi] reverse engineered the plotter’s circuitry and got it working with his Apple ][.

The years went by, dust accumulated, and in 2010 [Vegipete] found himself doing some work with linear acceleration on a PIC microcontroller. Remembering his old plotter, [Vegi] realized he could build an embedded version of his old Apple ][ circuit. He built a circuit that turned the plotter into something that can be controlled with an FTDI adapter. A small update to the code added the an Easter egg. When the Konami code is entered on the plotter’s buttons it responds in the spirit of our Fubarino contest.


This is an entry in the Fubarino Contest for a chance at one of the 20 Fubarino SD boards which Microchip has put up as prizes!

Continue reading “Fubarino Contest: A Really, Really Old Plotter”

Hanging Plotter With A Color Twist

hangbot

[Jack Boland], a mechanical engineer at the University of Wisconsin, built a cool hanging plotter project called HangBot. It’s a fairly standard setup, where he converts an image to G-Code files, and it is plotted using two stepper motors for control. We’ve seen vertical plotters before, but they tend to only have a single pen. [Jack] expanded this one to bring color into the mix by splitting an image into separate CMYK layers, and plotting each onto separate transparency film. When overlaid, they create something close to a full color image. His idea is to use this setup as a replacement for typical window signage.

Since it’s drawing a continuous line, he appears to be employing a grid instead of a traditional dot pattern. That, combined with the inaccuracy of a marker tip means resolution will be limited. Still, you can tell that he’s made a great start in this (albeit blurry) photo. Check out the video of it’s operation after the break.

Continue reading “Hanging Plotter With A Color Twist”

Robot Painter Works Like A Photobooth

robot-painter-photo-booth

[Ben], [David], [Drew], [Kayla], and [Peter] built a robotic artist as their senior design project. This mashes up a bunch of different project ideas, but the thing we like the most about it is that it works much like a photo booth that produces a painting. A Raspberry Pi uses a webcam to snap the picture, converts the image to three colors (plus the white background of the canvas) and sets the robot in motion. The team laments that initial testing of the completed project (seen in the clip below) worked out quite well but took hours to produce the painting. What do they expect? It’s art!

This is quite a bit different from the WaterColorBot (whose manufacturing process we just looked in on yesterday). WaterColorBot uses a flat canvas and a gantry system. This offering, which is called PICASSAU, uses an upright canvas with the paintbrush mounted in much the same way as a plotter robot. The biggest difference is that there is the ability to pivot the paint brush in order to pick up more paint, and for cleaning in between color changes.

Continue reading “Robot Painter Works Like A Photobooth”