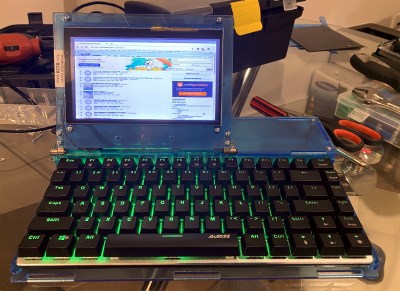
Retro Portable Computer Packs Printer For The Trip

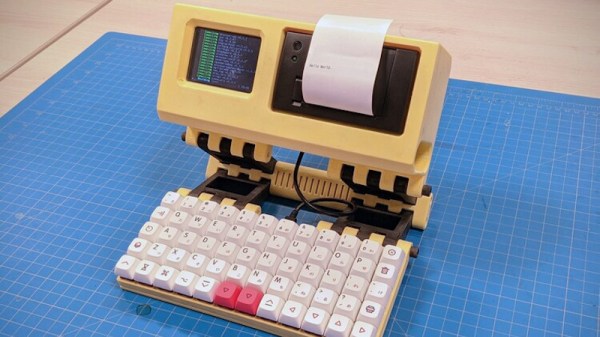
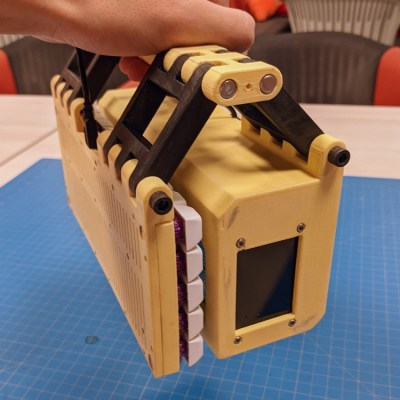
Looking like it dropped out of an alternate reality version of the 1980s, the Joopyter Personal Terminal is a 3D printed portable computer that includes everything you need for life in the retro-futuristic fastlane: a mechanical keyboard, a thermal printer, and the obligatory tiny offset screen. It’s a true mobile machine too, thanks to it’s onboard battery and a clever hinge design that lets you fold the whole thing up into something akin to a PLA handbag. You won’t want to leave home without it.

This gorgeous machine comes our way from [Gian], and while the design isn’t exactly open source, there’s enough information in the GitHub repository that you could certainly put together something similar if you were so inclined. While they might not serve as documentation in the traditional sense, we do love the faux vintage advertisements that have been included.

The upper section of the Joopyter holds a Raspberry Pi Zero W (though the new Pi Zero 2 would be a welcome drop-in upgrade), an Adafruit PiTFT 2.8″ display, a CSN-A2 panel mount thermal printer, and a Anker PowerCore 15600 battery to keep it all running. On the opposite side of the hinge is a hand wired keyboard powered by a Raspberry Pi Pico running KMK.

Speaking of that printed hinge, [Gian] says it comes on loan from [YARH.IO], which Hackaday readers may recall have produced a number of very slick 3D printed portable Linux machines powered by the Raspberry Pi over the last couple of years.

Continue reading “Retro Portable Computer Packs Printer For The Trip”

Triple Monitor Luggable PC Is An All In One Powerhouse

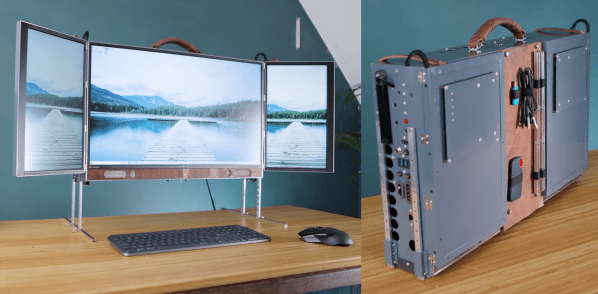
[Matt] from [DIY Perks] has made a name for himself building nice custom computing machines, and his latest triple-monitor luggable PC (video after the break) is sure to give most high-performance desktop machines a run for their money.

The large central monitor folding laptop monitors mounted vertically on either size look impressive, but only just scratches the surface of this build. Hidden behind aluminum panels are Ryzen 5950X CPU and RTX 3080 GPU with water cooling, 64 GB of RAM, and two 8 TB SSDs. A set of high-quality speaker drivers, subwoofer, and audio amps is also included. All this hardware pulls about 600 W of power from a large DC-DC converter block, which in turn receives power from either a pair of onboard AC-DC converters or a 16 V – 63 V DC source, like a battery system.

To mount everything to the back of the main monitor, [Matt] created 3D printed adaptor blocks with threaded inserts which slide under existing hooks on the back of the monitor. Aluminum angles screw to these blocks to cover the edges of the display panel, together with a large mounting plate with pre-drilled holes to mount all the components on standoffs. A set of adjustable and removable legs mount to the side of the PC. A hinged door in the back cover allows storage space for a keyboard and mouse during transport. When folded, the laptop monitors don’t fully cover the main monitor, so [Matt] created a leather cover that doubles as a cable and accessory organizer.

Whether its dual screens and an integrated SDR, or a rotating-folding screen, there is no shortage of ways to build a portable powerhouse. Continue reading “Triple Monitor Luggable PC Is An All In One Powerhouse”

Handheld Hackintosh Runs Mac OS On LattePanda

We’ve seen a huge influx of bespoke portable computers over the last couple of years thanks to availability of increasingly powerful single-board computers. The vast majority of these have been ARM powered using something like the Raspberry Pi 4, and naturally, run Linux. Only a handful have run on x86 hardware, usually because whoever built it wanted to be able to run Windows.

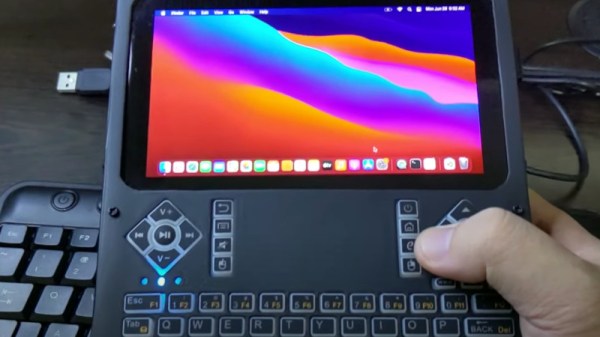
But this handheld x86 Hackintosh running the latest Mac OS on the LattePanda Alpha is truly something unique. Creator [iketsj] claims it to be a world’s first, and after a bit of searching, we’re inclined to agree. While others have installed Mac OS on the LattePanda to create Hackintosh laptops, this would indeed appear to be the first handheld computer to utilize this particular hardware and software blend.

Like other custom portables we’be seen, this one starts with a 3D printed enclosure. The overall design reminds us a bit of the YARH.IO we covered last year, and even borrows the trick of reusing the membrane and PCB of one of those miniature keyboard/pointer combos. Which in this case ends up being especially important, as in keeping with Apple’s own portable Mac OS machines, the screen on this handheld doesn’t support touch.

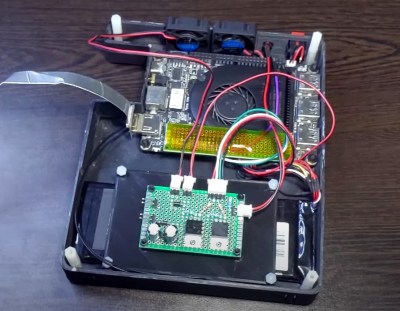
We especially like how the integrated Arduino on the LattePanda is being used in conjunction with some MOSFETs to control power to the handheld’s LCD, keyboard, and fans. While it sounds like the fans are currently running at full throttle, [iketsj] mentions he does intend on adding automatic speed control in the future. A dedicated “chassis controller” like this makes a lot of sense, and is something we imagine will only become more common as these portable builds become increasingly complex.

Now that we’ve seen a custom portable computer running Mac OS, are we due to see a whole new wave of cyberdecks sporting Cupertino’s software in the future? Maybe not. As [iketsj] points out at the end of this video, Apple’s switch from x86 to their own in-house silicon will almost certainly mean the death of the Hackintosh project within the next few years, bringing a fascinating era of computer hacking to a close.

Continue reading “Handheld Hackintosh Runs Mac OS On LattePanda”

This Stackable Pi Portable Is Ready To Rumble

The proliferation of desktop 3D printing and powerful single-board computers like the Raspberry Pi has given rise to an absolute explosion of small bespoke computing devices. Whether or not you think these cobbled together devices are close enough to Gibson’s original vision to call them cyberdecks, it’s a remarkable shift from the norm that brings us closer to the “High Tech, Low Life”  philosophy so prevalent in cyberpunk literature and films.
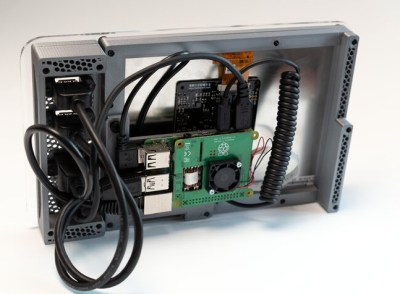
[Jay Doscher] has been on the front lines of this movement for some time now, producing several very popular designs. His latest creation leans hard into the more utilitarian aspects of the cyberpunk ethos, inspired more by the grit of The Expanse than the lusciously upholstered interiors of Star Trek’s Enterprise-D. The culmination of lessons learned over the last several years, the new Kuiper Deck is cheaper and easier to build than his previous designs, thanks at least in part to the fact that you no longer need to go out and get an expensive Pelican case.

Like his previous designs, the Kuiper Deck makes extensive use of 3D printed components. But this time around, [Jay] is using an array of smaller pieces that are bolted together on an acrylic front panel. This not only means the project is compatible with a wider array of machines, such as the Prusa Mini, but it’s also easier to print as larger parts have an annoying tendency to warp. The downside is that you’ll need some way to get the acrylic panel cut to shape, though you can buy one through him if you don’t have any way to get it made locally.

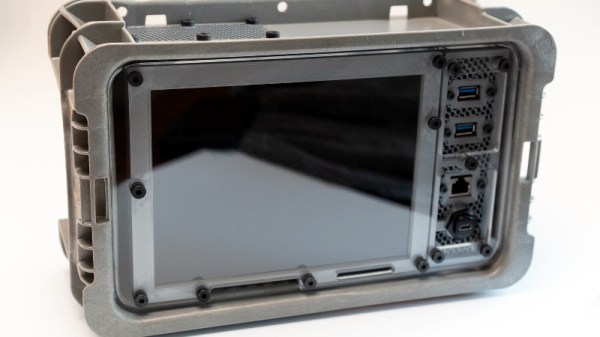
In place of the Pelican case his previous designs used as an enclosure, [Jay] has found a heavy-duty stackable plastic tote available from McMaster Carr for $12 USD. It’s not particularly nice looking, nor is it waterproof. But that’s also sort of the point. If you’re just trying to put together a small computer that you can toss around the shop and not have to worry about breaking, the Pelican case was always a bit overkill.

The electronics bill of materials is similarly sparse, comprising mainly of the Raspberry Pi 4, a cooling fan, and a 10 inch LCD from Pimoroni. Everything gets screwed to the rear of the panel and connected with pre-made cables, making assembly very simple. That said, there’s still plenty of room inside the case for custom hardware should you want to put something custom together such as a mobile software defined radio rig.

[Jay] created the original Raspberry Pi Field Unit in 2015, but it wasn’t until he unveiled the revised Raspberry Pi Recovery Kit in 2019 that the idea of sticking a Raspberry Pi into a Pelican case became something of hacker meme. It sounds like the Kuiper Deck is going to be his final word on the subject for now, but it’s a safe bet we’ll be seeing folks putting together similar builds for years to come.

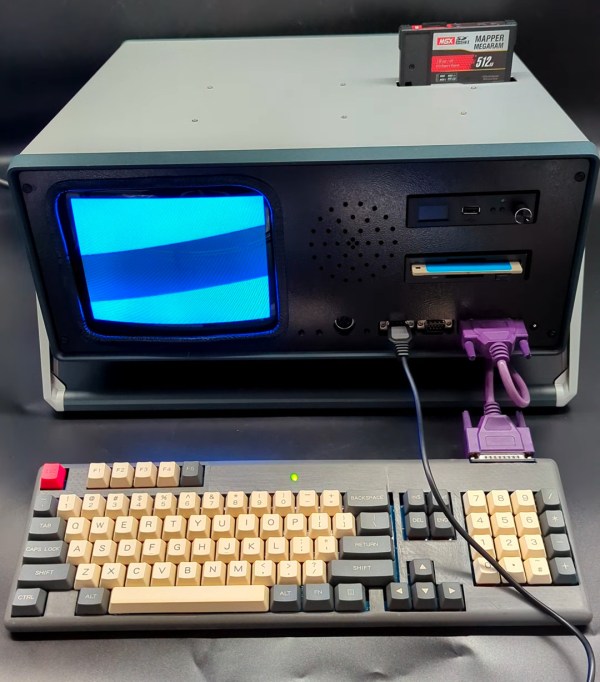
Third Time’s The Charm For This Capable Cyberdeck

For those who decide to build their own personal cyberdeck, it’s often as much about the journey as it is the final product. The recent write-up that [Sophie Wheeler] put together about the process that lead her to build her own bespoke mobile computer is a perfect example. She went through three distinct design phases to create something that had what she describes as a “retro-futuristic, hand-built, utilitarian aesthetic”, and we think you’ll agree the final product is right on target.

At Hackaday, we’re strong believers that you can learn just as much from a failed attempt as you will from a rousing success, which is why we especially appreciate the way [Sophie] has documented this project. The basic layout and general bill of materials for his hypothetical cyberdeck had been sorted out in her head for about a year, but it took a few attempts until everything came together in a way she was happy with. Rather than pretend those early missteps never happened, she’s decided to present each one and explain why it didn’t quite work out.

This laser-cut acrylic design was difficult to assemble.

Frankly both earlier attempts look pretty slick to us, but of course the only person who’s opinion really counts when it comes to a good cyberdeck is the one who’s building it. The original acrylic design was a bit too fiddly, and while the first attempt at 3D printing the computer’s frame and enclosure went much better, it still left something to be desired.

The final result is a clean and straightforward design that has plenty of room inside for a Raspberry Pi 4, UPSPack V3 power management board, 10,000 mAh battery, internal USB hub, and a AK33 mechanical keyboard. Topside there’s a 7” 1024×600 IPS LCD with touch overlay that’s naturally been offset in the traditional cyberdeck style, and on the right side of the enclosure there’s a bay that holds a KKMoon RTL-SDR. Though that could certainly be swapped out for something else should you decide to print out your own version of this Creative Commons licensed design.

In our 2020 review we noted the incredible influx of cyberdeck builds we’d seen over the last 12 months, and judging by just what we’ve seen in just these last few weeks, 2021 should be another bumper year for these unique computers.

3D Printed Pi Laptop Honors The Iconic GRiD Compass

If you’re familiar with vintage portable computers, you know about the GRiD Compass. Even if you’re not into computers of yesteryear, there’s a good chance you’ve seen a Compass or two without realizing it. From battling xenomorphs in Aliens to making the trip to orbit aboard the Space Shuttle, the trendsetting clamshell computer seemed to be everywhere in the 1980s. While far too expensive for the average consumer to afford back then, its no-compromise design and sleek looks helped lay the groundwork for today’s ubiquitous laptops.

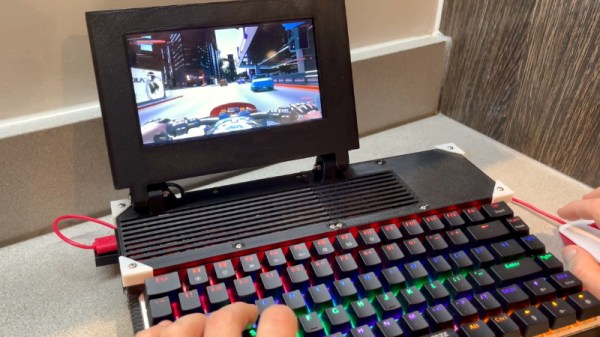
Getting your hands on a working GRiD Compass in 2021 isn’t a whole lot easier than it was in 1982, so [Mike] decided to do the next best thing and build his own. His GRIZ Sextant certainly isn’t a replica, but the family resemblance is strong enough to get the point across. The Raspberry Pi powered machine has a greatly reduced “trunk” section in the back as you might expect, but the overall layout is very similar. The Commodore 64 inspired color scheme is probably the biggest departure from the source material, but it’s hard to argue with the results.

It’s clear at a glance that a lot of thought was put into the external aesthetics of the Sextant, but a peek under the hood shows the internal details are equally impressive. [Mike] tells us he has a background in product design, and it shows. Rather than approaching this project as a one-off creation, he’s clearly taken great pains to ensure the design is as reproducible as possible.

All of the individual components of the 3D printed frame and enclosure have been carefully designed so they’ll fit within the build volume of the average desktop machine. Electronic components are screwed, not glued, to the internal framework; making future repairs and maintenance much easier. When combined with the ample internal volume available, this modular approach should make adding custom hardware a relatively painless process as well.

So when will you be able to build a GRIZ Sextant of your own? Hopefully, very soon. [Mike] says he still needs to work some kinks out of the power supply and finalize how the speakers will get mounted into the case. Once those last tweaks are locked in, he plans to release all the STL files and a complete Bill of Materials. For those who want to get a sneak peek before they start warming up the extruder, he’s also started documenting the assembly of the Sextant on his YouTube channel. Continue reading “3D Printed Pi Laptop Honors The Iconic GRiD Compass”

New Micro YARH.IO Designed For Skilled Operators

A few months back we brought you word of the YARH.IO, an extremely impressive Raspberry Pi portable that featured rugged good looks and a unique convertible design made possible by a removable keyboard. One of the most appealing aspects of the design was that everything was built from off-the-shelf modules; it only took a couple jumper wires and some scrap perfboard to get everything wired up inside the 3D printed enclosure.

The downside of this construction style was that the finished product was a bit chunkier than was strictly necessary. But that’s not the case with the new YARH.IO Micro. The palm-sized portable looks almost exactly like the original, though it had to ditch the removable keyboard in the shrinking process. Gone as well is the touch pad, though with the touch screen capabilities of the Pimoroni Hyper Pixel four inch IPS display, that’s not much of a problem.

What’s the catch? Well, at a glance we can tell you this one is considerably harder to build. For one thing, you’ll need to remove the Ethernet and USB connectors from the Pi 3B+. The USB ports get relocated, but Ethernet understandably has to be left on the cutting room floor. Nothing to worry about with the GPIO pins, the display takes up all of those, but you’ll probably want to wire the I2C lines to the female header on the side of the case so you can add external hardware and sensors.

You also need to nestle an Arduino Pro Micro in there to communicate status information about the battery to the operating system over I2C. If you wanted to save a little wiring you could probably leave off the DS3231 RTC module, but it depends on how often you’ll be able to sync up with NTP.

While it may be more difficult to assemble than its predecessor, it’s certainly not unapproachable. Once again, no custom PCBs or exotic components are required. You might be doing a lot more soldering (and desoldering) than you would have before, but it’s nothing that the average Hackaday reader isn’t capable of. For your troubles, you’ll get a exceptionally portable Linux machine that’s ripe for hacking and modification.

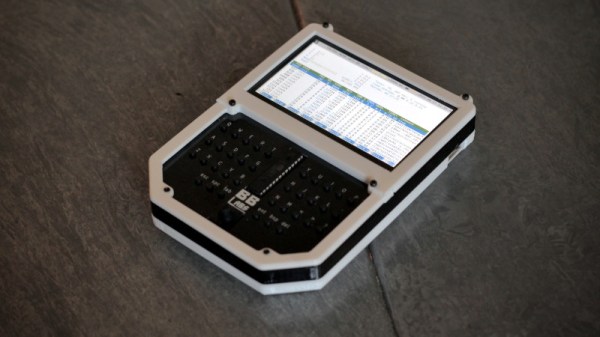
If the time and effort it will take to put together a YARH.IO is a bit more than you’re willing to invest right now, there’s always commercial alternatives like the DevTerm. But whether you go with the original or this new Micro edition, we think the satisfaction of having built the whole thing yourself will be more than worth it.