RotBot Adds An Extra Dimension To 3D Printing, With A Twist

It always seemed to us that the Z-axis on a 3D printer, or pretty much any CNC machine for that matter, is criminally underused. To have the X- and Y-axes working together to make smooth planar motions while the Z-axis just sits there waiting for its big moment, which ends up just moving the print head and the bed another fraction of a millimeter from each other just doesn’t seem fair. Can’t the Z-axis have a little more fun?

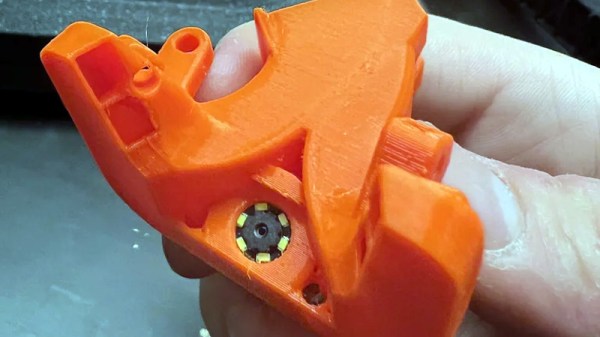
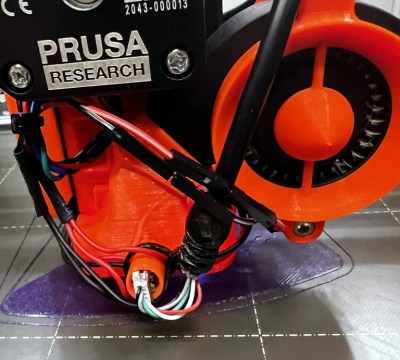
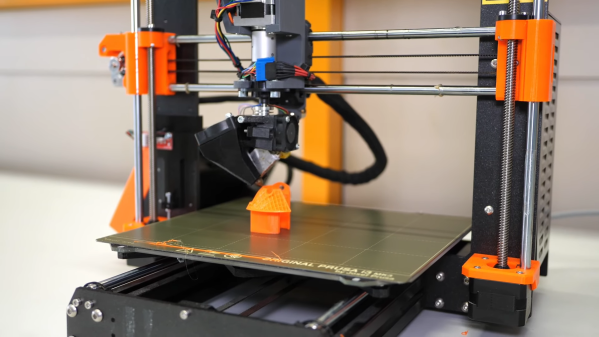
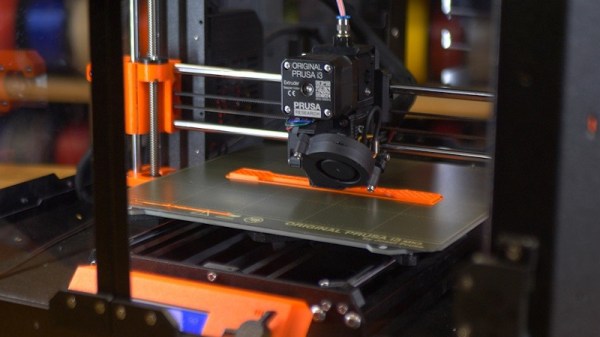
Of course it can, and while non-planar 3D printing is nothing new, [Stefan] over at CNC Kitchen shows us a literal twist on the concept with this four-axis non-planar printer. For obvious reasons, it’s called the “RotBot,” and it comes via the Zurich University of Applied Sciences, where [Michael Wüthrich] and colleagues have been experimenting with different slicing strategies to make overhang printing more manageable. The hardware side of things is actually pretty intuitive, especially if you’ve ever seen an industrial waterjet cutter in action. They modified a Prusa printer by adding a rotating extension to the print head, putting the nozzle at a 45° angle to the print bed. A slip ring connects the heater and fan and allows the head to rotate 360°, with the extruder living above the swiveling head.

On the software side, the Zurich team came up with some clever workarounds to make conical slicing work using off-the-shelf slicers. As [Stefan] explains, the team used a “pre-deformation” step to warp the model and trick the slicer into generating the conical G-code. The G-code is then back-transformed in exactly the opposite process as pre-deformation before being fed to the printer. The transformation steps are done with a bit of Python code, and the results are pretty neat. Watching the four axes all work together simultaneously is quite satisfying, as are the huge overhangs with no visible means of support.

The academic paper on this is probably worth a read, and thankfully, the code for everything is all open-sourced. We’re interested to see if this catches on with the community.

Continue reading “RotBot Adds An Extra Dimension To 3D Printing, With A Twist”

The Prints Don’t Stop With This Prusa I3 MK3 Mod

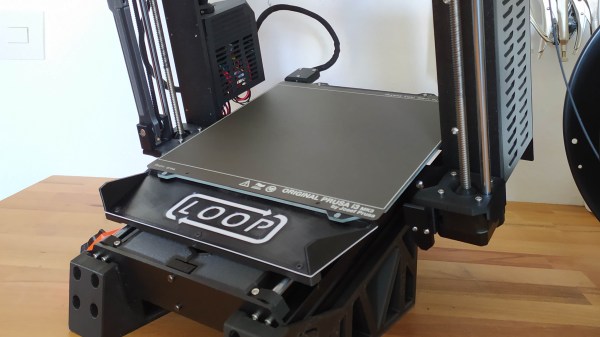
One of the issues with 3D printing is that when a print is done, you need to go back and pull the print off the bed to reset it for the next one. What if you needed to print 600 little parts for whatever reason? Most people might say get lots of printers and queue them up. Not [Pierre Trappe], as he decided that his Prusa i3 MK3S+ would print continuously.

The setup was dubbed Loop and consisted of a few parts. First, there’s an arm that sweeps the build plate to clear the printed pieces, a slide for the pieces to descend on, and a stand for the printer to sit on that puts it at an angle. The next step is to modify OctoPrint to allow a continuous print queue. The slicer needs to change as [Pierre] provides some G-code to reset the printer and clear the print.

We were especially impressed with the attention to detail in the documentation for this one. There’s extensive guidance on getting the bed adhesion just right, as you can’t have it come off mid-print, but you need it to detach cleanly and easily when the arm sweeps across the bed. Calibrating that first layer is essential, and he provides handy instructions to dial it in. Additionally, temperature and material play a crucial role, and [Pierre] documented the different materials and temperatures he used while developing Loop.

While continuous belt printers are arguably the “correct” answer to the question of printing 600 little parts, they come with their own baggage. Being able to pull off something similar on a printer as reliable and well supported as the Prusa i3 makes for a compelling alternative.

Continue reading “The Prints Don’t Stop With This Prusa I3 MK3 Mod”

Prusa’s Official Enclosure Pulls Out All The Stops

It’s well known in the desktop 3D printing world that you get what you pay for. If you want to spend under $300 USD, you get a Creality Ender 3 and deal with its slightly half-baked nature. Or if you’ve got the money to burn, you buy a Prusa i3 MK3 and know that you’ll remain on the cutting edge thanks to a constantly evolving slicer and regular hardware revisions.

Now it stands to reason that an expensive product will have expensive accessories, but even still, the recently unveiled “Original Prusa Enclosure” is sure to induce a bit of sticker shock in even the most ardent of [Josef Průša]’s fans — the most bare-bones configuration of the 10 kg (22 lbs) box rings up at $349 USD. You read that right, just the enclosure for Prusa’s flagship machine costs more than the average Chinese 3D printer. In fact it costs as much as the kit version of the Prusa Mini, which incidentally, is set to get its own version of the enclosure sometime in the future. If you select all the bells and whistles, a fully-decked out Prusa Enclosure will cost you $700 USD, plus shipping.

Continue reading “Prusa’s Official Enclosure Pulls Out All The Stops”

Resuming a print

Multiple Ways Of Recovering A Failed Print

It’s a special gut-dropping, grumbly moment that most who use 3d printers know all too well. When you check on your 13-hour print, only to see that it failed printing several hundred layers ago. [Stephan] from [CNC Kitchen] has a few clever tricks to resume failed prints.

It starts when you discover your print has failed and whether the part is still attached to the bed. If it has detached, the best you can do is whip out your calipers to get a reasonably accurate measurement of how much has been printed. Then slice off the already printed section, print the remainder, and glue the two parts together. If your part is attached to your print bed and you haven’t shifted the plate (if it is removable), start by removing any blemishes on the top layer. That will make it smooth and predictable as it’s starting a new print, just on top of an existing one. Measuring the height that has been printed is tricky since you cannot remove it. Calipers of sufficient length can use their depth function, but you might also be able to do a visual inspection if the geometry is unique enough. After you load up your model in a G-Code viewer, go through it layer by layer until you find what matches what has already been printed.

The last (and perhaps most clever) is to use the printer as a makeshift CMM (coordinate measuring machine). You manually step the printer until it touches the top of the part, then read the z-axis height via a screen or M114 command. A quick edit to the raw G-Code gives you a new file that will resume precisely what it was doing before. If you can’t rehome because the head can’t clear the part, [Stephan] walks you through setting the home on your printer manually.

If all the doesn’t work, and the print is still unrecoverable, perhaps you can look into recycling the plastic into new filament.

Prusa XL Goes Big, But That’s Only Half The Story

For a few years now it’s been an open secret that Prusa Research was working on a larger printer named, imaginatively enough, the Prusa XL. Positioned at the opposite end of their product spectrum from the wildly popular Prusa Mini, this upper-tier machine would be for serious hobbyists or small companies that need to print single-part objects that were too large for their flagship i3 MK3S+ printer. Unfortunately, the global COVID-19 pandemic made it difficult for the Czech company to focus on bringing a new product to market, to the point that some had begun to wonder if we’d ever see this mythical machine.

But now, finally, the wait is over. Or perhaps, it’s just beginning. That’s because while Prusa Research has officially announced their new XL model and opened preorders for the $1,999+ USD printer, it’s not expected to ship until at least the second quarter of 2022. That’s already a pretty substantial lead time, but given Prusa’s track record when it comes to product launches, we wouldn’t be surprised if early adopters don’t start seeing their machines until this time next year.

So what do you get for your money? Well, not an over-sized Prusa i3, that’s for sure. While many had speculated the XL would simply be a larger version of the company’s popular open source printer with a few modern niceties like a 32-bit control board sprinkled in, the reality is something else entirely. While the high purchase price and ponderous dimensions of the new machine might make it a tough sell for many in the hacker and maker communities, there’s little question that the technical improvements and innovations built into the Prusa XL provide a glimpse of the future for the desktop 3D printer market as a whole.

Continue reading “Prusa XL Goes Big, But That’s Only Half The Story”

3D Printed Box Gets Bigger

If you ever watched Dr. Who, you probably know that the TARDIS looked like a police call box on the outside, but was very large on the inside. When asked, the Doctor had some explanation of how something can look small when it is far away and large when it is close up, which never made much sense. However, [iQLess] has been 3D printing boxes in a small area, that fold out to be much larger boxes. (Video, embedded below.) The design comes from someone called [Cisco] who has a lot of interesting print in place designs.

You can find the design on the Prusa site or Thingiverse. The boxes do take a while to print, according to the video below. What was interesting to us, though, is that you should be able to print a design like this to create a box larger than your printer.

Continue reading “3D Printed Box Gets Bigger”

Prusa Mini Gets Custom Heavy Duty Enclosure

Still waiting on your Prusa Mini to arrive? Join the club. Between the incredible amount of interest in the inexpensive 3D printer and the COVID-19 pandemic, it can take months for the machine to arrive at your doorstep. But patient makers are finally taking delivery of their new printers, and as such the hacks and modifications are starting to trickle their way in.

First up is this gloriously over-engineered enclosure from [Build Comics]. While PLA and PETG usually print fine with nothing more exotic than a heated bed, trickier materials like ABS work best when the printer is enclosed as it helps maintain a consistent temperature. Plus it keeps any curious hands and paws a safe distance from the hot moving bits, and if things go really pear-shaped, can help contain smoke and flames.

The enclosure is made from welded steel square tube, wood, and fire-retardant fiber board. A hinged polycarbonate cover, taking the form of a four-sided cube, is lowered over the printer with some heavy-duty hinges that look like they were intended for a fence. To keep the cover from slamming back down, [Build Comics] came up with a simple locking mechanism that can easily be operated from the front or side of the enclosure. With the addition of a small temperature and humidity display, the conditions inside the chamber can easily be monitored.

But [Build Comics] didn’t stop there. He also rigged up a relay box that will cut power to the printer should the smoke detector mounted above it trip. While there’s no reason to think the Prusa Mini would suffer the same fate of earlier budget desktop 3D printers, but there’s certainly no harm in taking precautions.

Will you need to build a similar enclosure whenever your Prusa Mini shows up? Maybe not. But if you felt so inclined, at least now you’ve got plenty of images and details that can help you spin up your own solution.