Non-Planar Fuzzy Skin Textures Improved, Plus A Paint-On Interface

If you’ve wanted to get in on the “fuzzy skin” action with 3D printing but held off because you didn’t want to fiddle with slicer post-processing, you need to check out the paint-on fuzzy skin generator detailed in the video below.

For those who haven’t had the pleasure, fuzzy skin is a texture that can be applied to the outer layers of a 3D print to add a little visual interest and make layer lines a little less obvious. Most slicers have it as an option, but limit the wiggling action of the print head needed to achieve it to the XY plane. Recently, [TenTech] released post-processing scripts for three popular slicers that enable non-planar fuzzy skin by wiggling the print head in the Z-axis, allowing you to texture upward-facing surfaces.

The first half of the video below goes through [TenTech]’s updates to that work that resulted in a single script that can be used with any of the slicers. That’s a pretty neat trick by itself, but not content to rest on his laurels, he decided to make applying a fuzzy skin texture to any aspect of a print easier through a WYSIWYG tool. All you have to do is open the slicer’s multi-material view and paint the areas of the print you want fuzzed. The demo print in the video is a hand grip with fuzzy skin applied to the surfaces that the fingers and palm will touch, along with a little bit on the top for good measure. The print looks fantastic with the texture, and we can see all sorts of possibilities for something like this.

Continue reading “Non-Planar Fuzzy Skin Textures Improved, Plus A Paint-On Interface”

3D Printer Swaps Build Plates To Automate Print Jobs

[Andre Me] has long-standing interest in automating 3D print jobs, and his latest project is automating build plate changes on the Bambu A1 Mini.

Here’s how it works: each build plate gets a sort of “shoe” affixed to it, with which attachments on the printer itself physically interact when loading new plates and removing filled ones.

When a print job is finished, custom G-code causes an attachment on the printer to wedge itself under the build plate and peel it off until it is freed from the magnetic bed, after which the finished plate can be pushed towards the front. A stack of fresh build plates is behind the printer, and the printer slips a new one from the bottom when needed. Again, since the printer’s bed is magnetic, all one has to do is get the new plate to reliably line up and the magnetic attraction does the rest.

Some methods of automating print jobs rely on ejecting the finished parts and others swap the print beds. [Andre]’s is the latter type and we do really like how few moving parts are involved, although the resulting system has the drawback of requiring considerably more table space than just the printer itself. Still, it’s not at all a bad trade-off.

Watch it in action in the two videos embedded below. The first shows a time-lapse of loading and ejecting over 100 build plates in a row, and the second shows the whole system in action printing bowls in different colors. Continue reading “3D Printer Swaps Build Plates To Automate Print Jobs”

Art of 3D printer in the middle of printing a Hackaday Jolly Wrencher logo

3D Printering: Speed Is So Hot Right Now

Speed in 3D printing hasn’t been super important to everyone. Certainly, users value speed. But some value quality even more highly, and if gaining quality means giving up speed, then so be it. That’s more or less how things stood for a while, but all things change.

The landscape of filament-based 3D printing over the past year or so has made one thing clear: the market’s gotten a taste of speed, and what was once the domain of enthusiasts installing and configuring custom firmware is now a baseline people will increasingly expect. After all, who doesn’t want faster prints if one doesn’t have to sacrifice quality in the process?

Speed vs. Quality: No Longer a Tradeoff

Historically, any meaningful increase in printing speed risked compromising quality. Increasing print speed can introduce artifacts like ringing or ghosting, as well as other issues. Printing faster can also highlight mechanical limitations or shortcomings that may not have been a problem at lower speeds. These issues can’t all be resolved by tightening some screws or following a calibration process.

The usual way to get into higher speed printing has been to install something like Klipper, and put the necessary work into configuring and calibrating for best results. Not everyone who prints wishes to go this route. In 3D printing there are always those more interested in the end result than in pushing the limits of the machine itself. For those folks, the benefits of speedy printing have generally come at too high a cost.

That’s no longer the case. One can now buy a printer that effectively self-calibrates, offers noticeably increased printing speeds over any earlier style machines, and does it at a reasonable price.

Continue reading “3D Printering: Speed Is So Hot Right Now”

Bambu Lab To Allow Installing Open Firmware After Signing Waiver

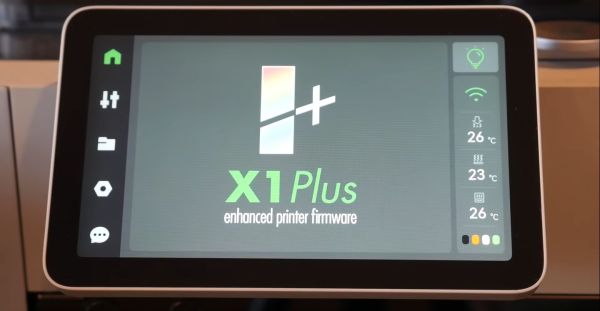
On January 10th Bambu Lab published a blog post in which they address the issue of installing custom firmware on your Bambu Lab X1 3D printer. This comes hot on the heels of a number of YouTube channels for the first time showing off the X1Plus firmware that a number of X1 users have been working on as an open source alternative to the closed, proprietary firmware. Per the Bambu Lab blog post, there is good and bad news for those wanting to use X1Plus and similar projects that may pop up in the future.

After Bambu Lab consulted with the people behind X1Plus it was decided that X1 users would be provided with the opportunity to install such firmware without complaints from Bambu Lab. They would however have to sign a waiver that declares that they agree to relinquish their rights to warranty and support with the printer. Although some details are left somewhat vague in the blog post, it appears that after signing this waiver, and with the target X1 printer known to Bambu Lab, it will have a special firmware update (‘Firmware R’) made available for it.

This special firmware then allows for third-party firmware to be installed, with the ability to revert to OEM firmware later on. The original exploit in pre-v1.7.1 firmware will also no longer be used by X1Plus. Hopefully Bambu Lab will soon clarify the remaining questions, as reading the Reddit discussion on the blog post makes it clear that many statements can be interpreted in a variety of ways, including whether or not this ‘Firmware R’ is a one-time offer only, or will remain available forever.

It’s not the first time we’ve seen a 3D printer manufacturer give users this sort of firmware ultimatum. Back in 2019 Prusa added a physical “appendix” to their new 32-bit control board that the user would have to snap off before they could install an unsigned firmware, which the company said signified the user was willing to waive their warranty for the privilege.

Thanks to [Aaron] for the tip.

X1Plus: Open Source Bambu Lab X1 Firmware

Recently [Michael] over at the [Teaching Tech] YouTube channel got access to the X1Plus firmware, and takes us through what it may mean for Bambu Lab X1 owners. X1Plus is alternative firmware for the Bambu Lab X1 FDM 3D printer that was developed by X1 owners who felt that there were some features that they were missing, such as a detailed report on automatic bed leveling, input shaping calibration response graphs and more.

Perhaps most interesting is that this firmware does not replace the Bambu Lab firmware, but rather runs completely from a microSD card that’s inserted into the display’s SD card reader. This means that only the bootloader of the printer’s boot medium is changed, and the printer thus retains the ability boot to the OEM firmware as needed. Whether you want to try it on your own X1 depends on a few factors, first of all being that it only works with the OEM firmware up to and including version 1.7.0.

Since the bootloader modification relies on an exploit that was patched in newer firmware, a lot depends on whether Bambu Lab allows such tinkering, much like Prusa does with the Mini printer, or allows flashing of older firmware which would enable the exploit on newer X1 printers. Depending on Bambu Lab’s response, the imminent public release of this open source firmware may as a result run into some pretty big hurdles.

Continue reading “X1Plus: Open Source Bambu Lab X1 Firmware”

Reducing Poop On Multicolor Prints

While multicolor printing eliminates painting steps and produces vibrant objects, there are two significant downsides; filament consumption and print time. A single-nozzle filament printer needs to switch from one color to another, and doing so involves switching to the other filament and then purging the transition filament that contains a mixture of both colors, before resuming the print with the clean new color.

[teachingtech] tests out a variety of methods for reducing print time and waste. One surprising result was that purging into the infill didn’t result in significant savings, even when the infill was as high as 50%. Things that did have a positive effect included reducing the amount of purge per transition based on light to dark color changes, and printing multiple copies at once so that even though the total amount of waste was the same as a single part, the waste per part was reduced.

All of the tests were with the same model, which had 229 color changes within a small part, so your mileage may vary, but it’s an interesting investigation into some of the deeper settings within the slicer. Reducing filament waste and print time is an admirable goal, and if you make your own extruder, you can turn all of that purge waste into various shades of greenish brownish filament. Continue reading “Reducing Poop On Multicolor Prints”

Lessons In Printer Poop Recycling

The fundamental problem with multi-color 3D printing using a single hotend is that they poop an awful lot. Every time they change filaments, they’ve got to purge the single nozzle, which results in a huge number of technicolor “purge poops” which on some machines are even ejected out a chute at the back of the printer. The jokes practically write themselves.

What’s not a joke, though, is the sheer mass of plastic waste this can produce. [Stefan] from CNC Kitchen managed to generate over a kilo of printer poop for a 500-gram multi-color print. So he set about looking for ways to turn printer poops back into filament, with interesting results. The tests are based around a commercial lab-scale filament extruder, a 3Devo Composer, but should apply to almost any filament extruder, even the homebrew ones. A few process tips quickly became evident. First, purge poops are too big and stringy (ick) to feed directly into a filament extruder, so shredding was necessary.

Second, everything needs to be very clean — no cross-contamination with plastics other than PLA, no metal bits in the chopped-up plastic bits, and most importantly, no water contamination. [Stefan]’s first batch of recycled filament came from purge poops that had been sitting around a while, and sucked a lot of water vapor from the air. A treatment in a heated vacuum chamber seems to help, but what worked best was using purge poops hot and fresh from a print run. Again, ick.

[Stefan] eventually got a process down that produced decent, usable filament that would jam the printer or result in poor print quality. It even had a pretty nice color, which of course is totally dependent on the mix of colors you start with. Granted, not everyone has access to a fancy filament extruder like his, so this may not be practical for everyone, but it at least shows that there’s a path to reducing the waste stream from any printer, especially multi-material ones.

Continue reading “Lessons In Printer Poop Recycling”