Laptop Touchpad-based LED Lighting Control

touchpad_lighting

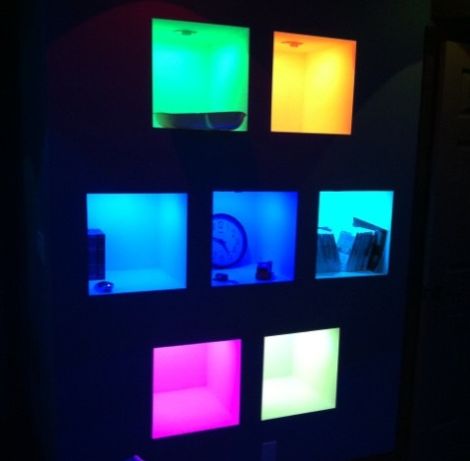
[Dave] needed some extra light above his desk/workbench area and decided to wire up some RGB LED light strips to brighten the place up a bit. He wasn’t content with using a standard switch to toggle them on and off, and after some brainstorming, he decided to build a capacitive touch circuit using a pair of copper tubes mounted in a project box. Just as he was putting the finishing touches on his switch, he saw a project online where a Synaptics touchpad was used in conjunction with an Arduino for lighting control. The copper tube switch was pitched, and he got busy working with his Arduino.

When connected to an Arduino, the touchpads can be used in two modes – relative and absolute. Relative mode is familiar to most people because it is used to guide the mouse cursor around on a laptop’s screen. Absolute mode however, relays coordinate information back to the Arduino, allowing the user to map specific areas of the pad to specific functions. [Dave] enabled his touchpad to use absolute mode, and mapped a handful of different functions on the Arduino. He can now fade his lights on and off or light the room on a timer, as well as use a sliding function to tweak the LEDs’ brightness.

It’s a neat, yet simple hack and a great way to repurpose old laptop touchpads.

Continue reading for a quick demo video he put together, and swing by his site if you want to take a look at the source code he used to get this working.

Continue reading “Laptop Touchpad-based LED Lighting Control”

Third Time’s A Charm – 512 LED Cube Kicks It Up A Notch With RGB LEDs

rgb_led_cube

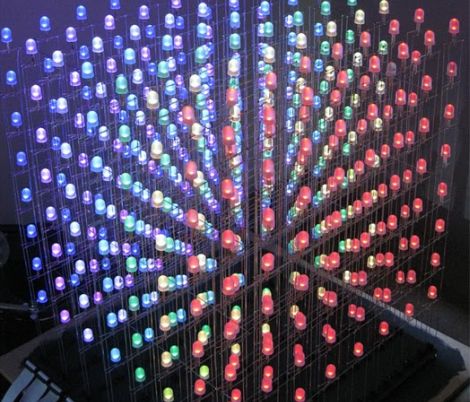
In the comments section of our 512-LED cube post from the other day, several people suggested that to take the project up a notch, building a similar cube using RGB LEDS was the next logical step. It seems that Hack-a-Day reader [vespine] was way ahead of the curve, as he sent us the build details of his 8x8x8 RGB cube shortly after the other story was published.

His cube, which was finished earlier this year, uses 512 10mm RGB LEDs, arranged on top of a simple elevated stand. The stand conceals all of the circuitry he uses to control the cube, the centerpiece of which is a PIC32 MCU. A dozen TLC5940 16-channel PWM drivers are used alongside the PIC in order to adjust the color output of the LEDs, each of which can be addressed and colored individually.

The end result is just about as amazing as you would imagine. He has created several quick demonstration animations, which you can view in the video below. Be sure to stop by his site to see all of his build details – there’s quite a lot there.

Continue reading “Third Time’s A Charm – 512 LED Cube Kicks It Up A Notch With RGB LEDs”

PWM-controlled LED Display Is Truly A Gift From The Heart

led_heart_panel

Instructables user [Simon] admits he addicted to electronics. Lucky for him, his wife of 15 years is pretty cool with, or at least tolerant of his need to fiddle with anything that plugs in. As a gift for their wedding anniversary, he decided it would be neat to combine his love for his wife with his love for electronics. The result is the the RGB LED “Love Heart” you see above. He built an RGB LED circuit controlled by a PIC12F683 microcontroller, which shines into a hand-etched plexi-glass panel.

The LED color is controlled using PWM, as you would expect. What you might not expect however, is the lengths [Simon] would travel to ensure nearly perfect color and brightness matching across the 5 LEDs he used in his project. Since RGB LEDs do not have a uniform output brightness, he used a Lux meter to precisely measure the white balance of each LED. He then plotted the results in Excel before coding the PWM driver. Now that’s devotion! Once the LEDs were settled, he went about constructing the rest of the LED panel.

If you are interested in building one for your sweetheart, [Simon] has you covered – he provides all of the schematics, templates, and source code required to get the job done.

Continue reading to see a video of his heart panel in action.

Continue reading “PWM-controlled LED Display Is Truly A Gift From The Heart”

Intro To Circuit Bending

Electronic musical instruments are a lot of fun for a hacker because, with a small palette of tools, know-how and curiosity, they are easily modified. As with any hack, there is always the chance that the subject will be ruined, so it’s not necessarily worth the risk to muck about inside your thousand-dollar pro synthesizer. Luckily for all of us, there are shovel-fulls of old electronic musical toys littering the curbs and second-hand shops of the world. These fun little devices provide ample opportunity to get familiar with audio electronics and circuit bending techniques.

A note on definitions: the term “circuit bending” can be synonymous with “hardware hacking” in the world of audio electronics, and we have seen some debate as to which term is better suited to a given project. We welcome you to share your viewpoints in the comments.

Keep reading to get started.
Continue reading “Intro To Circuit Bending”

LED Lighthouse Simulator

This Christmas [Bill Porter] decided to show his parents that those college dollars were well spent. He upgraded the custom lighthouse light which he originally designed in high school for their garden fountain. He even went so far as to craft some retail-worthy packaging for the gift.

We think it’s a wonderful design, on a custom PCB and based around an ATtiny85. A real lighthouse has a spinning lens to aim the beam of light. When the lens sweeps across your viewpoint there is a sudden flash and he’s recreated that effect using PWM. Take a look at the video after the break and you’ll see what we mean.

Also, during development he was plagued by a startup glitch which we got majorly sidetracked reading aboutContinue reading “LED Lighthouse Simulator”

Large Magnets Spark On Halloween, Who Knew?

This overly large magnet certainly completes the mad scientist look (for an even crazier look, take a jar of water with red food coloring and place in one large cauliflower, instant brain in a jar).

The base of the magnet is painted foam cut with a makeshift hot-knife; to get the magnet sparking [Macegr] laser etched acrylic with a fractal pattern and embedded LEDs in the ends of the acrylic. An Arduino handles the flashing LEDs and also produces a 60Hz PWM pulse for the spark’s hum. The end result is satisfyingly mad, and while practicing your evil ominous laugh catch a video of the magnet after the jump.

Continue reading “Large Magnets Spark On Halloween, Who Knew?”

Plantenna: The Plant Antenna

The back story behind [Mike] experimenting with plants as AM radio transmission antennas antennae is rather interesting and worth the short read. But for those who just want the facts, [Mike] took an ATMega324, modified the PWM output into a sinusoidal AM signal (using a simple form of RLC circuitry), and connected the circuit to a plant no plants were harmed in the making of this project. The results? Well we’re not ones who would spoil the surprise, you’ll have to see for yourself in the video after the jump.

Continue reading “Plantenna: The Plant Antenna”