How do you get eyeballs on a blog post? Put Raspberry Pi Zero in the headline. How do you get even more eyeballs? Put the word drone in there too. Lucky for us, there’s one very special project in the Hackaday Prize that combines both. It’s the Pi0drone from [Victor], and it’s exactly what it looks like: a flying Raspberry Pi Zero.
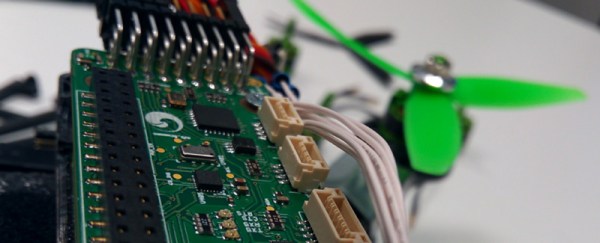
[Victor] has been working on the PXFmini, a ‘shield’ or ‘hat’ for the Raspberry Pi that integrates a barometer, IMU, and a few PWM outputs into a very small form factor that is just a shade larger than the Raspberry Pi Zero itself. It comes with standard connector ports for UART and I2C to attach GPS and on screen display for FPV flying.
Of course, there are dozens of flight controllers for drones and quads out there, but very few are running Linux, and even fewer platforms are as well supported as the Raspberry Pi. To leverage this, [Victor] is running Dronecode on the Pi for mission planning, real autopilot, and everything else that turns a remote controlled quadcopter into a proper drone. It works, and it’s flying, and you can check out the video proof below.
Continue reading “Hackaday Prize Entry: Raspberry Pi Zeros And Drones”