Ah R2D2. Probably one of the most recognized little robots on the planet. There have to be a hundred different toys of R2 out there, but one of the more impressive is the 30th Anniversary Interactive edition. Complete with all kinds of bells and whistles, it’s about as realistic as they come. One Star Wars fan found himself in possession of a broken Interactive R2, and with his girlfriend’s birthday coming up, decided to do a little droid surgery to create the ultimate gift.
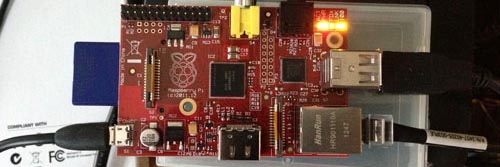
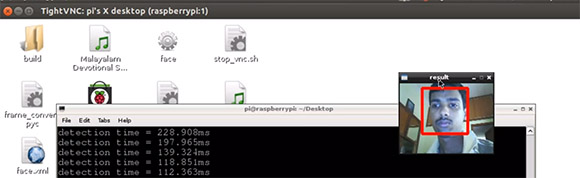
Giving Anakin a run for his money, all the controls for this R2 unit were custom built. A Raspberry Pi running Rasbian acts as the brain. Facial recognition was implemented using OpenCV. Voice commands in either English or Chinese were made possible by PocketSphinx. Some of the other features he included are: message recording and playback, ultrasonic distance detection, motion detection, wifi, and a rechargeable battery. Many of those features were included in the original toy, but since this unit was broken, had to be rebuilt from scratch.
In the end, it must have impressed his girlfriend – she’s now his wife. Good work Jedi. Check out some build photos and a video demonstration after the break.
Continue reading “Hacked Interactive R2D2 Controlled By Raspberry Pi”