TRS-80 Luggable Gets Fresh Face, New Gear

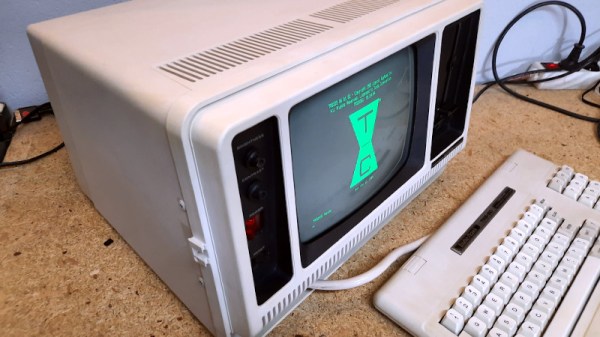
It’s true that this TRS-80 Model 4P “luggable” was in better shape than many of the vintage machines that pass through the hands of [Drygol], but that doesn’t make the end result of its refurbishment and upgrade process any less impressive. After all, not every rebuild has to be a once-in-a-lifetime achievement.

No, the case didn’t have to get pieced back together by hand, and the board didn’t need to have half of its traces recreated. But the outer plastic was certainly in need of a good retrobright treatment, the keyboard was overdue for a cleaning, and the capacitors in the PSU were predictably due for retirement. After [Drygol] got through with it, the machine was back in like-new condition. But then, we can do a little better than that…
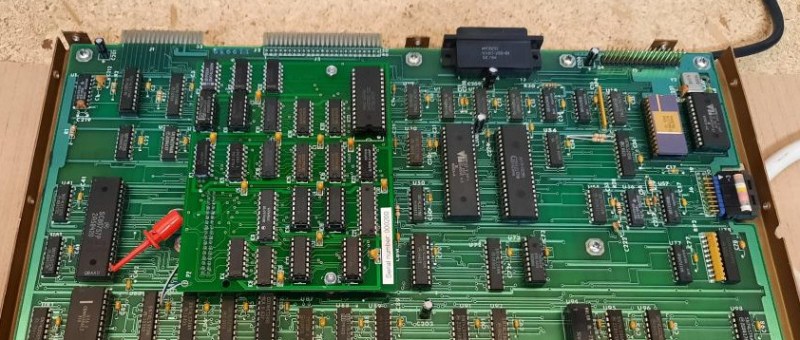
Installation of the new Grafyx board.

So into the refreshed computer went several community-developed modifications, including a M3SE expander that adds Compact Flash and Ethernet support to the TRS-80 and a high-resolution Grafyx video board. In classic [Drygol] style, every effort was made to integrate these upgrades as seamlessly as possible. After struggling for a bit to find a 5.25″ drive that would write a disk the TRS-80 would actually read, all the necessary files to get the upgrades working were transferred over, and the system was booting into TRSDOS.

We’ve covered a lot of [Drygol]’s restorations, and never get tired of seeing how these old and broken machines get a new lease on life once they come out the other end. Whether it’s a relatively easy task of swapping out some dud chips, or using every trick in the book to piece together what’s left of a computer’s case, they always show an incredible level of dedication and attention to detail that you can’t help but admire.

A Deep Dive Into The Chemistry Of Retrobright

Considerable effort is often required to rejuvenate the yellowed and grungy plastic cases of retrocomputing gear. One generally does well to know their enemy in order to fight it, though, which is where this guide to the chemistry of plastic yellowing and whitening (PDF) comes in handy.

“The Retrobright Mystery” was written and sent in to us by [Caden Xu], a high school student who also goes by the alias [Saltypretzel]. The paper begins with an excellent description of the chemistry of plastic yellowing. We had always heard that the yellowing in ABS, or acrylonitrile-butadiene-styrene, the plastic most commonly used for cases back in the day, was primarily caused by brominated compounds added to the plastic as flame retardants. It turns out that’s only a minor contributor, with the bulk of yellowing occurring thanks to a complex chain of reactions starting with free radicals liberated from the butadiene copolymer through a reaction requiring oxygen and energy.

Reactive radicals from the decomposing synthetic rubber, added to ABS to increase its flexibility, unroll the benzene ring in styrene copolymers to form a conjugated compound called 2-hydroxymuconic acid. The alternating double and single bonds in this compound tend to absorb light towards the blue end of the spectrum strongly, so the accumulation of 2-HMA in the plastic over time thus makes it reflect more and more yellow and red wavelengths, giving aged ABS its unhealthy bronze glow.

Luckily, just as ketchup smears and grass stains, both rich in conjugated compounds like lycopene and chlorophyll, can be bleached out of existence, so too can yellowed plastics. [Caden] notes that Retrobright, which contains a powerful dose of hydrogen peroxide, does its whitening trick by breaking the UV-absorbing double bonds in 2-HMA. There’s little that can be done about the embrittlement of the ABS caused by the breakdown of butadiene copolymers, but at least it’ll look good.

We found this guide quite comprehensive and instructive, and it should only help retrocomputing fans in their restoration efforts. For those less interested in the chemistry, [Bob Baddeley] published an overview of the yellowing of plastic and manufacturing steps to avoid it, and we covered the more practical considerations of Retrobright treatment too.

Plastic Cleanup Via Retrobrighting

If you work on old radios, electronics is only one of the skills you need. The other is wood or metal working to restore the cabinets and chassis. However, more recent electronics have plastic and old plastic tends to turn yellow. [Odd Experiments] shows how to whiten plastic using a UV light source, aluminum foil, and hydrogen peroxide. Generally, ABS is the plastic at fault, especially those mixed with bromine as a fire retardant. You can see the results in the video below.

Note the peroxide in use was 12% — much stronger than what’s probably in your medicine cabinet. That’s usually only 3% solution, although you can get different strengths including some over 30% if you shop. However, if you search you’ll find that people have used 12%, 6%, and even 3% successfully, although we’d imagine it takes more time with 3%.

Continue reading “Plastic Cleanup Via Retrobrighting”

Yellowing: The Plastic Equivalent Of A Sunburn

Your fancy white electronic brick of consumer electronics started off white, but after some time it yellowed and became brittle. This shouldn’t have happened; plastic is supposed to last forever. It turns out that plastic enclosures are vulnerable to the same things as skin, and the effects are similar. When they are stared at by the sun, the damage is done even though it might not be visible to you for quite some time.

Continue reading “Yellowing: The Plastic Equivalent Of A Sunburn”

Neosporin…the Retrobright For Bench Equipment?

polishing-knobs

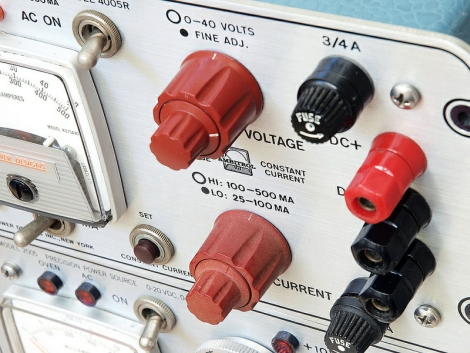
[linux-works] picked up an old power supply from eBay, and as it was built back in the 60’s or 70’s, it was in need of a little TLC. One thing that immediately caught his eye was the condition of the knobs, dials, and banana plug receptacles – they were dull and faded, showing off 40+ years of heavy usage.

He started off by simply removing the knobs from the power supply, giving them a thorough cleaning with soapy water before leaving them to air dry. They didn’t look any better afterward, so he decided to take a different approach and apply some triple antibiotic ointment to the knobs. As it turns out, letting the ointment sit for a few minutes then wiping the knobs with a soft cloth really made them shine, as you can see in the image above. [linux-works] attributes the effect to the white petrolatum base of the product rather than the antibiotics, likely making a wide array of products equally suitable for the job.

We know how well Retr0bright has worked for the vintage computer folks, so we’ll be interested to see how long the effects of the triple antibiotic treatment last. It certainly can’t hurt those readers who spend their time perusing flea markets in search of classic electronic equipment.