Raspberry Pi Driven Polargraph Exhibits High Precision Drawing Ability

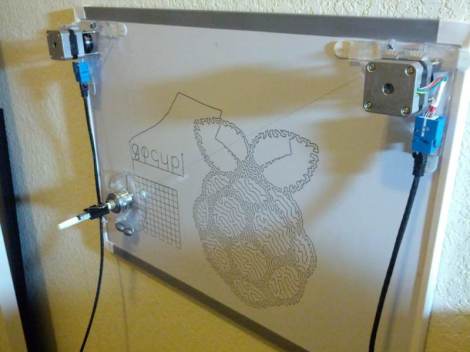
This polar graph draws some amazing shapes on a dry erase board. Part of that is due to the mounting brackets used for the two stepper motors and the stylus. But credit is also due for the code which takes velocity into account in order to plan for the next set of movements.

The Go language is used to translate data into step commands for the two motors. This stream of commands is fed over a serial connection between the RPi board and an Arduino. The Arduino simply pushes the steps to the motor controllers. The inclusion of the RPi provides the horsepower needed to make such smooth designs. This is explained in the second half of [Brandon Green’s] post. The technique uses constant acceleration, speed, and deceleration for most cases which prevents any kind of oscillation in the hanging stylus. But there are also contingencies used when there is not enough room to accelerate or decelerate smoothly.

You can catch a very short clip of the hardware drawing a tight spiral in the video embedded after the break.

Continue reading “Raspberry Pi Driven Polargraph Exhibits High Precision Drawing Ability”

Mesh Networking With Multiple Raspberry Pi Boards

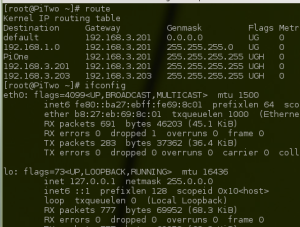
Since he’s got several Raspberry Pi boards on hand [Eric Erfanian] decided to see what he could pull off using the robust networking tools present in every Linux installation. His four-part series takes you from loading an image on the SD cards to building a mesh network from RPi boards and WiFi dongles. He didn’t include a list of links to each article in his post. If you’re interested in all four parts we’ve listed them after the break.

He says that getting the mesh network up and running is easiest if none of the boards are using an Ethernet connection. He used the Babel package to handle the adhoc routing since no device is really in charge of the network. Each of the boards has a unique IP manually assigned to it before joining. All of this work is done in part 3 of the guide. The link above takes you to part 4 in which [Eric] adds an Internet bridge using one of the RPi boards which shares the connection with the rest of the mesh network.

If the power of this type of networking is of interest you should check out this home automation system that takes advantage of it.

Continue reading “Mesh Networking With Multiple Raspberry Pi Boards”

Developing A Thermostat For A Heat Pump That Only Has A Timer

The heat pump which cools [Chris LeBlanc’s] home lacks the sort of control he was looking for. It’s just got a timer, which switches it off automatically. He wanted to the ability to schedule the cooling cycle like you would with a thermostat-driven arrangement. He ended up build his own controller to automate the cooling process.

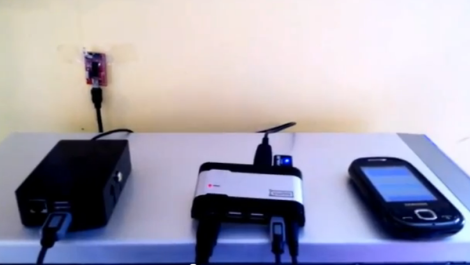
The heat pump came with an IR remote control which provides the access point for the project. [Chris] set out to emulate the remote protocol which saved him the trouble of having to crack open the unit and wire in a controller. He went with the IR Toy from Dangerous Prototypes as this device is able to record and transmit IR signals — it’s basically a universal remote for your USB port. His Raspberry Pi, seen to the left, controls the system. It’s connected to the red IR Toy board via a USB hub which is used to interface a WiFi dongle as well. The system works alongside Google Calendar to allow [Chris] to schedule his home’s cooling just by adding an appointment. A Python script queries the calendar, then selects and sends the appropriate IR command. He shows off the build in the clip after the break.

Continue reading “Developing A Thermostat For A Heat Pump That Only Has A Timer”

Controlling Google TV From A Raspberry Pi (or Other Networked Devices)

Google TV is a network connected television. It does what you would think: plays television programs, streams media from the internet, and allows you to open URLs on your TV. But one nice feature is that it can also be controlled over the network rather than just via an IR remote. Google publishes apps which make this simple with a smartphone. But the communications protocols are open source, so [Leon Nicholls] wrote a Google TV remote control library in Java.

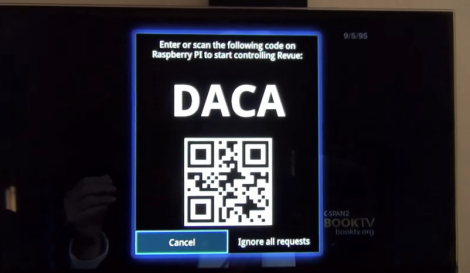
The video after the break shows him pairing a Raspberry Pi with his television. The image above is the pairing verification code you must enter on the remote hardware before control is authorized. Apparently this is a step that needs to happen every time if using Google’s Anymote library. [Leon] improved that, by saving the pairing data so that the first authorization is all that it takes.

He figures this could be used for home automation. We’re not sure what we’d use it for but we’d love to hear your ideas in the comments.

One-button Audiobook Player Made From A Raspberry Pi

[Michael Clemens] was looking for gifts for his Grandmother’s 90th Birthday. She is visually impaired and loves to be able to listen to audiobooks. The problem is that she doesn’t really get the hang of using electronics. He made things easy by building her a one-button audiobook player.

The Raspberry Pi board is a perfect solution for this project. It’s cheap, it has an audio port, it has storage for the books on the system SD card, and it runs Linux. The last part is key as it made things very simple when [Michael] started pulling together the various components.

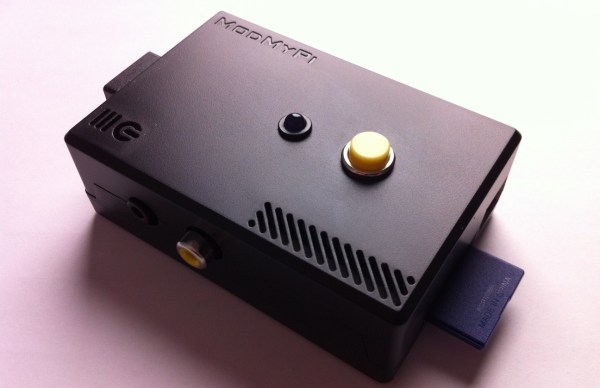
When the RPi is powered up it drops immediately into a Python script which loads the audio track and places the music player daemon in pause. The yellow button seen above works as a play/pause button when clicked. If the listener misses something she can hold the button for more than four seconds to go back one track. Loading new books is easy too. [Michael] copies the files onto a thumb drive with a special volume label. When plugged into the RPi USB port the script automatically copies the book and starts playing when the drive is removed. He included a video demo on his project page linked above.

PCA9517 I2c Translator A Perfect Companion For Raspberry Pi Hardware Add-ons

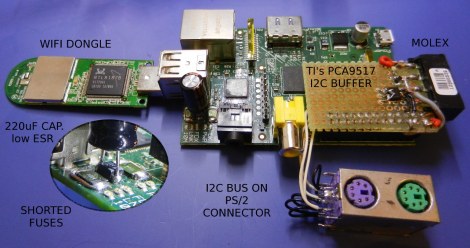
The rig pictured above works as an Internet connected temperature sensor which sends [Zaion] an email with a graph of the change over time. This in itself is interesting, but one part in particular caught our eye. He’s using an i2c temperature sensor , and we think the PCA9517 Level-Translating I2C Bus Repeater that makes it possible is a perfect match for the RPi.

This is a Texas Instruments part. You can find more about it from the company’s product page. The key words in the name of the chip are ‘Level-Translating’. This has two bus connections, each with variable voltage levels. On side A the bus can be 0.9V to 5.5V. On side B the bus range is 2.7V to 5.5V. Since the Raspberry Pi I/O pins operate at 3.3V this could connect to the B side, give you the ability to interface with i2c parts rated for lower or higher voltages. This is especially handy for folks who started with the Arduino and own mostly 5V compliant prototyping hardware.

The part comes in a SOIC package, which you can easily hand solder and will costs around $1 depending on the supplier.

RPi Video With Pygame

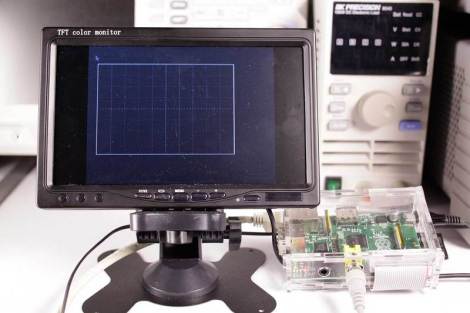
Adafruit has a new tutorial on creating video with an RPi and pygame. The goal is to create custom user interfaces on low cost hardware, powered by the easy to use pygame library. The tutorial walks through getting your RPi set up to run pygame, creating a basic pygame script that controls the framebuffer, and drawing an oscilloscope display on the screen.

This tutorial uses Adafruit’s WebIDE as a development environment. This is an excellent solution for working on video display, since you can develop the code on a networked computer and view the shell while running your graphical application. This is very useful for debugging, since you can just print information to your WebIDE console.

There’s a lot of potential for this setup. It would be ideal for creating any kiosk application. Maybe an announcement display, interactive kiosk, or even a programmable logic controller type user interface? What else could you build with a RPi attached to a LCD touchscreen?

Check out a video of Adafruit’s display in action after the break.

Continue reading “RPi Video With Pygame”