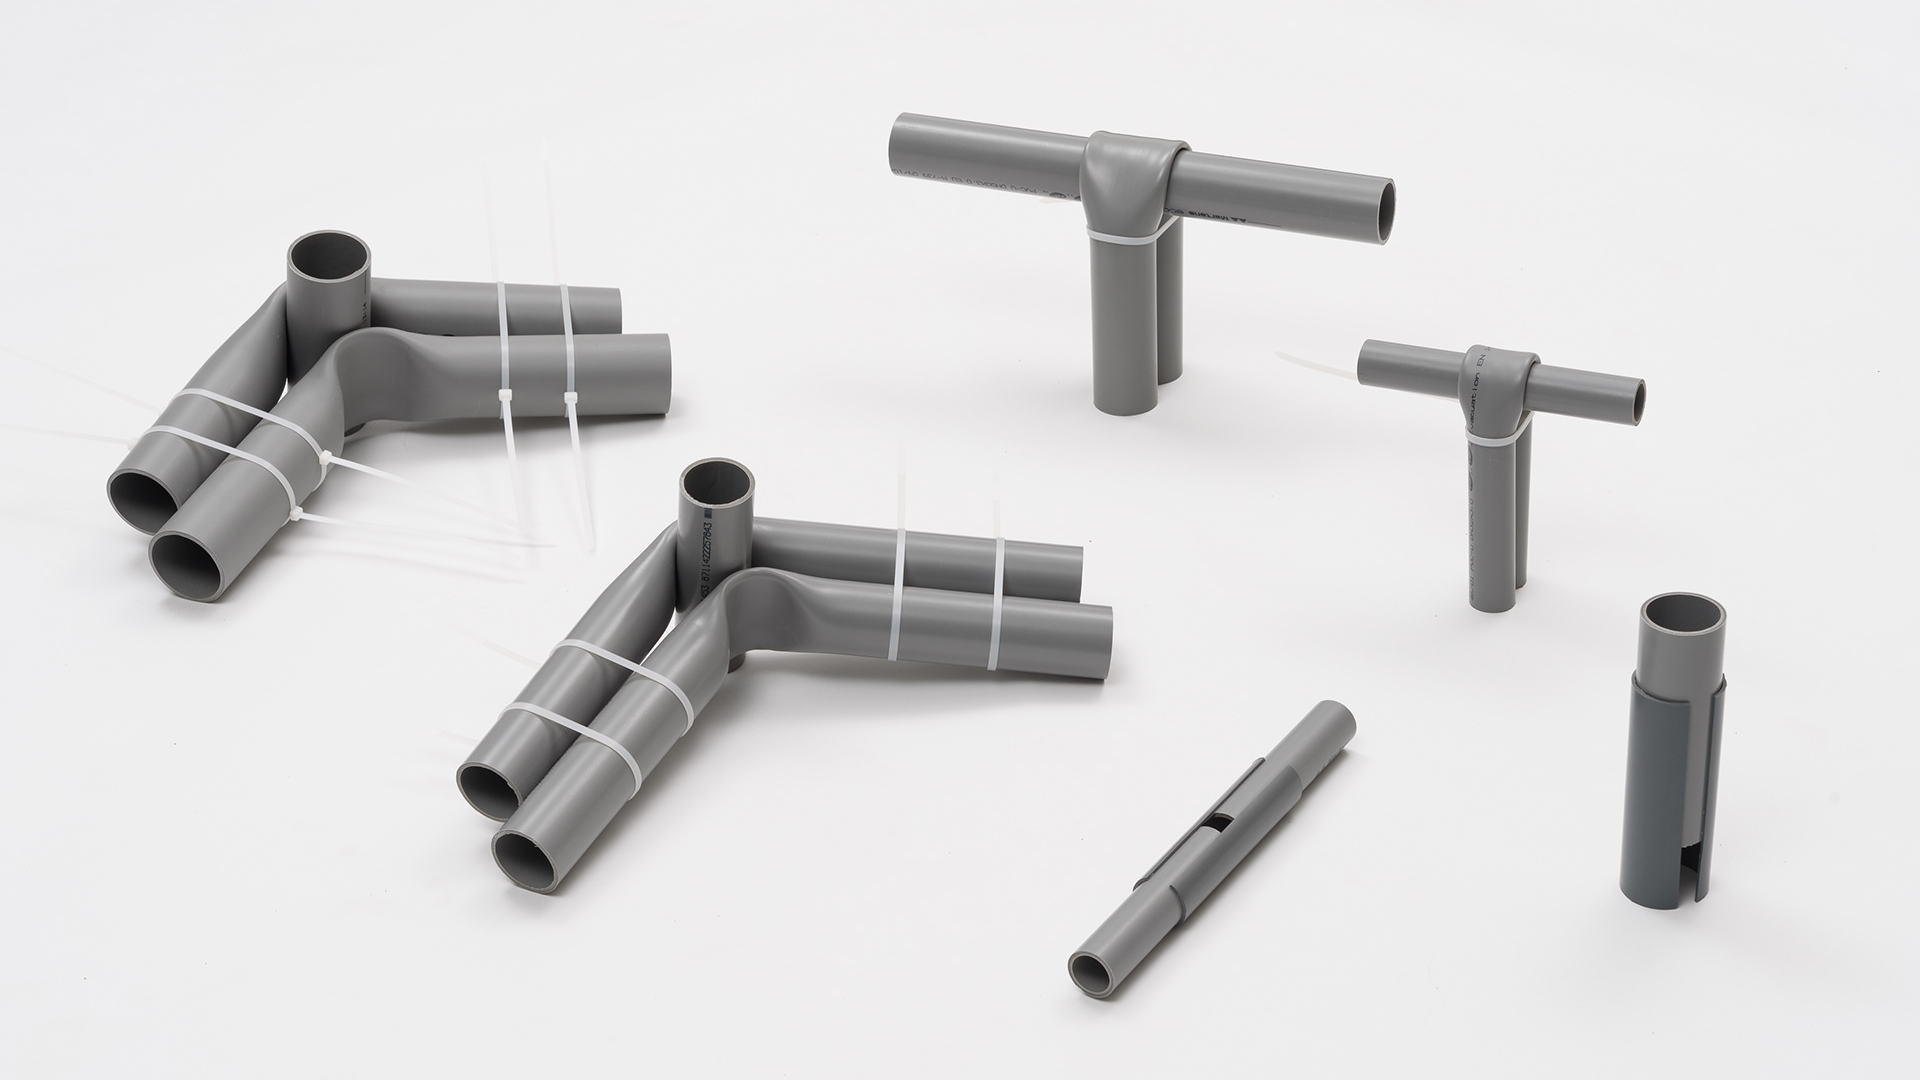
[Baptiste Marx] shares his take on designing emergency structures using PVC pipe in a way that requires an absolute minimum of added parts. CINTRE (French, English coverage article here) is his collection of joint designs, with examples of how they can be worked into a variety of structures.
Basic joints have many different applications.
PVC pipe is inexpensive, widely available, and can often be salvaged in useful quantities even in disaster areas because of its wide use in plumbing and as conduits in construction. It can be cut with simple tools, and once softened with heat, it can be re-formed easily.
What is really clever about [Baptiste]’s designs is that there is little need for external fasteners or hardware. Cable ties are all that’s required to provide the structural element of many things. Two sawhorse-like assemblies, combined with a flat surface, make up a table, for example.
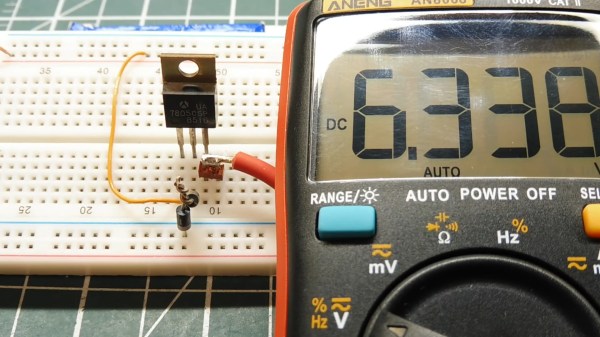
It’s late at night. The solder smoke keeps getting in your tired eyes, but your project is nearly done. The main circuit is powered by your 13.8 V bench supply, but part of the circuit needs 9 V. You dig into your stash to find your last LM7809 voltage regulator, but all you have is a bunch of LM7805’s. Are you done for the night? Not if you’ve watched [0033mer]’s Simple Electronic Circuit Hacks video! You know just what to do. The ground pin of a LM7805 connects to the cathode of a TL431 programmable Zener diode pulled from an old scrapped TV. The diode is referenced to a voltage divider, and voila! Your LM7805 is now putting out a steady 9 V.
How did [0033mer] become adept at doing more with less? As he explains in the video below, his primary source of parts in The Time Before The Internet was old TV’s that were beyond repair. Using N-Channel MOSFETs to switch AC, sensing temperature changes with signal diodes, and even replacing a 555 with a blinking LED are just a few of the hacks covered in the video below the break.
We especially appreciated the simple, to-the-point presentation that inspires us to keep on hacking in the truest sense: Doing more with less! If you enjoy a good diode hack like we do, you will likely appreciate learning Diode Basics by W2AEW, or a Diode Based Radiation Detector.
Thank you [DSM] for the tip! Be sure to submit your the cool things you come across to our Tips Line!
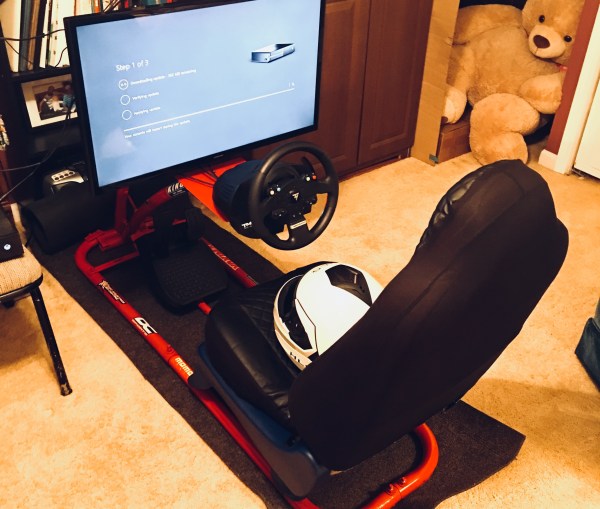
Paradise means something different for everyone, it could be a sitting by a fire on a rainy night or lying on a sun-kissed beach. But for us, and makers like [liltreat4you], it’s a well stocked scrap pile out behind the house. After buying a racing wheel and pedals for his Xbox, he took a trip out to his little slice of paradise and found nearly all the hardware he needed to build a professional looking race simulator. According to his breakdown, most of the money he spent on this build ended up going into that sweet red paint job and the speed-enhancing stickers.
Everything the light touches is our kingdom.
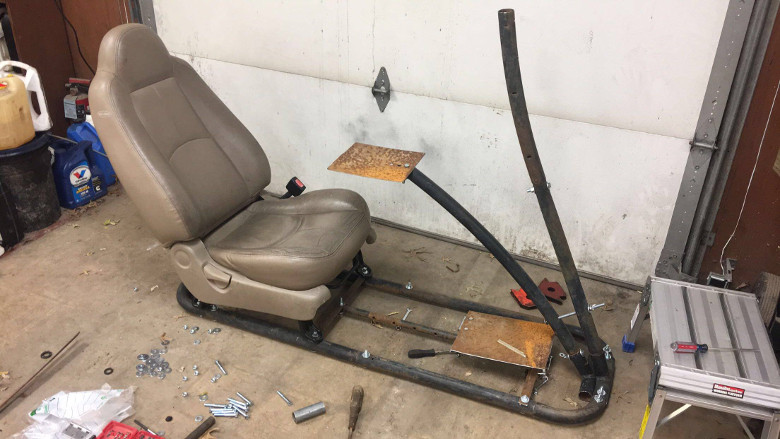
Not all of us are as lucky as [liltreat4you], and we probably won’t just happen upon a driver’s seat out of a Mazda, or a bunch of perfectly bent metal pipes from an old trampoline out on the back forty. But trolling Craigslist or cruising around for flea markets can still get you parts like these for cheap, so try not to be too discouraged if your backyard isn’t quite as well stocked.
Once he had the metal pipes and seat from the car, the rest of the build came together pretty quickly. After building an oval out of his salvaged pipes, he attached the seat and the arms that would eventually hold the steering wheel and display. A plate was also added at the bottom for the pedals to sit on. By using long bolts, [liltreat4you] was even able to add a degree of adjustment to the wheel position. Being that he got his seat out of a real car, there’s the usual adjustment you’d expect there as well.
Speaking of which, [liltreat4you] casually mentions that you should disconnect the battery of the donor vehicle before taking out the seat, as it’s possible that the removal of the seat or the disconnection of the seat harness can cause the airbags to deploy. We can neither confirm nor deny this, but it’s probably safe advice to follow.
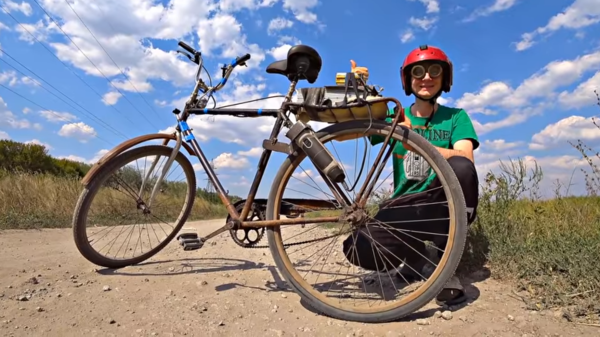
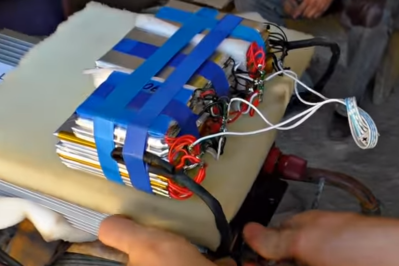
When it comes to bringing an idea to life it’s best to have both a sense of purpose, and an eagerness to apply whatever is on hand in order to get results. YouTube’s favorite Ukrainians [KREOSAN] are chock full of both in their journey to create this incredible DIY e-bike using an angle grinder with a friction interface to the rear wheel, and a horrifying battery pack made of cells salvaged from what the subtitles describe as “defective smartphone charging cases”.
Battery pack made from cells salvaged out of defective equipment. Sometimes, you use what you have on hand.
What’s great to see is the methodical approach taken to creating the bike. [KREOSAN] began with an experiment consisting of putting a shaft on the angle grinder and seeing whether a friction interface between that shaft and the tire could be used to move the rear wheel effectively. After tweaking the size of the shaft, a metal clamp was fashioned to attach the grinder to the bike. The first test run simply involved a long extension cord. From there, they go on to solve small problems encountered along the way and end up with a simple clutch system and speed control.
The end result appears to work very well, but the best part is the pure joy (and sometimes concern) evident in the face of the test driver as he reaches high speeds on a homemade bike with a camera taped to his chest. Video is embedded below.