Drawer Blade

Smarter-than-wood Saw Blade Makes Perfect Foldable Joints

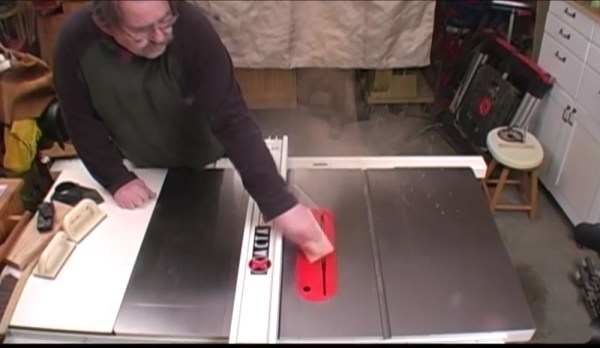
[Andrew Klein] knows the pain of building drawers from plywood. It can be a pain to get all of the pieces measured and cut just right. Then you have to line them up, glue them together, and clamp them perfectly. It’s time-consuming and frustrating. Then one day it hit him that he might be able to make the whole process much easier using a custom saw blade.

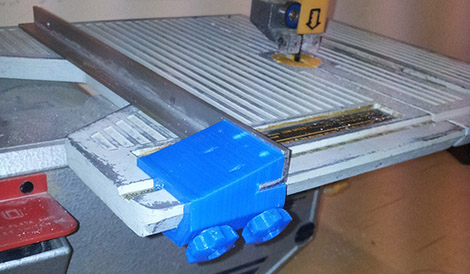
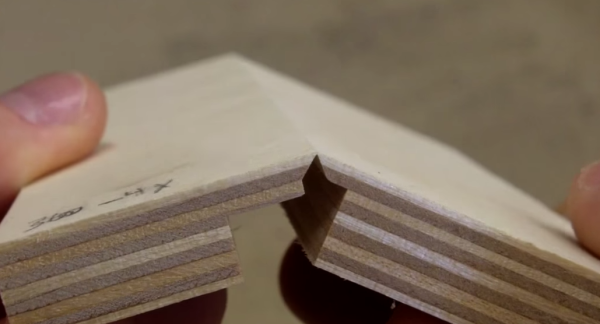
The the video below, [Andrew] does a great job explaining how the concept works using a piece of paper. The trick is that the plywood must be cut in a very specific shape. This shape results in the plywood just barely being held together, almost as if it’s hinged. The resulting groove can then be filled with wood glue, and the plywood is folded over on itself. This folding process leaves no gaps in the wood and results in a strong joint. Luckily this special shape can be cut with a specialized saw blade.

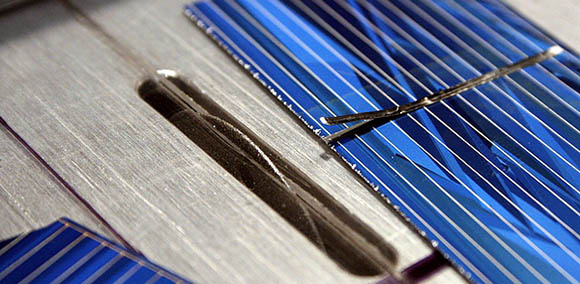
This new process removes the requirement of having five separate pieces for a drawer. Instead, only four cuts are needed on a single piece of square plywood. The corners are then removed with a razor blade and all four sides are folded up and into place. [Andrew] shows that his prototype blade needs a little bit of work, but he’s so hopeful that this new invention will be useful to others. Continue reading “Smarter-than-wood Saw Blade Makes Perfect Foldable Joints”

Table Saw Kickback Video Ends Badly

Our comments section has been pretty busy lately with talk of table saws and safety, so we decided to feature this sobering video about table saw kickback. [Tom] is a popular YouTube woodworker. He decided to do a safety video by demonstrating table saw kickback. If you haven’t guessed, [Tom] is an idiot – and he’ll tell you that himself before the video is over. There are two hacks here. One is [Tom’s] careful analysis and preparation for demonstrating kickback (which should be fail of the week fodder). The other “hack” here is the one that came breathtakingly close to happening – [Tom’s] fingers.

Kickback is one of the most common table saw accidents. The type of kickback [Tom] was attempting to demonstrate is when a board turns and catches the blade past the axle. On a table saw kickback is extremely dangerous for two reasons. First, the piece of wood being cut becomes a missile launched right back at the saw operator. We’ve seen internal injuries caused by people being hit by pieces of wood like this. Second, the saw operator’s hand, which had just been pushing the wood, is now free to slid right into the blade. This is where a SawStop style system, while expensive, can save the day.

The average 10 inch table saw blade has an edge traveling at around 103 mph, or 166 kmh. As [Tom] demonstrates in his video, it’s just not possible for a person to react fast enough to avoid injury. Please, both personal users and hackerspaces, understand general safety with all the tools you’re using, and use proper safety equipment. As for [Tom], he’s learned his lesson, and is now using a SawStop Table.

Continue reading “Table Saw Kickback Video Ends Badly”

Fixing Tools With 3D Printers

saw

Over at the Manchester Hackerspace, [Bob] has been busy getting a 30-year-old bandsaw up and running. The saw worked great, but it was missing a fence, making straight cuts difficult to say the least.  The solution, of course, was to build a new fence, and [Bob] decided to capitalize on his hackerspace’s workshop by making a new fence with a 3d printer.

[Bob] began by taking careful measurements of the saw’s table and the channel running down the length of it. These measurements were plugged into OpenSCAD, and after a few iterations, [Bob] had an extremely well-fitting profile a fence could be attached to.

With the profile down, [Bob] created a new part in OpenSCAD that would hold an aluminum angle piece. This was attached to the plastic parts with screws, and the entire assembly clamps down to the saw with the help of a few 5mm bolts. For a machine that is usually dedicated to making 3D printer parts and Yoda heads, [Bob] did a great job making good use of his 3D printer.

A Table Saw To Cut Solar Panels

saw

Steampunker extraordinaire [Jake von Slatt] loves the idea of solar-powered garden lights soaking up the sun’s rays during the day and powering a LED in the evening. Commercially available solar lanterns, as [Jake], you, me, and everyone else on the planet have discovered, are universally terrible and either don’t have solar panels large enough to charge a battery, or only last a year or so. [Jake]’s solution was to make his own solar lanterns and in the process he came up with a great way of cutting his own solar panels.

[Jake] turned to ebay to source 100 3″ x 6″ solar panels for about $30. These are broken panels, factory rejects, but still are able to produce the 0.5 Volts they should. Since these are rather large panels for a solar lantern, [Jake] needed a way to cut these panels into manageable sizes.

To cut the panels, [Jake] made a box to fit a Dremel with a right angle attachment and a port for a vacuum cleaner. There’s a sled for the panels with markings at 40, 80, 75, and 150 mm so the panels can be quickly cut to size with a diamond cutting wheel.

After the boards are cut, [Jake] checks them out with a multimeter to be sure they’re producing the half volt they should. After that, it’s a simple matter of soldering them together and adding them to his solar lanterns.

Creating Wooden Enclosures

[Matthias] built a wooden enclosure for his keyboard. He’s used to using a Commodore 64 keyboard and decided he didn’t need the num pad found on modern keyboards.

It’s not the finished product that interests us, but the methods he used to create such a nice looking enclosure. From the wooden binary adder he produced we know he’s a talented woodworker. He takes us step-by-step through the use of a scroll saw, table saw, and router tabled to turn out this one-of-a-kind. You may not own these tools but someone you know does. Follow his example and turn out your own wooden wonders.

[Thanks Harald]