Bask In The Glory Of This 336 LED Digit Display

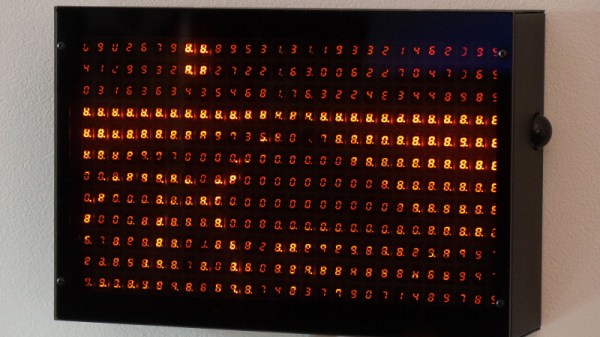
[Chris Combs] recently took the wraps off of an incredible art piece that he calls Road Ahead which uses 336 seven segment LED digits to create an absolutely gorgeous display. With a piece of smoked acrylic to slightly diffuse the orange glow of the LEDs, the end result has a distinctively retro look that we’d gladly spend all day staring at.

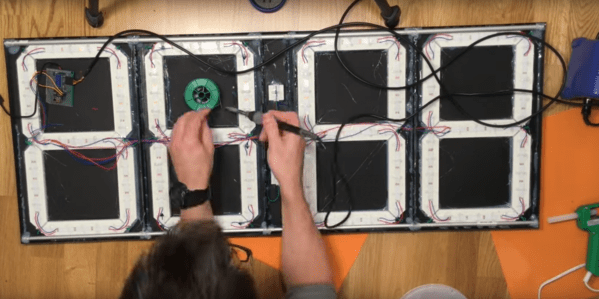
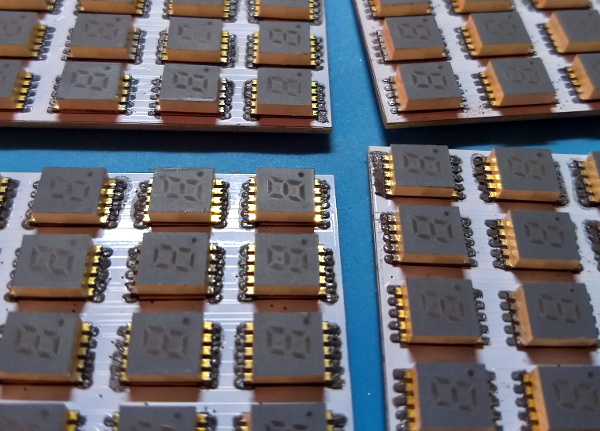
For those looking to dig a bit deeper, [Chris] has put together some very impressive documentation over on Hackaday.io that goes into plenty of detail on how he designed and built this beauty. From the design of the PCBs that carry all of the 0.3″ SMD displays to the custom software running on the Raspberry Pi 3 that powers it, there’s no technical stone left unturned.

According to the build log, this is the second version of the display. The first one was housed in a rather attractive wooden enclosure, but as [Chris] explains, that was precisely the problem. He wanted something that looked cold and unfeeling as the nearly 340 digits flashed away with potentially ominous intent. So he ditched the wooden case for a powder coated steel one that looks more like the front panel of a mainframe than something you’d pick up at the craft store.

Another interesting point explained in the write-up is how the Python software is designed to treat the hardware as a contiguous graphical display rather than just an array of independent digits. Grayscale images can be reproduced on the by using PWM to adjust the brightness of each segment’s corresponding “pixel”; though admittedly it takes a bit of imagination to see the intended image with a resolution this low.

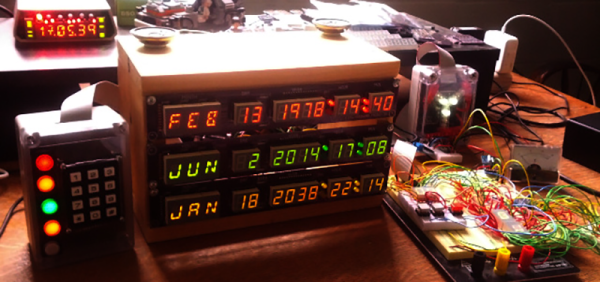
This project reminds us of the incredible LED hexdump display we saw not that long ago, down to the PWM trickery for squeezing “graphics” out of these exceptionally non-graphical elements. With any luck, perhaps these are the opening shots in an arms race to see who can build the largest array of multi-segment LED displays.

Waking Up To Classic Soundgarden Screaming

In a project that was really only slighly less creepy before the singer’s untimely death in 2017, this alarm clock built by [Rafael Mizrahi] awakens its user to a random selection of Chris Cornell’s signature screams. Not content to be limited to just the audio component of the experience, he contained all of the hardware within a styrofoam head complete with a printed out facsimile of the singer’s face.

An Arduino Uno coupled with a seven segment LED display provides the clock itself, which is located in the base. There’s no RTC module, so the Arduino is doing its best to keep time by counting milliseconds. This means the clock will drift around quite a bit, but given that there’s also no provision for setting the time or changing when the alarm goes off short of editing the source code, it seems like accurate timekeeping was not hugely important for this project.

Audio is provided by an Adafruit VS1053, which contains a microSD card full of MP3 samples of Cornell’s singing. This is connected to an X-Mini portable capsule speaker which has been installed in a hollowed out section of the foam.

Unconventional alarm clocks are something of a staple here at Hackaday. From ones which physically assault you to mimicking sunrise with OLEDs, we thought we had seen it all. We were wrong.

Continue reading “Waking Up To Classic Soundgarden Screaming”

Really Big Digital Clock Finds Use For Really Big 3D Printer

What does it take to make a really big digital clock? If [Ivan Miranda]’s creation is any gauge, it takes a really big 3D printer, an armful of Neopixel strips, and a ton of hot melt glue.

It looks like [Ivan]’s plus-size clock is mainly an exercise for his recently completed large-bed custom 3D printer, in itself a project worth checking out. But it’s a pretty ambitious project, and one that has some possibilities for enhancements. Each of the four seven-segment displays was printed separately, with a black background, translucent white for the segments, and recesses for five RGB LEDs each. The four digits and colon spacer are mated together into one display, and an ESP8266 fetches the time from a NIST server and drives the segments. What’s really interesting about [Ivan]’s projects is that he constrains himself to finishing them each in a week. That explains the copious amount of hot glue he uses, and leaves room for improvements. We’d love to see this display built into a nice walnut case with a giant red diffusing lens. Even as it stands it certainly makes a statement.

We’ve featured other outsized seven-segment displays before, but few as big as this one.

Continue reading “Really Big Digital Clock Finds Use For Really Big 3D Printer”

Raspberry Pi-Powered Back To The Future Time Circuits

Here’s something that’s a little late to celebrate the fact that all the events in Back to the Future have happened in the past, but that’s what time machines are for, right? [Deater] created Pi-powered time circuits and a flux capacitor. He might not have a DeLorean, but he does have the equipment to turn a DeLorean into a cool car.

The ‘time circuits’ shown on-screen in Back to the Future actually weren’t very complex; the times were just cutouts with lights and gels; no real electronics wizardry necessary. Of course the BttF DeLorean has since been remodeled and refurbished with time circuits that look and act the part, and [Deater]’s time circuits have everything you would expect: a display of the destination, current, and last time, sound effects, numeric keypad, flux capacitor, and a speedometer.

While it doesn’t simulate the time circuits from the movie exactly, that’s not necessarily a bad thing. The movie time circuits were colored gels, and wouldn’t exactly be practical for a Raspberry Pi-based prop. It’s a great build, and one that would look great in either a ’98 Nissan Altima or a DeLorean

Continue reading “Raspberry Pi-Powered Back To The Future Time Circuits”